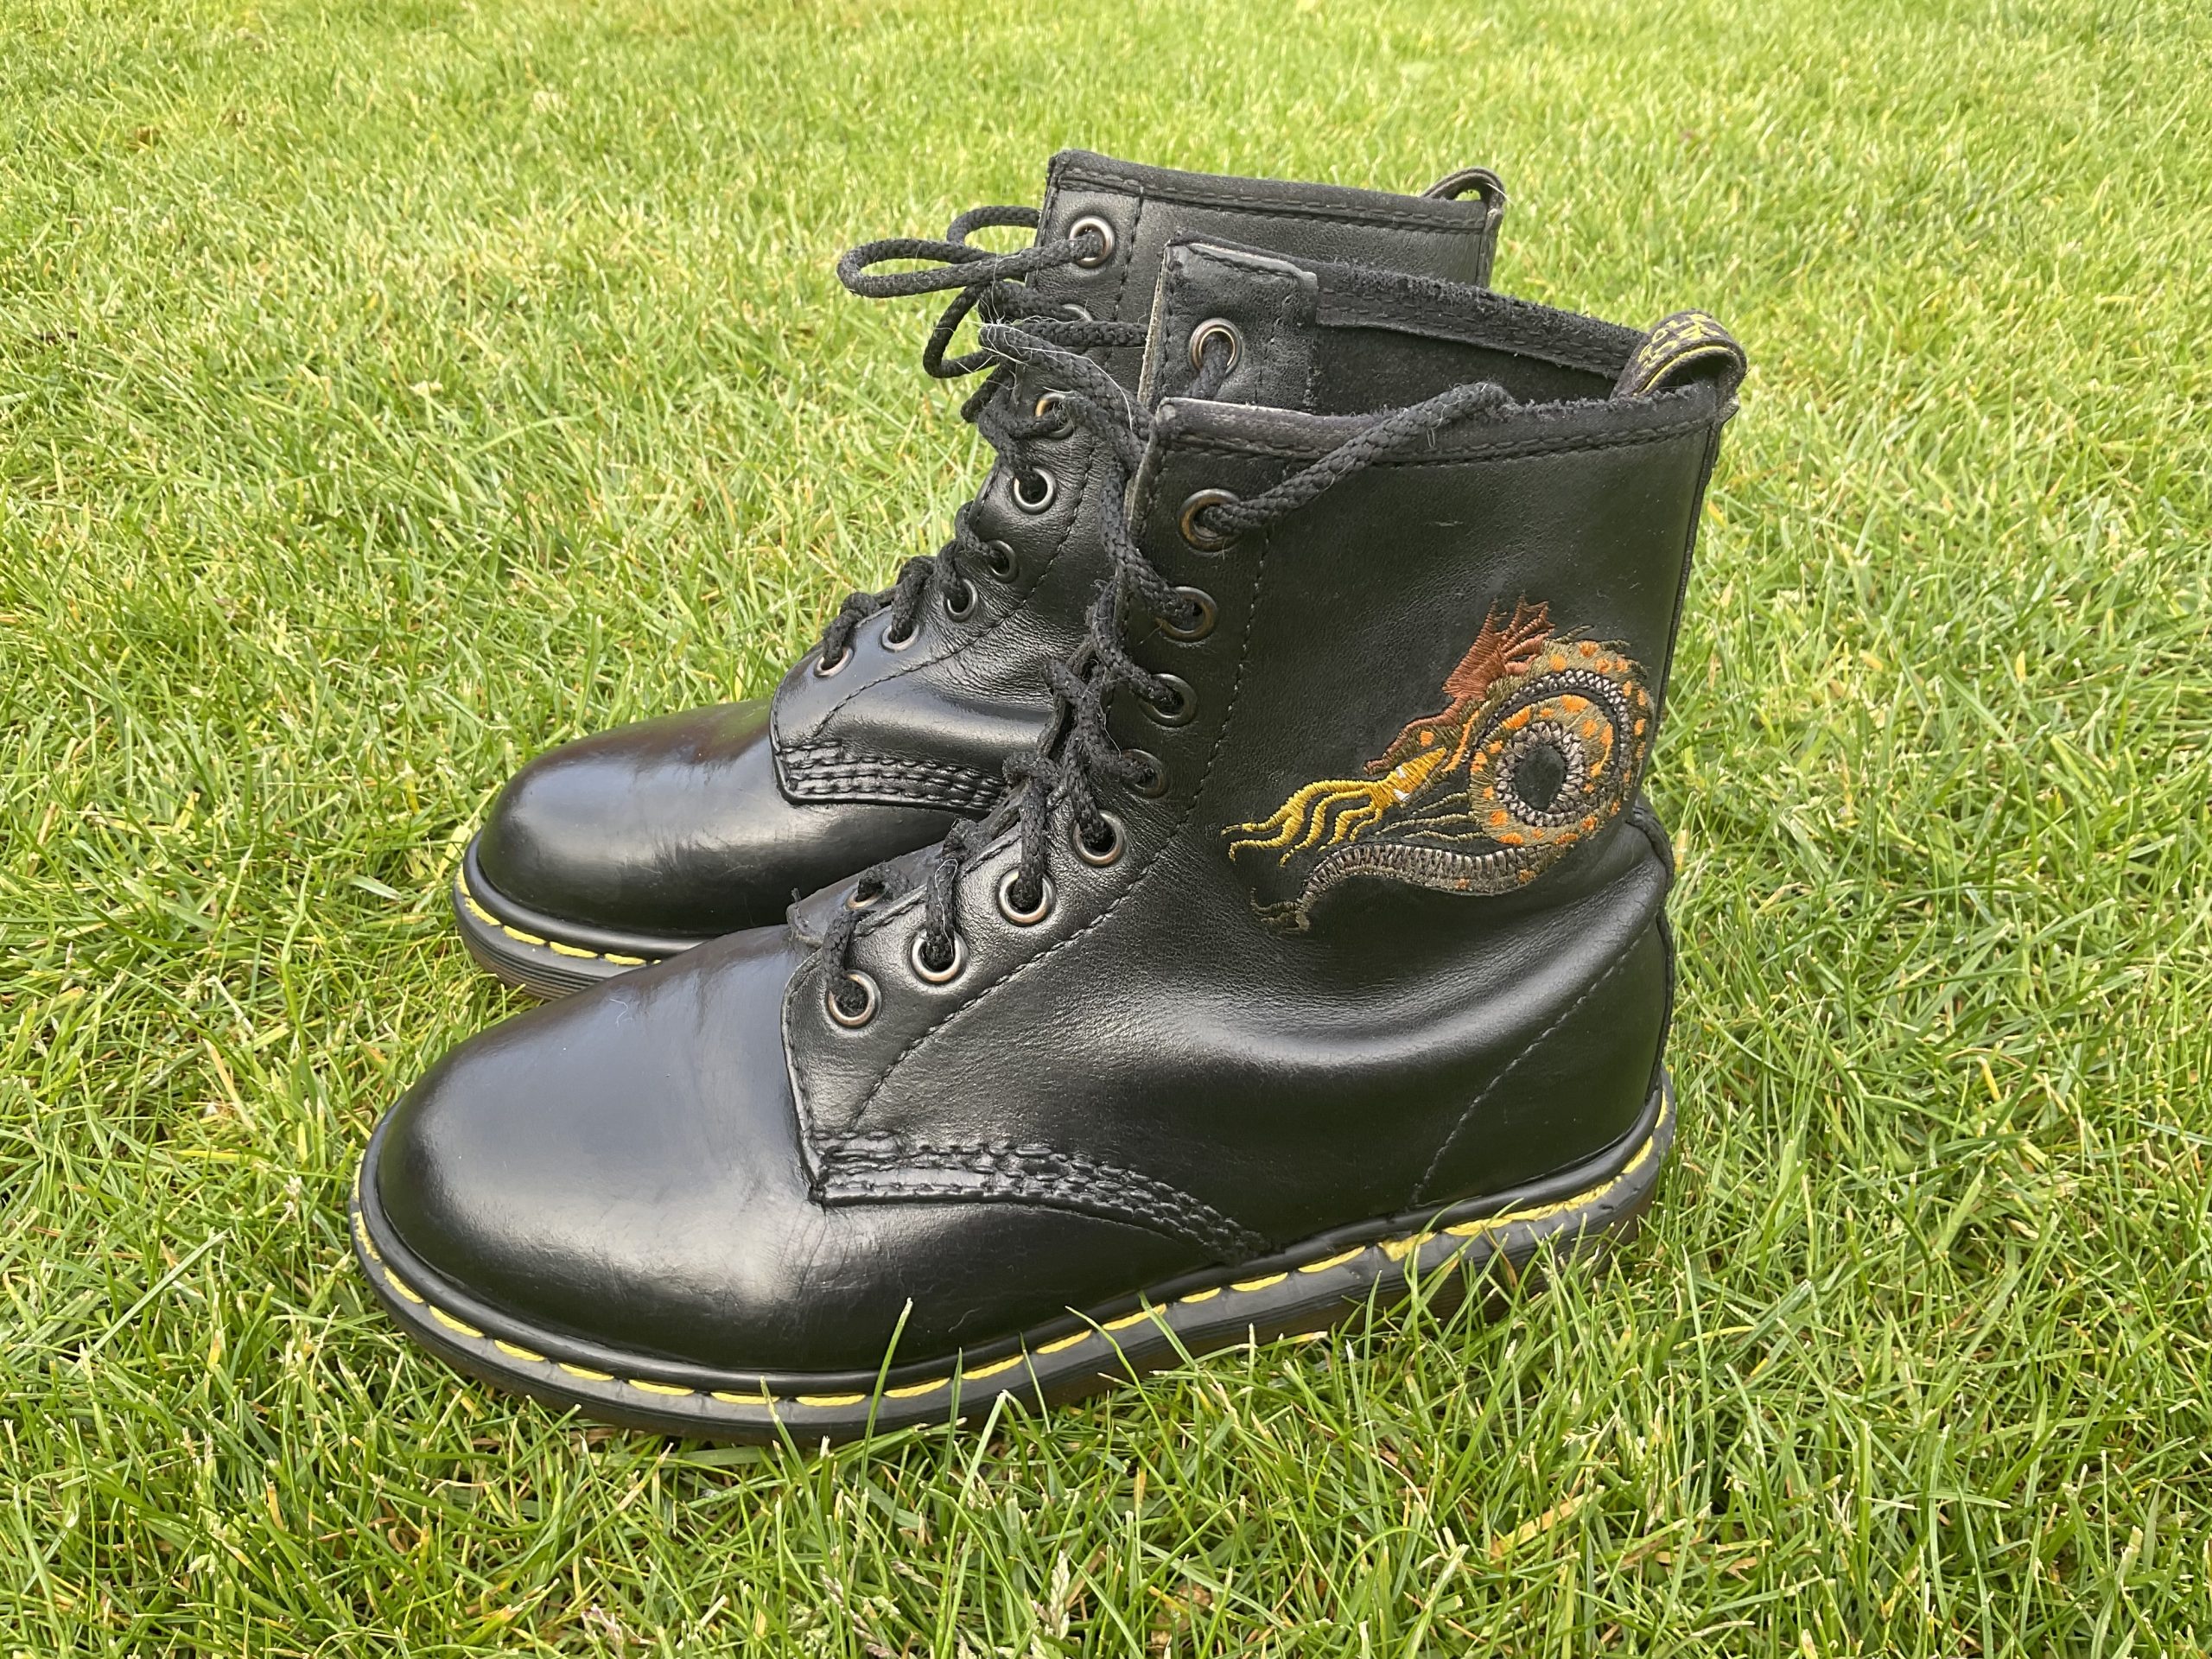
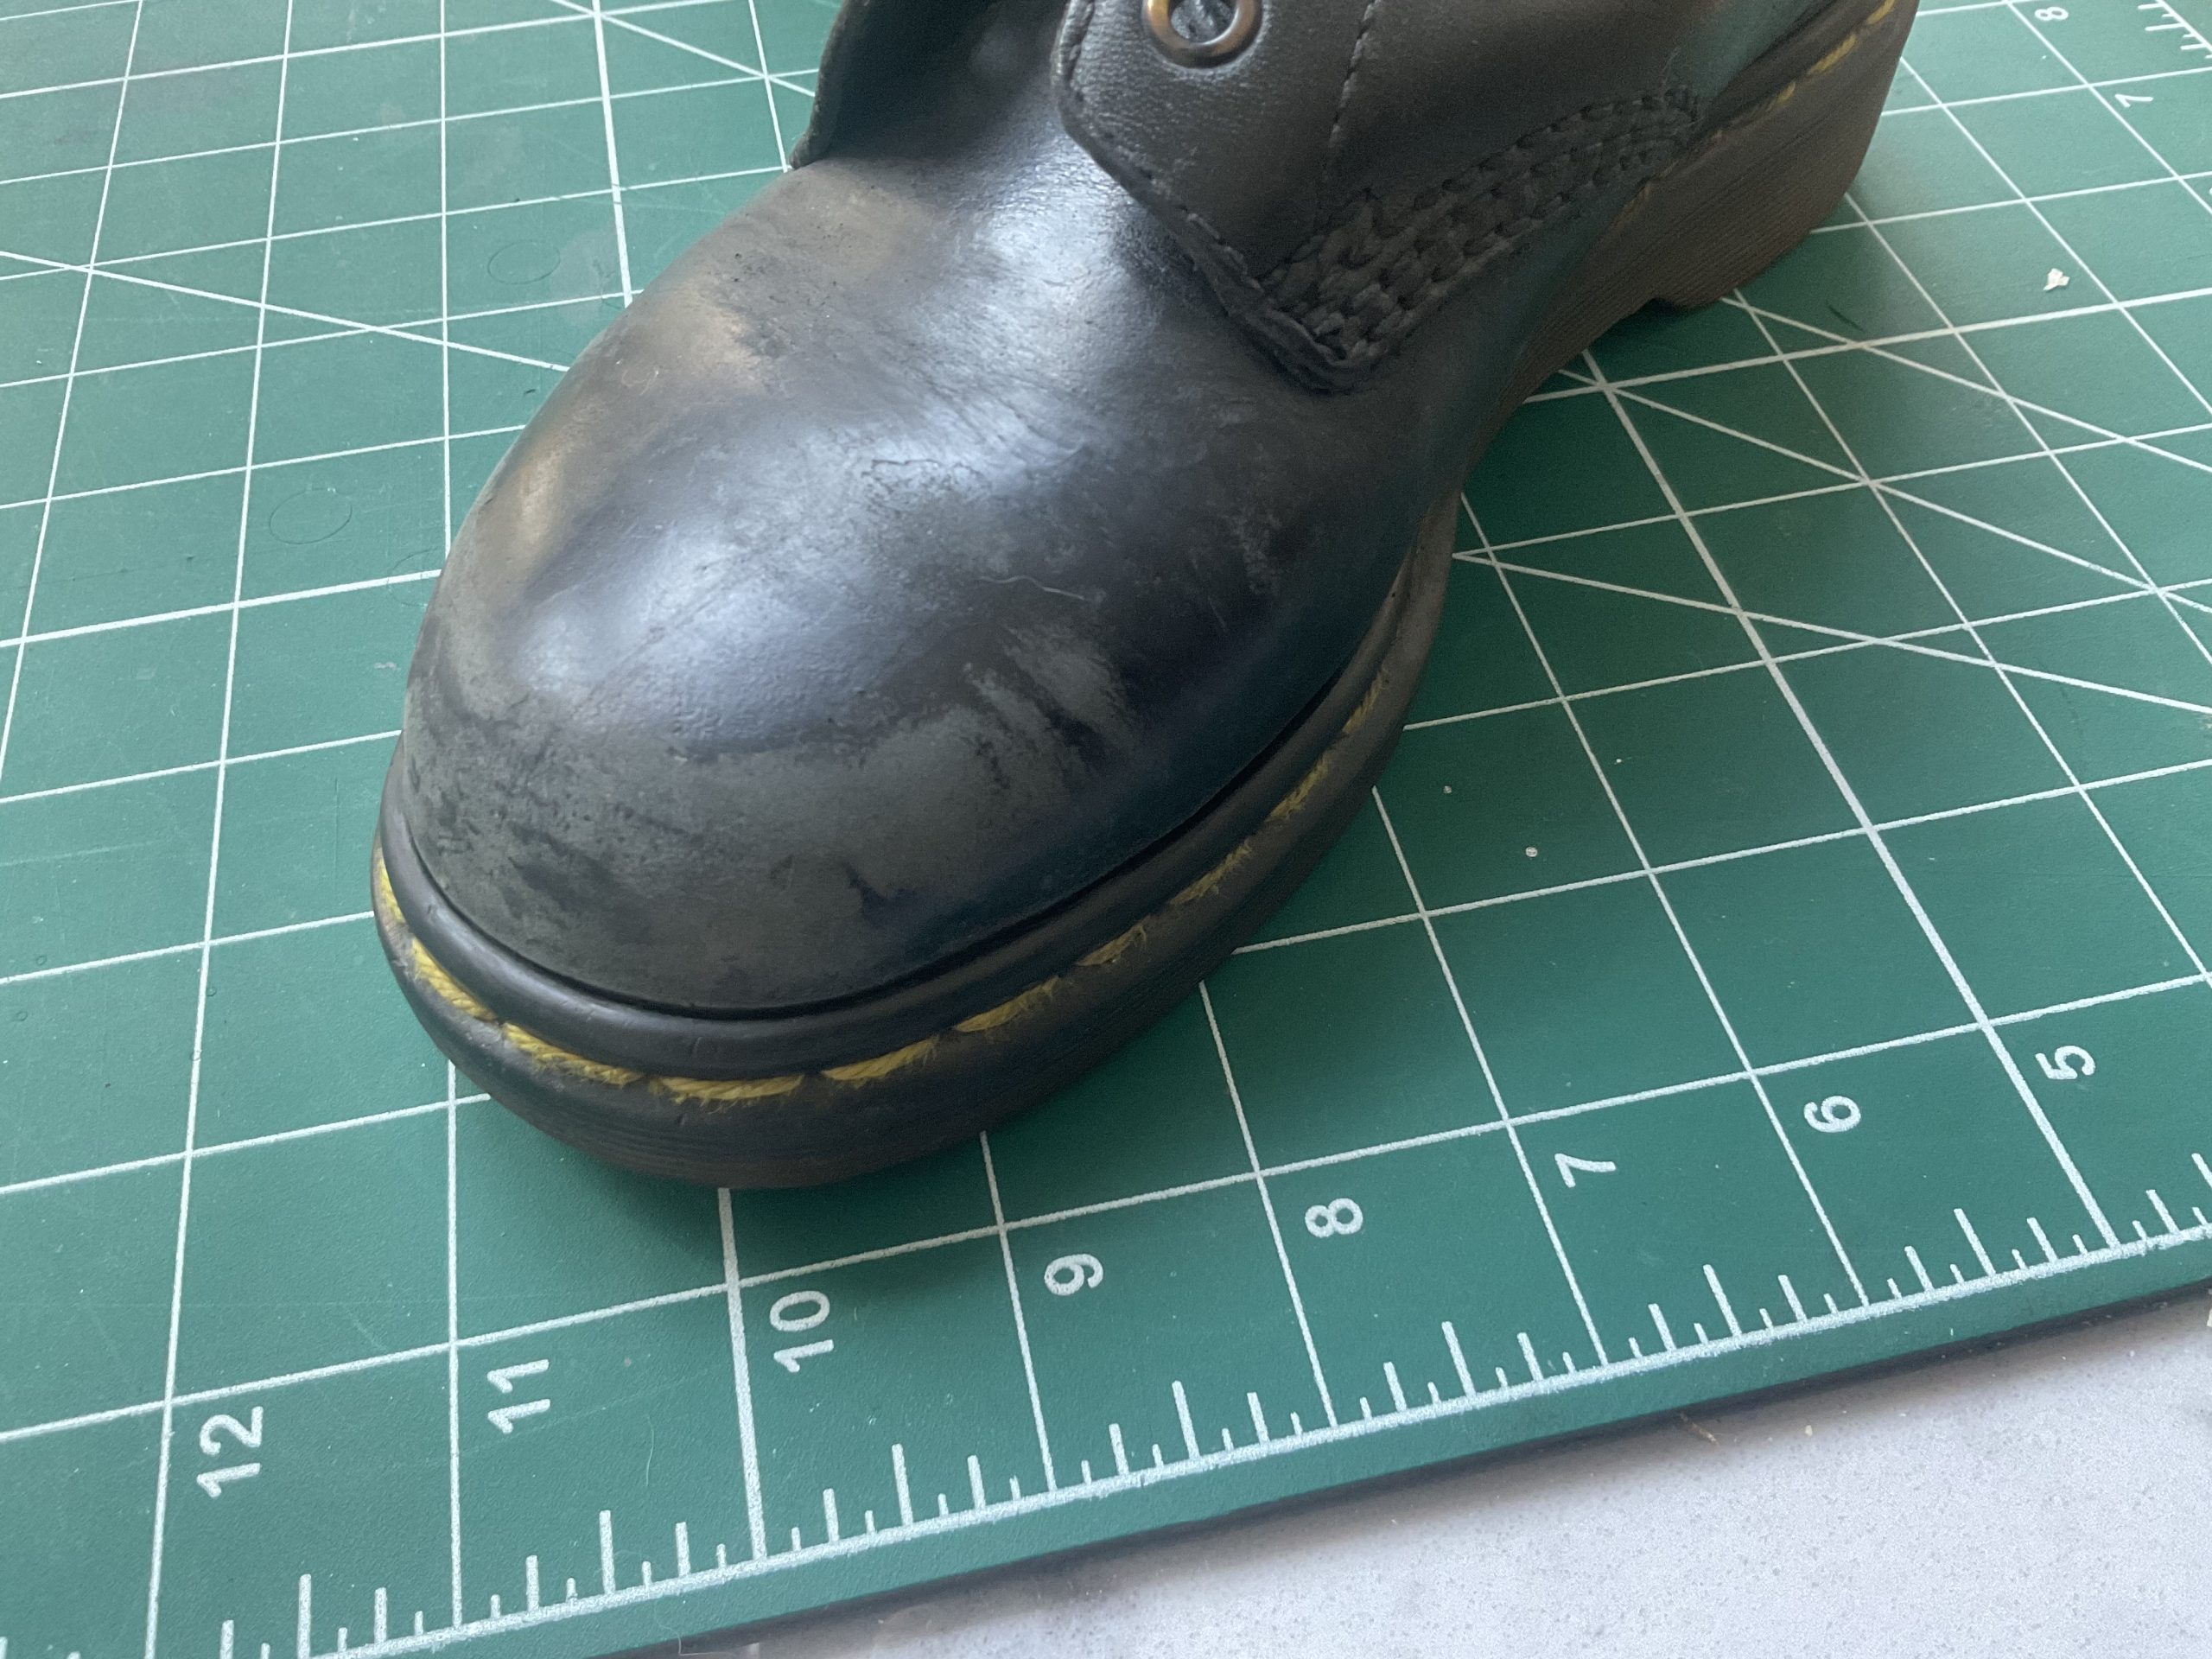
This was a scary one – being asked to restore a pair of Dr Martens which had significant sentimental value. After quite a bit of research, the plan was to thoroughly clean the boots, rough sand the areas that needed filling/repairing (which took an enormous leap in faith!), filling the cracks and blemishes with leather filler, sanding down any excess filler, applying dyed leather cream and finally polishing. Taking sandpaper to the flesh side of leather to in some way repair it is counter-intuative and the fear of ruining the boots was at the forefront of my mind and a real worry.
Products Used: Renapur Leather Cleaner Spray, Saphir Leather Foam Cleaner, 600/1000/1500 wet & dry sandpaper, Tarrago Filling Paste (Black), black Saphir Creme Medaille D’Or 1925 and Renapur Leather Balsam.

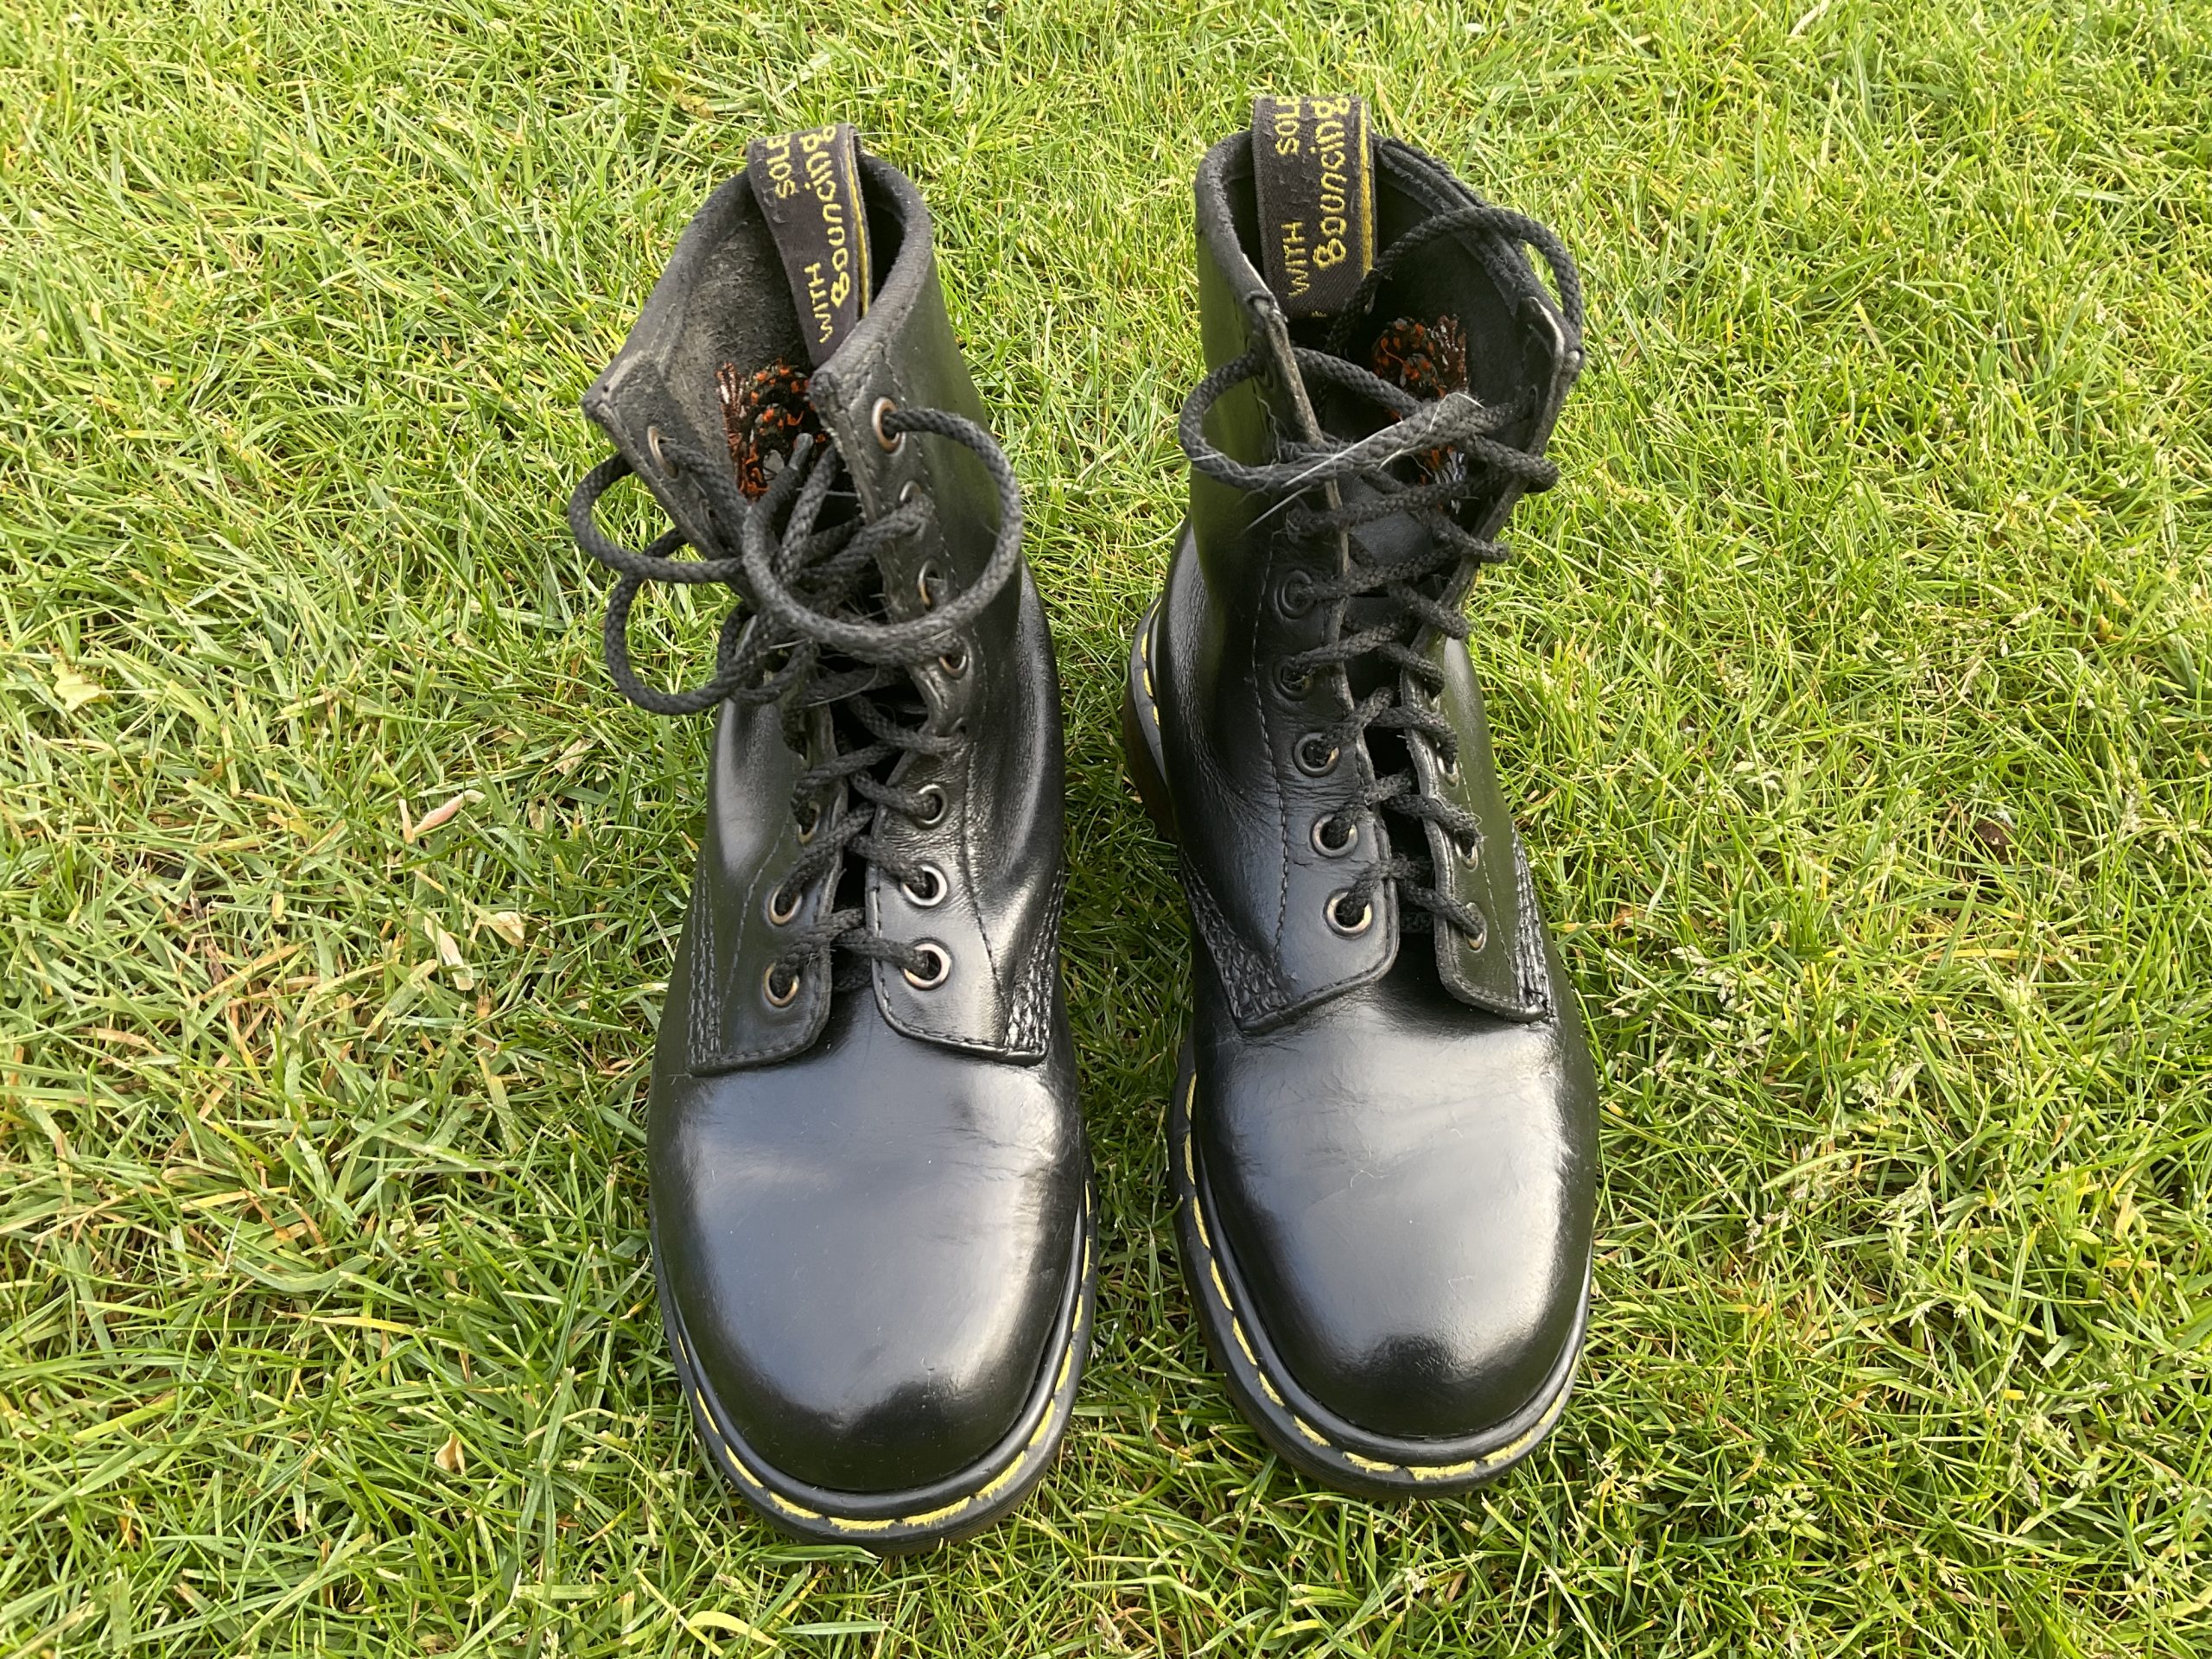
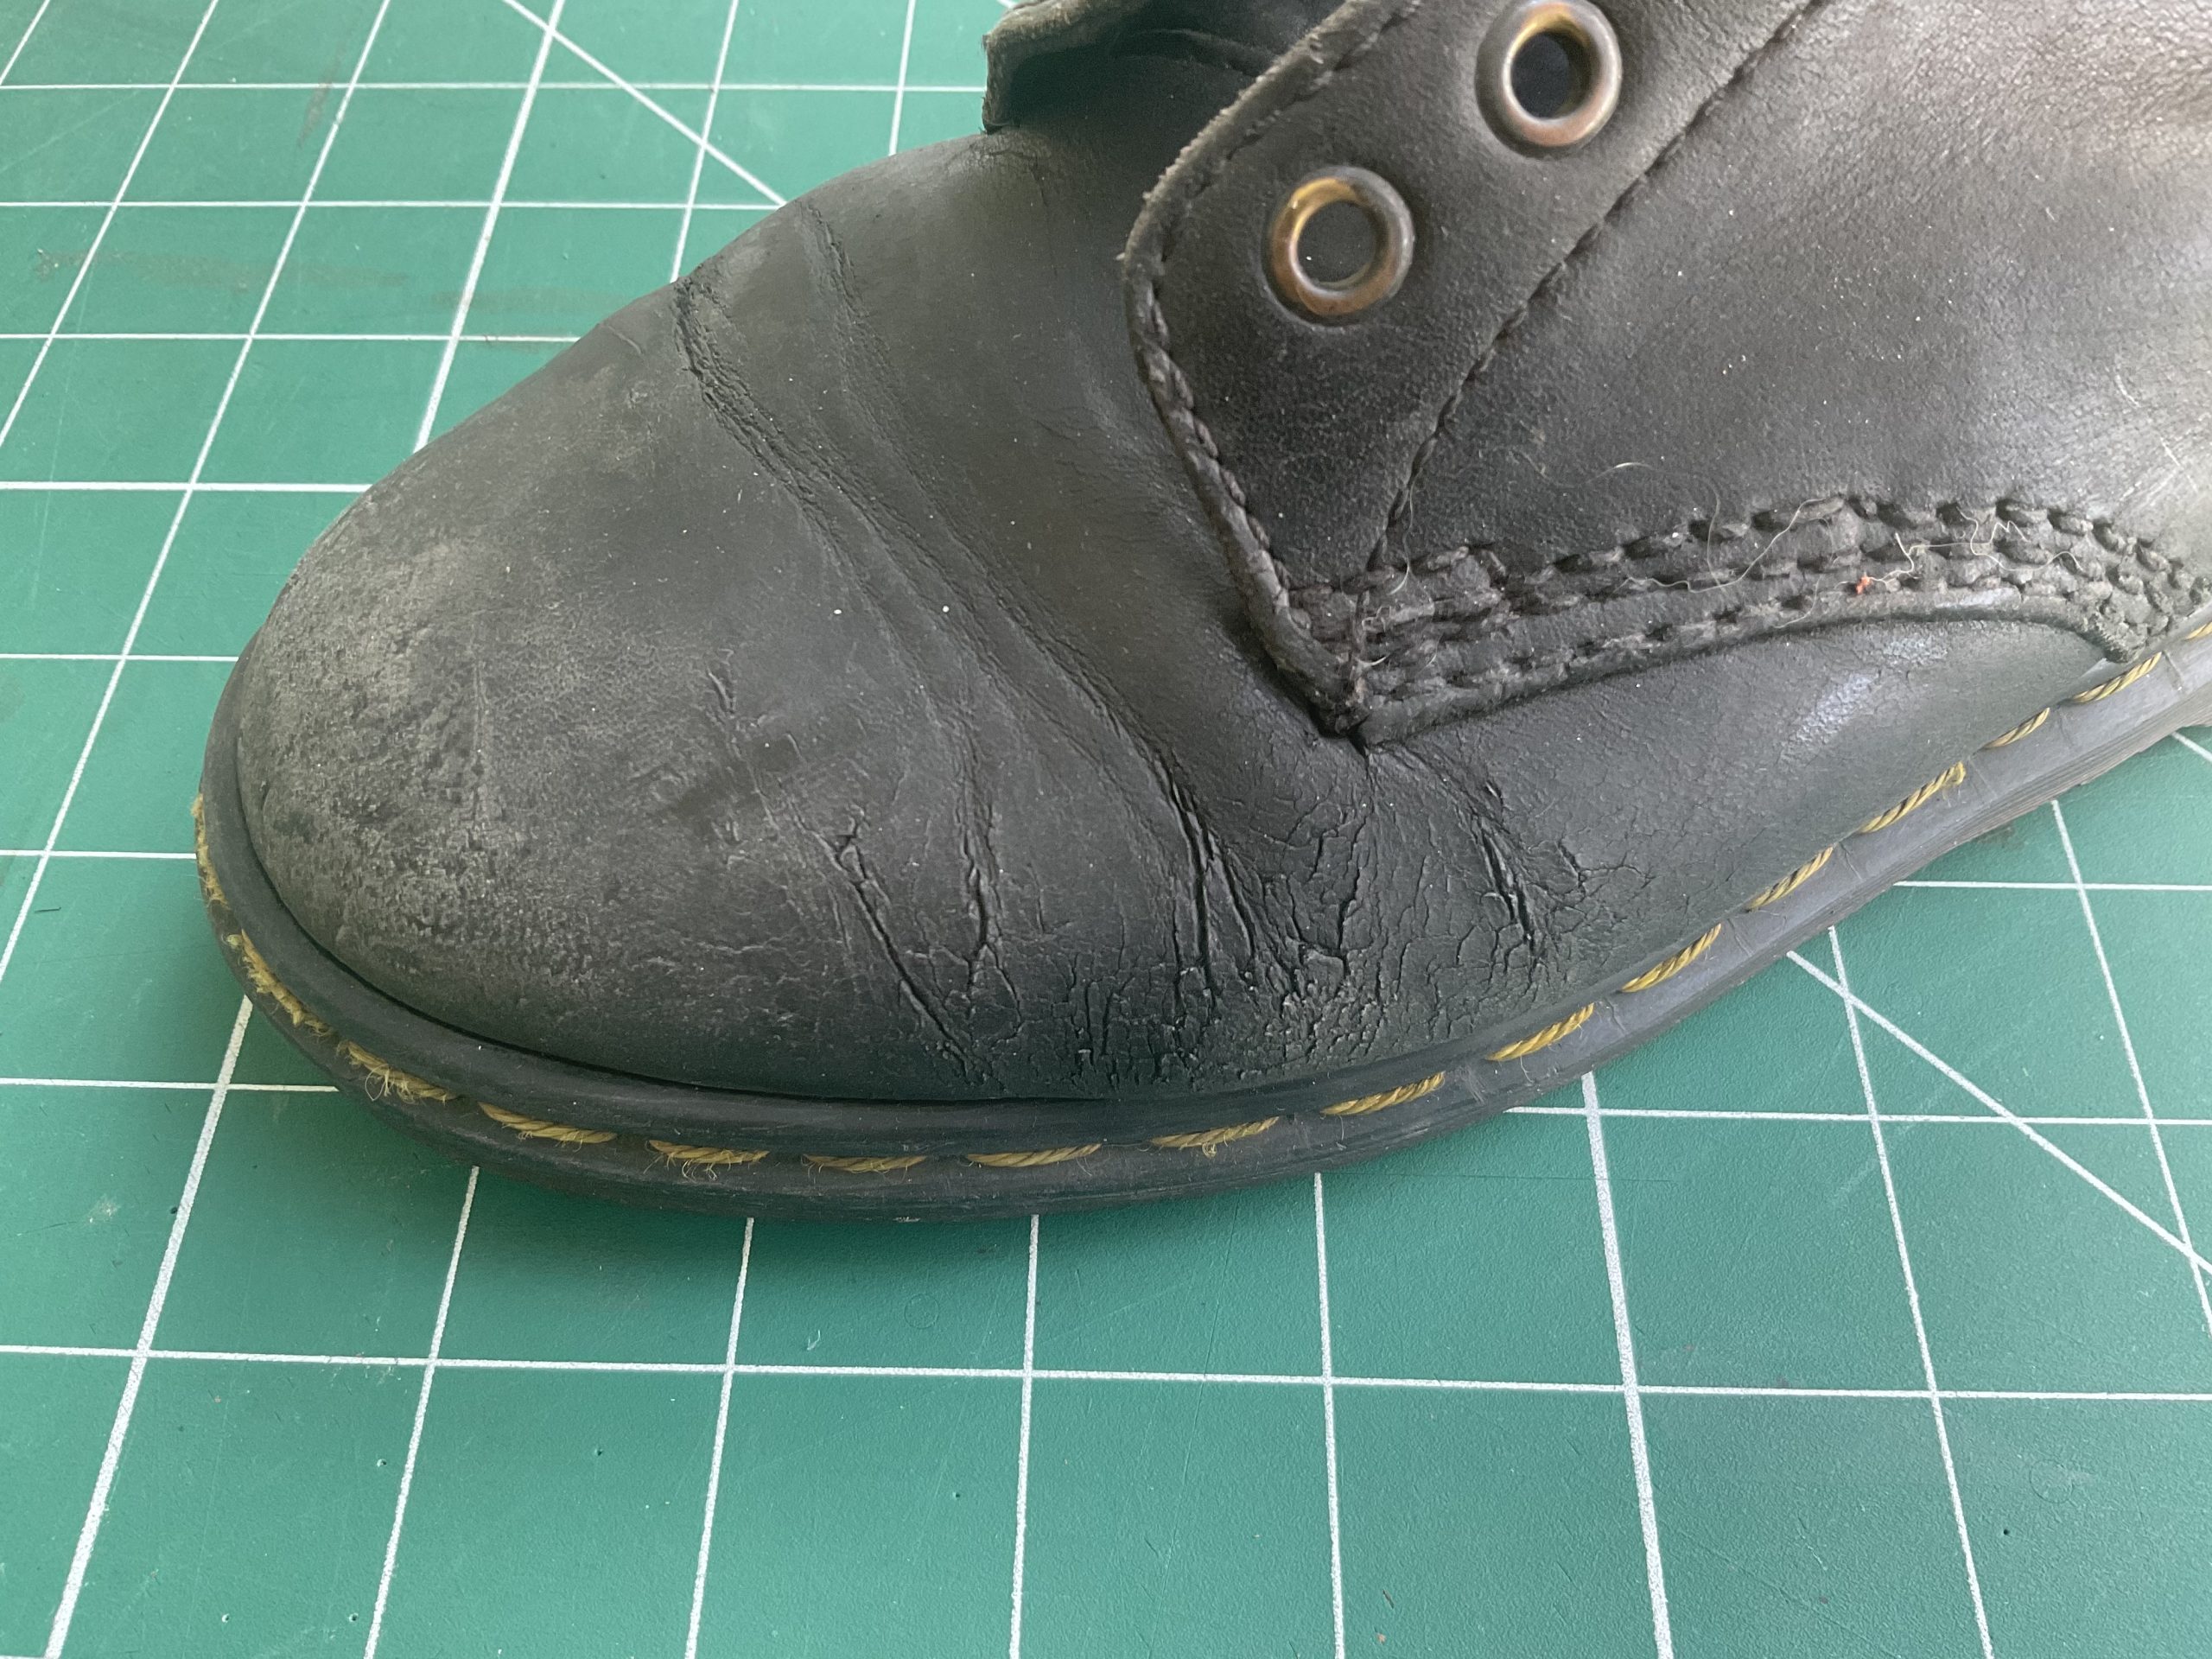
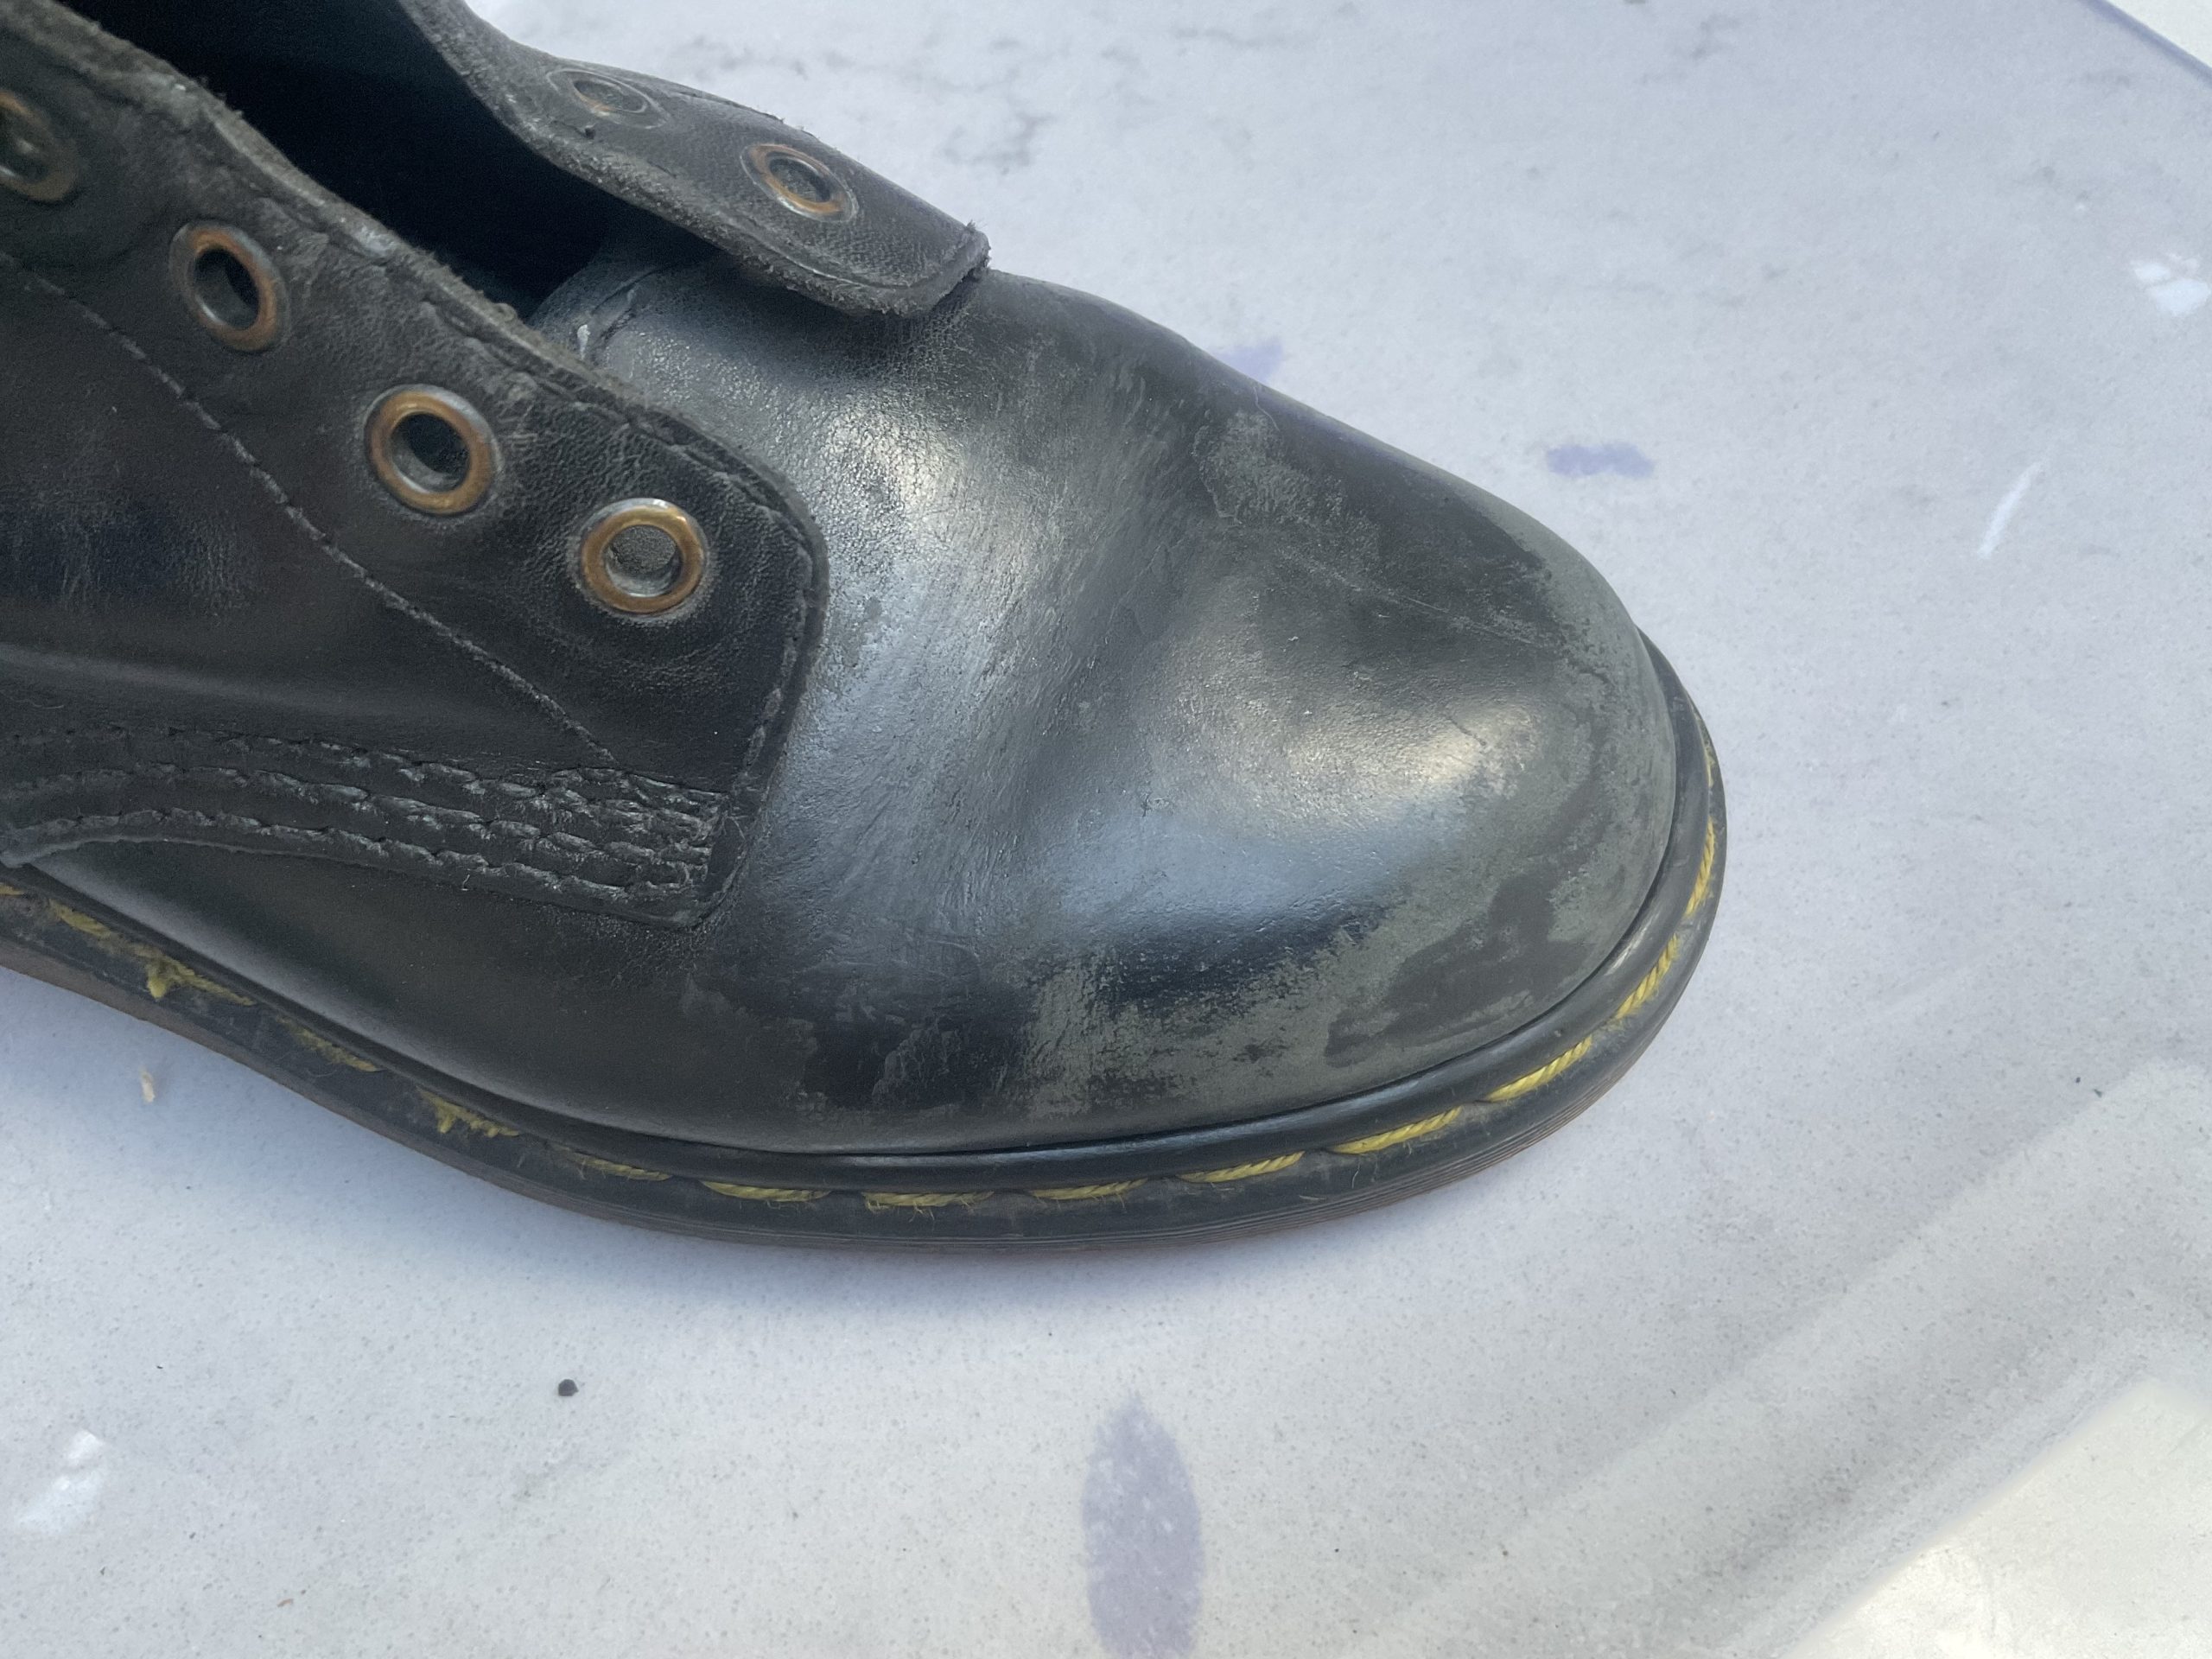
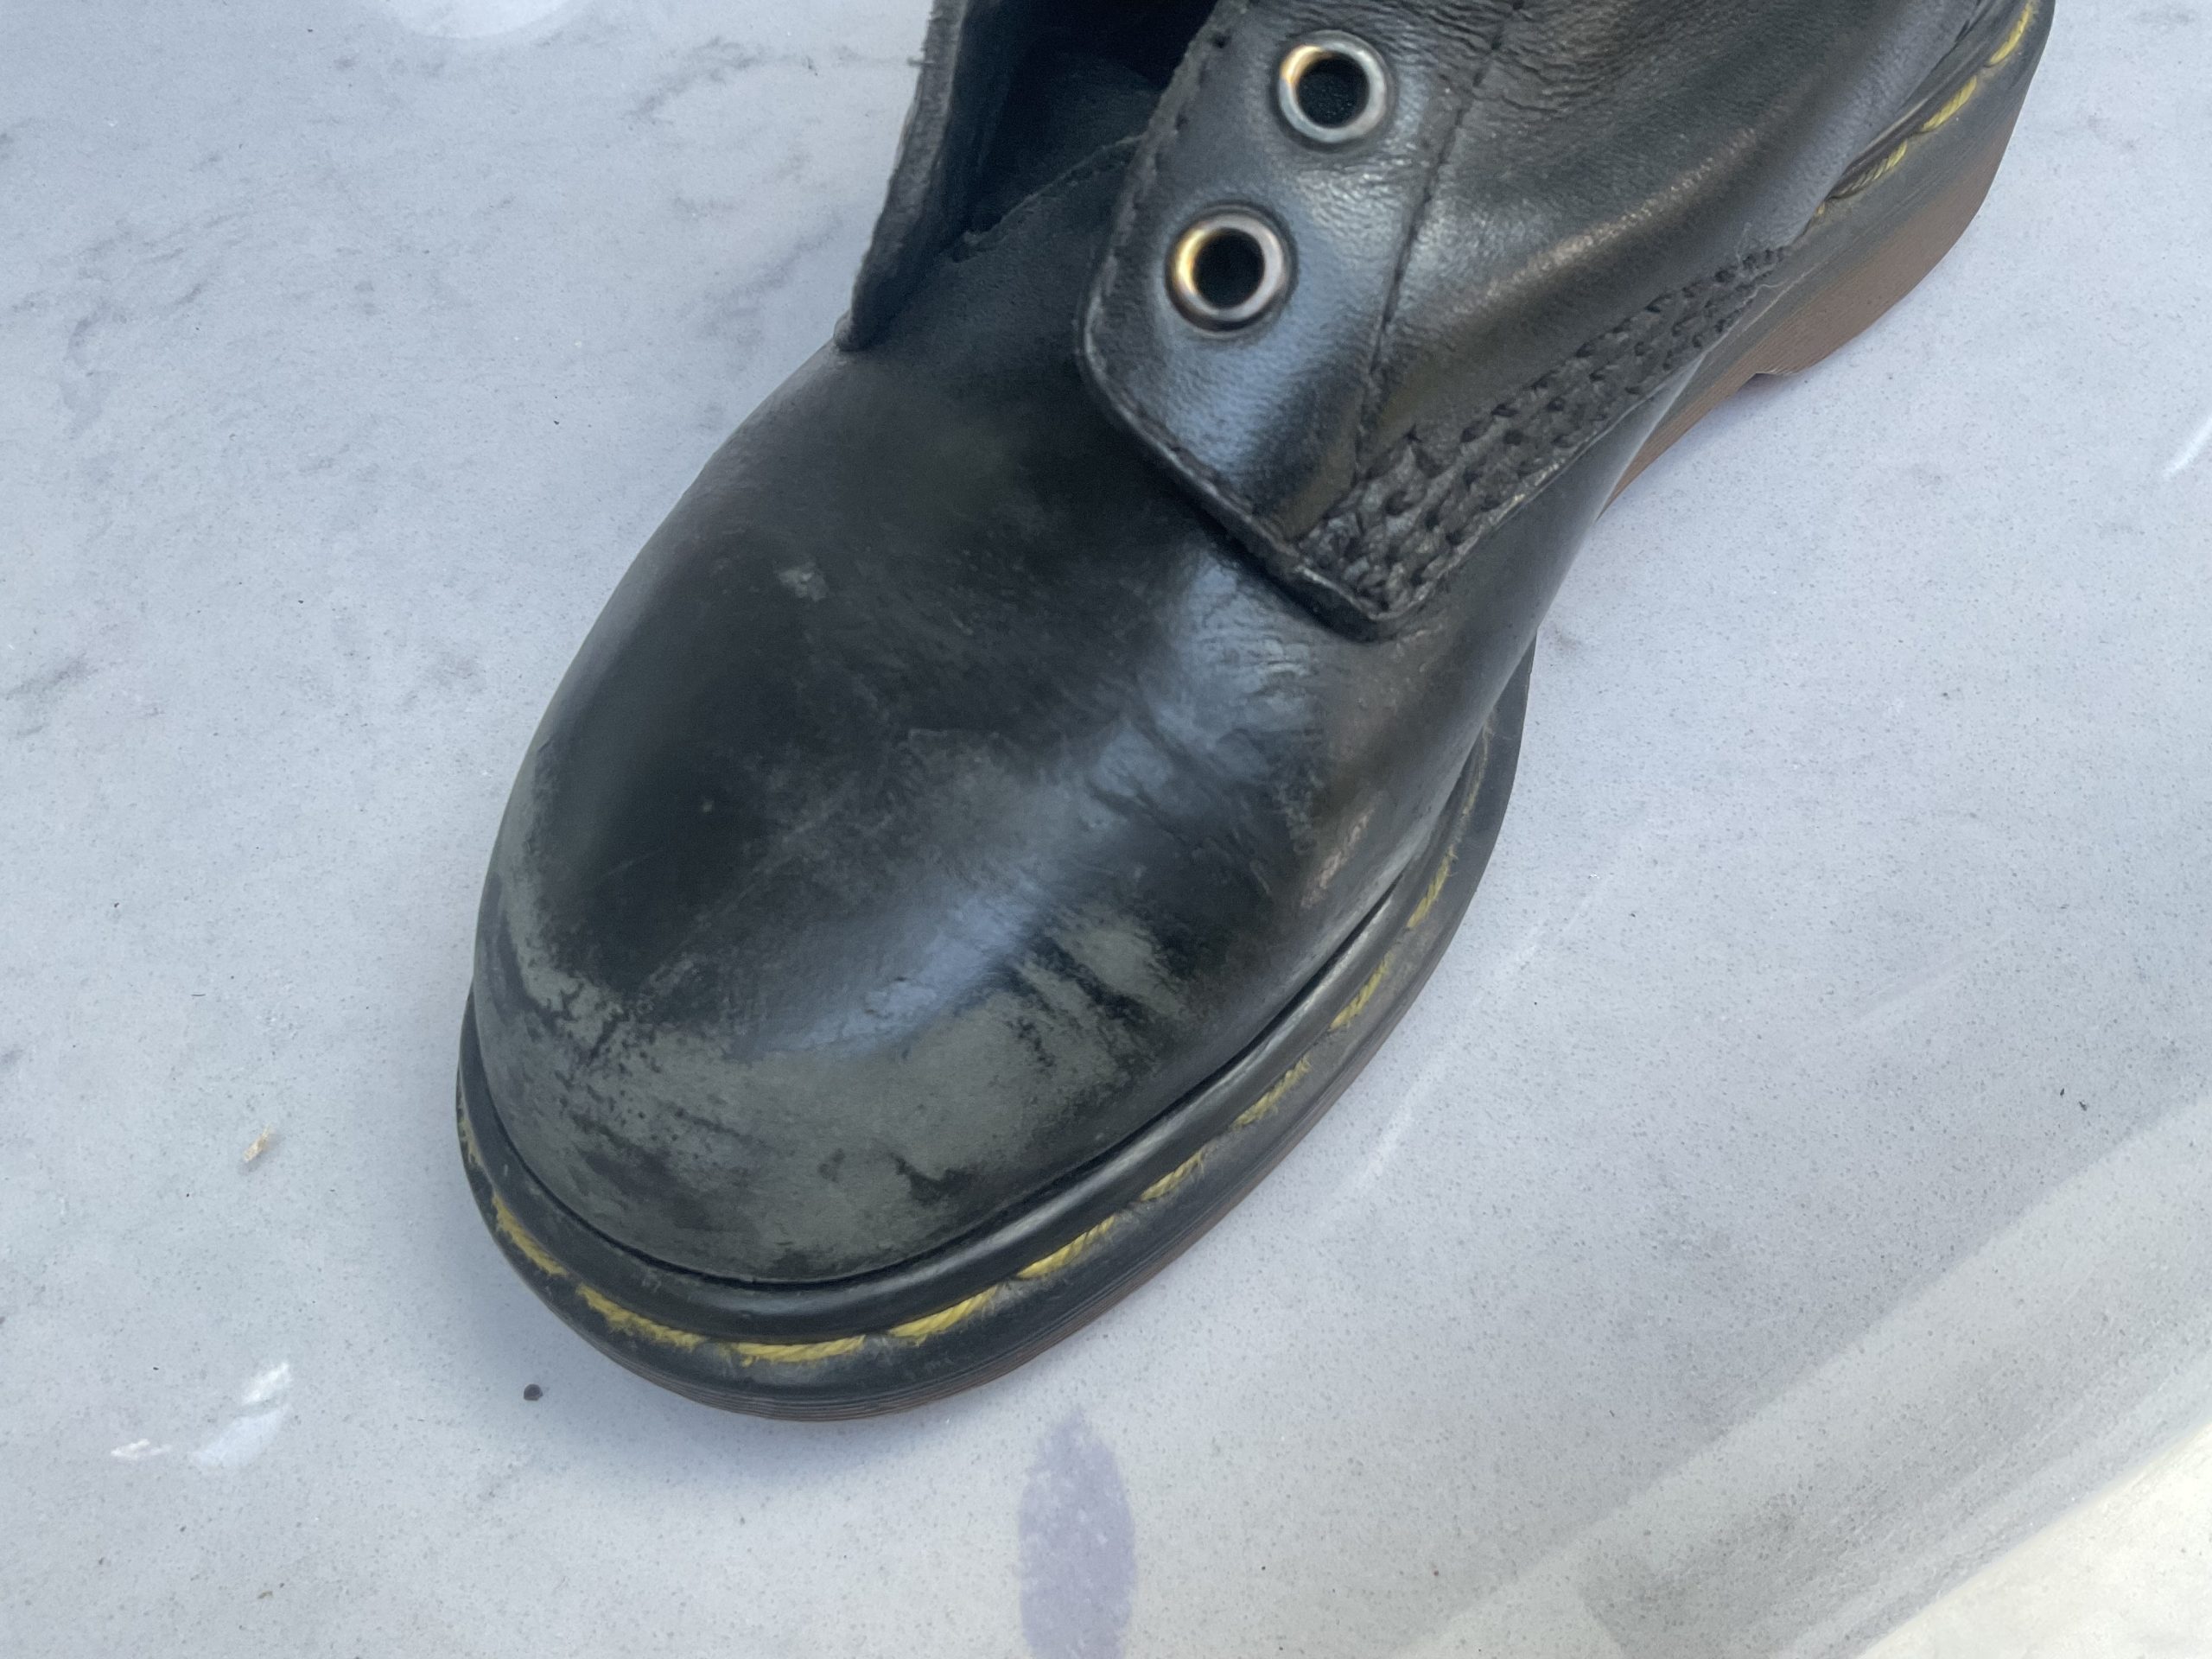
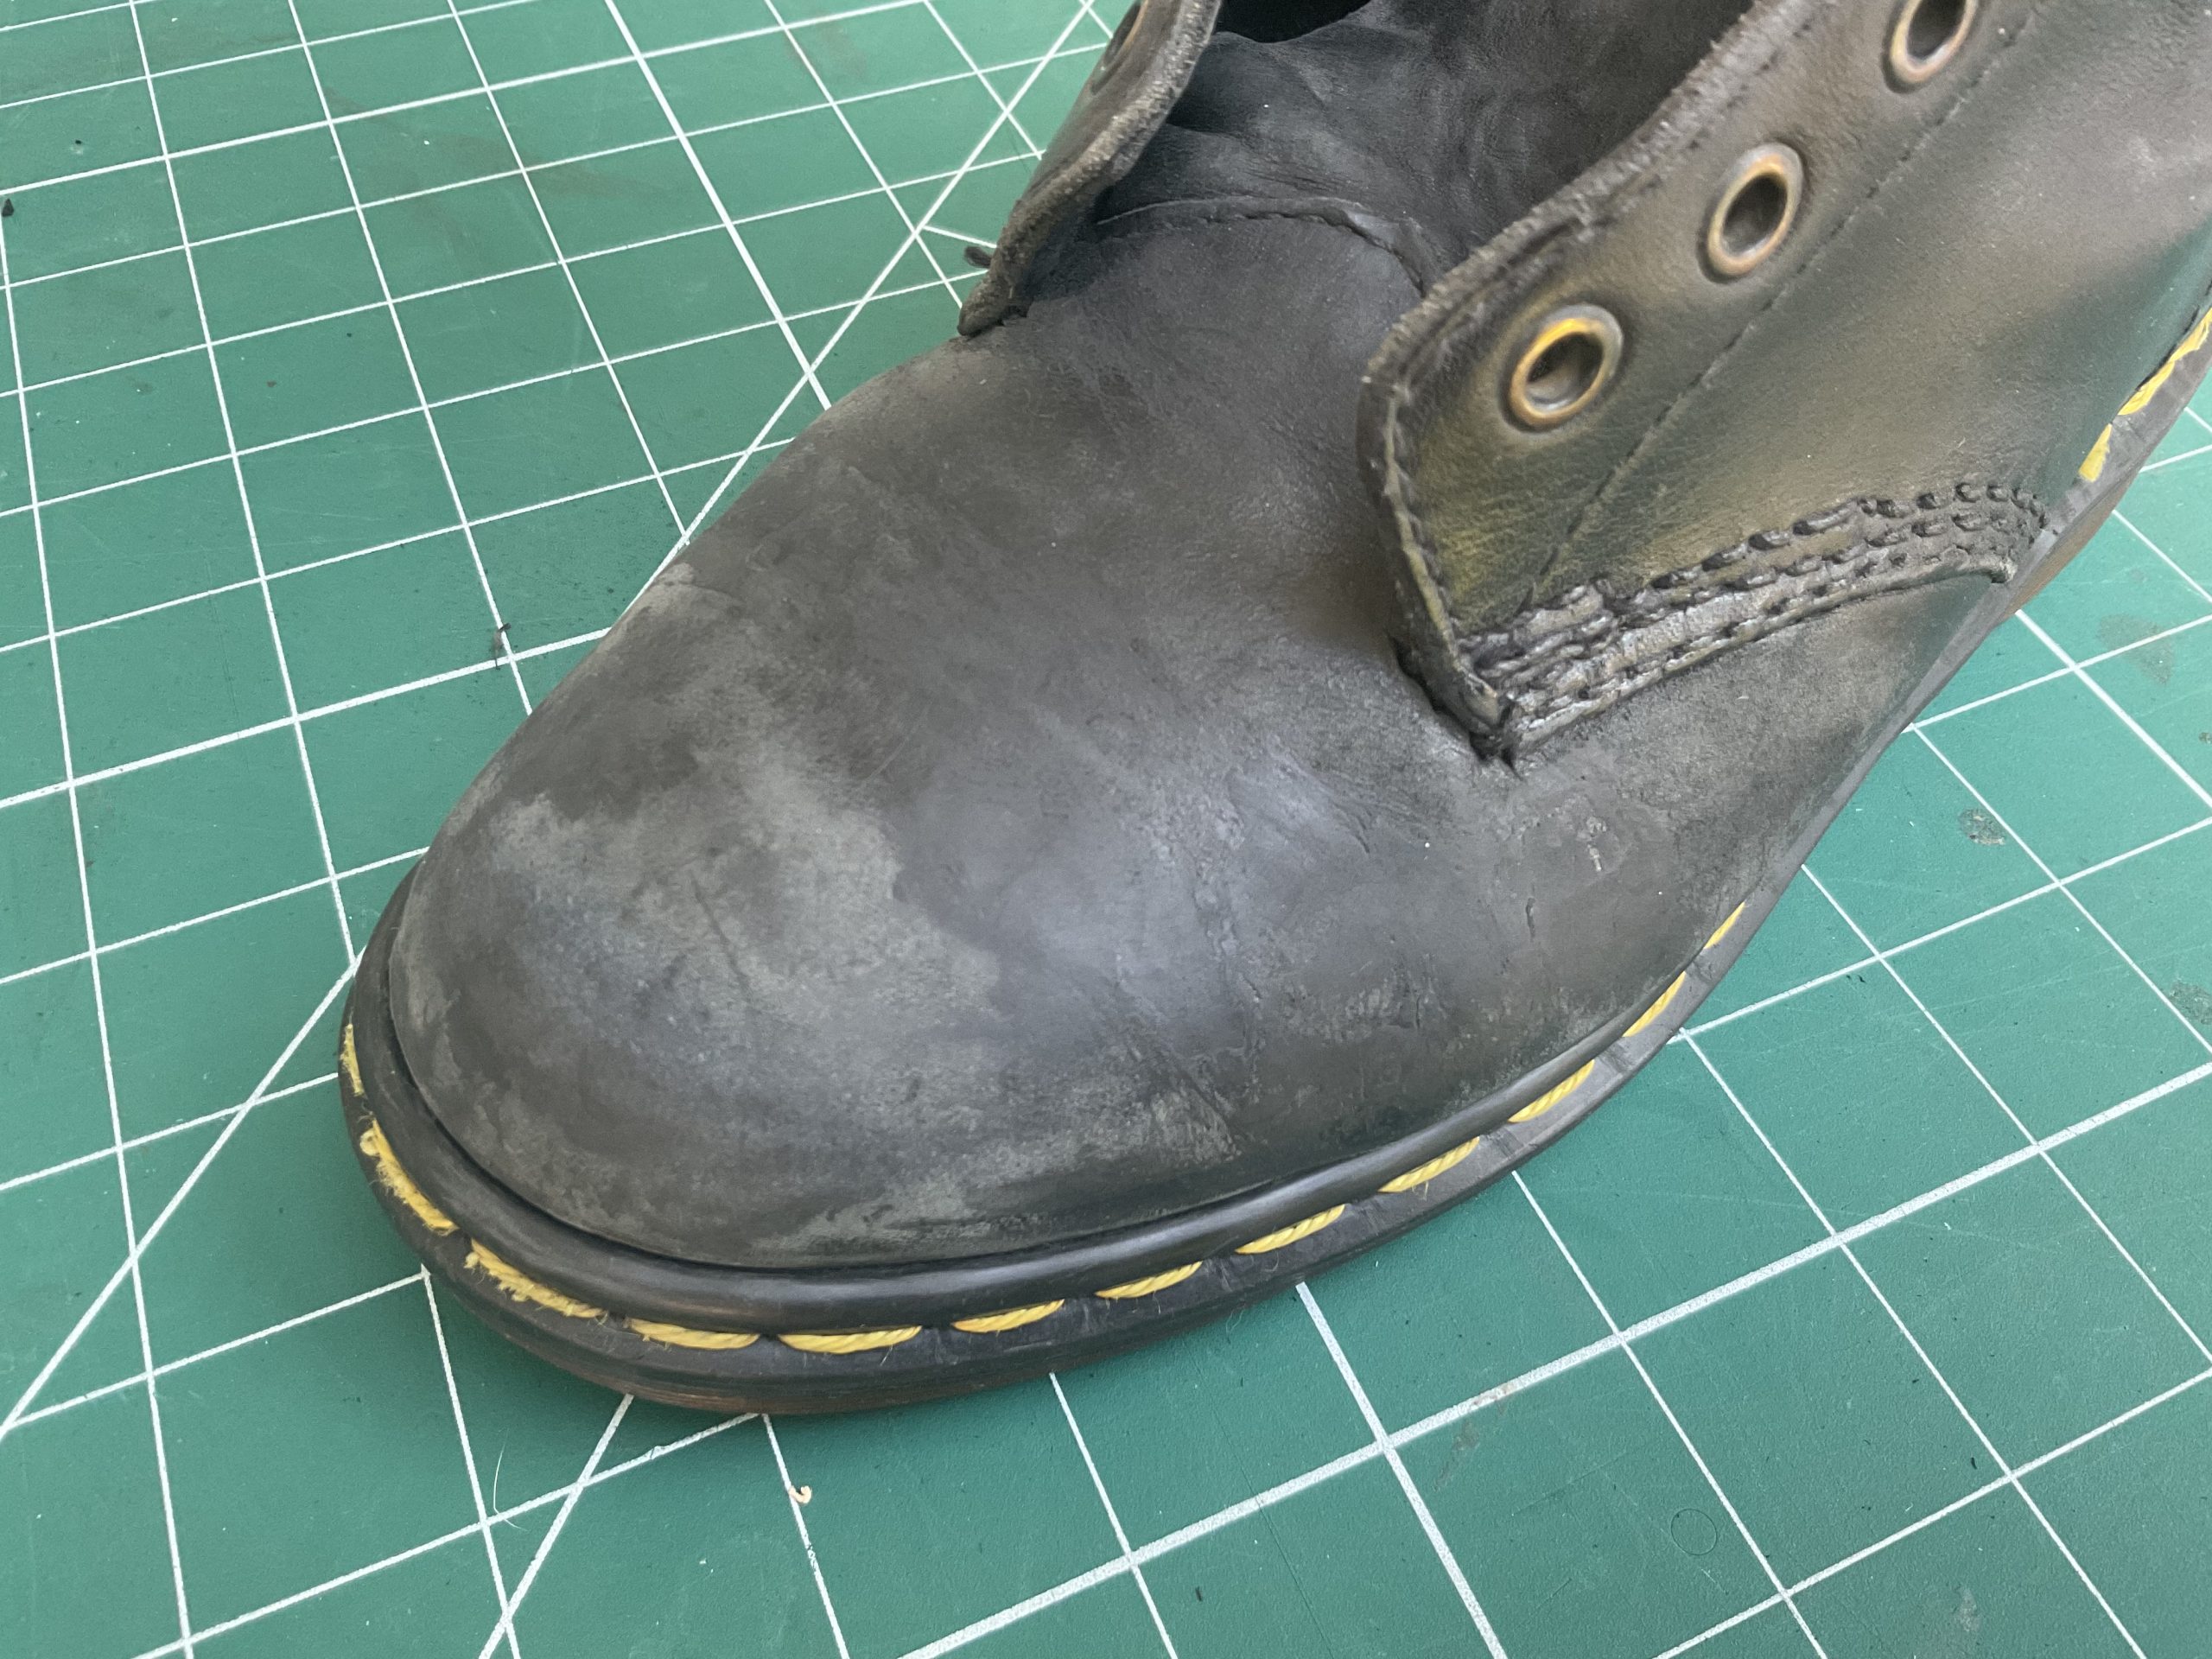
I don’t think the boots had ever seen any polish or care products since they were purchased, so the leather had completely dried out. Resulting in deeps cracks just behind the toe cap area. A thorough clean with Renapur leather cleaner spray removed all the dirt as well as preparing the surface of the leather to have a better bond with the leather filler.
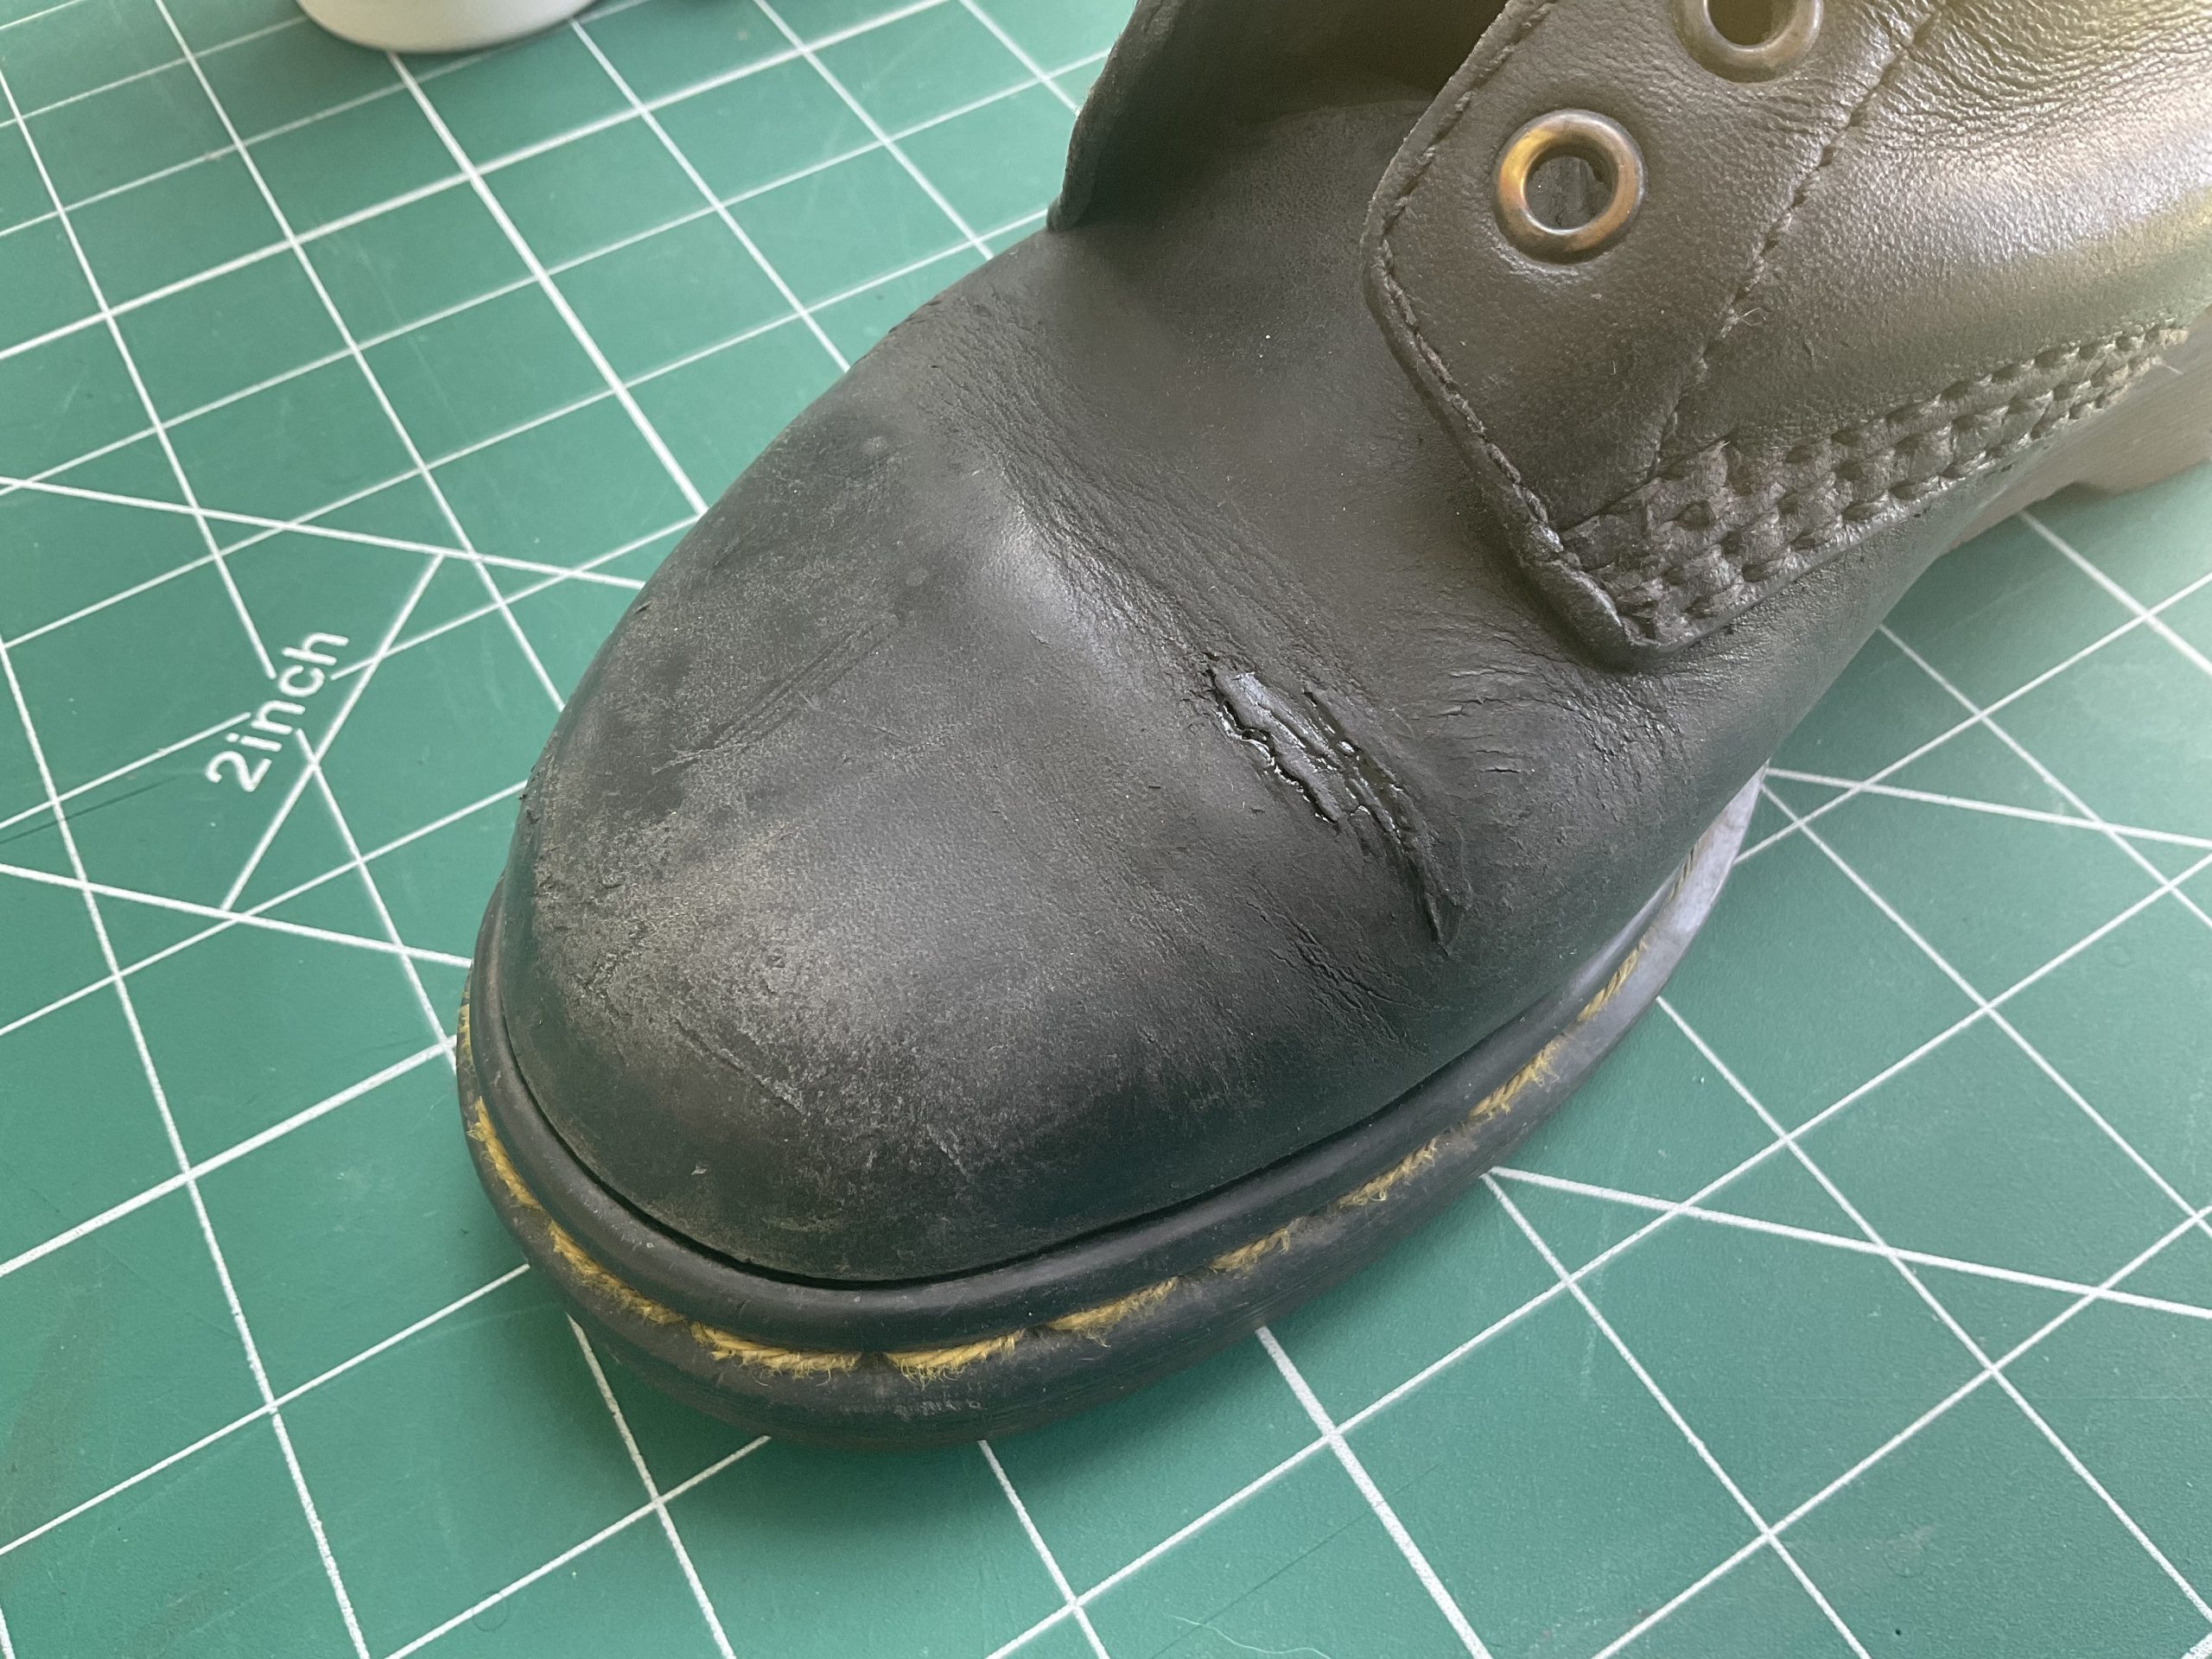
The cracking was so severe they would have to be filled with a dyed leather filler. Black Tarrago filling paste will be applied in thin layers using a small spatula.
I hadn’t repaired any footwear before so the leather filler was applied in very thin layers to slowly fill the cracks. Therefore hopefully avoiding too much sanding later on.
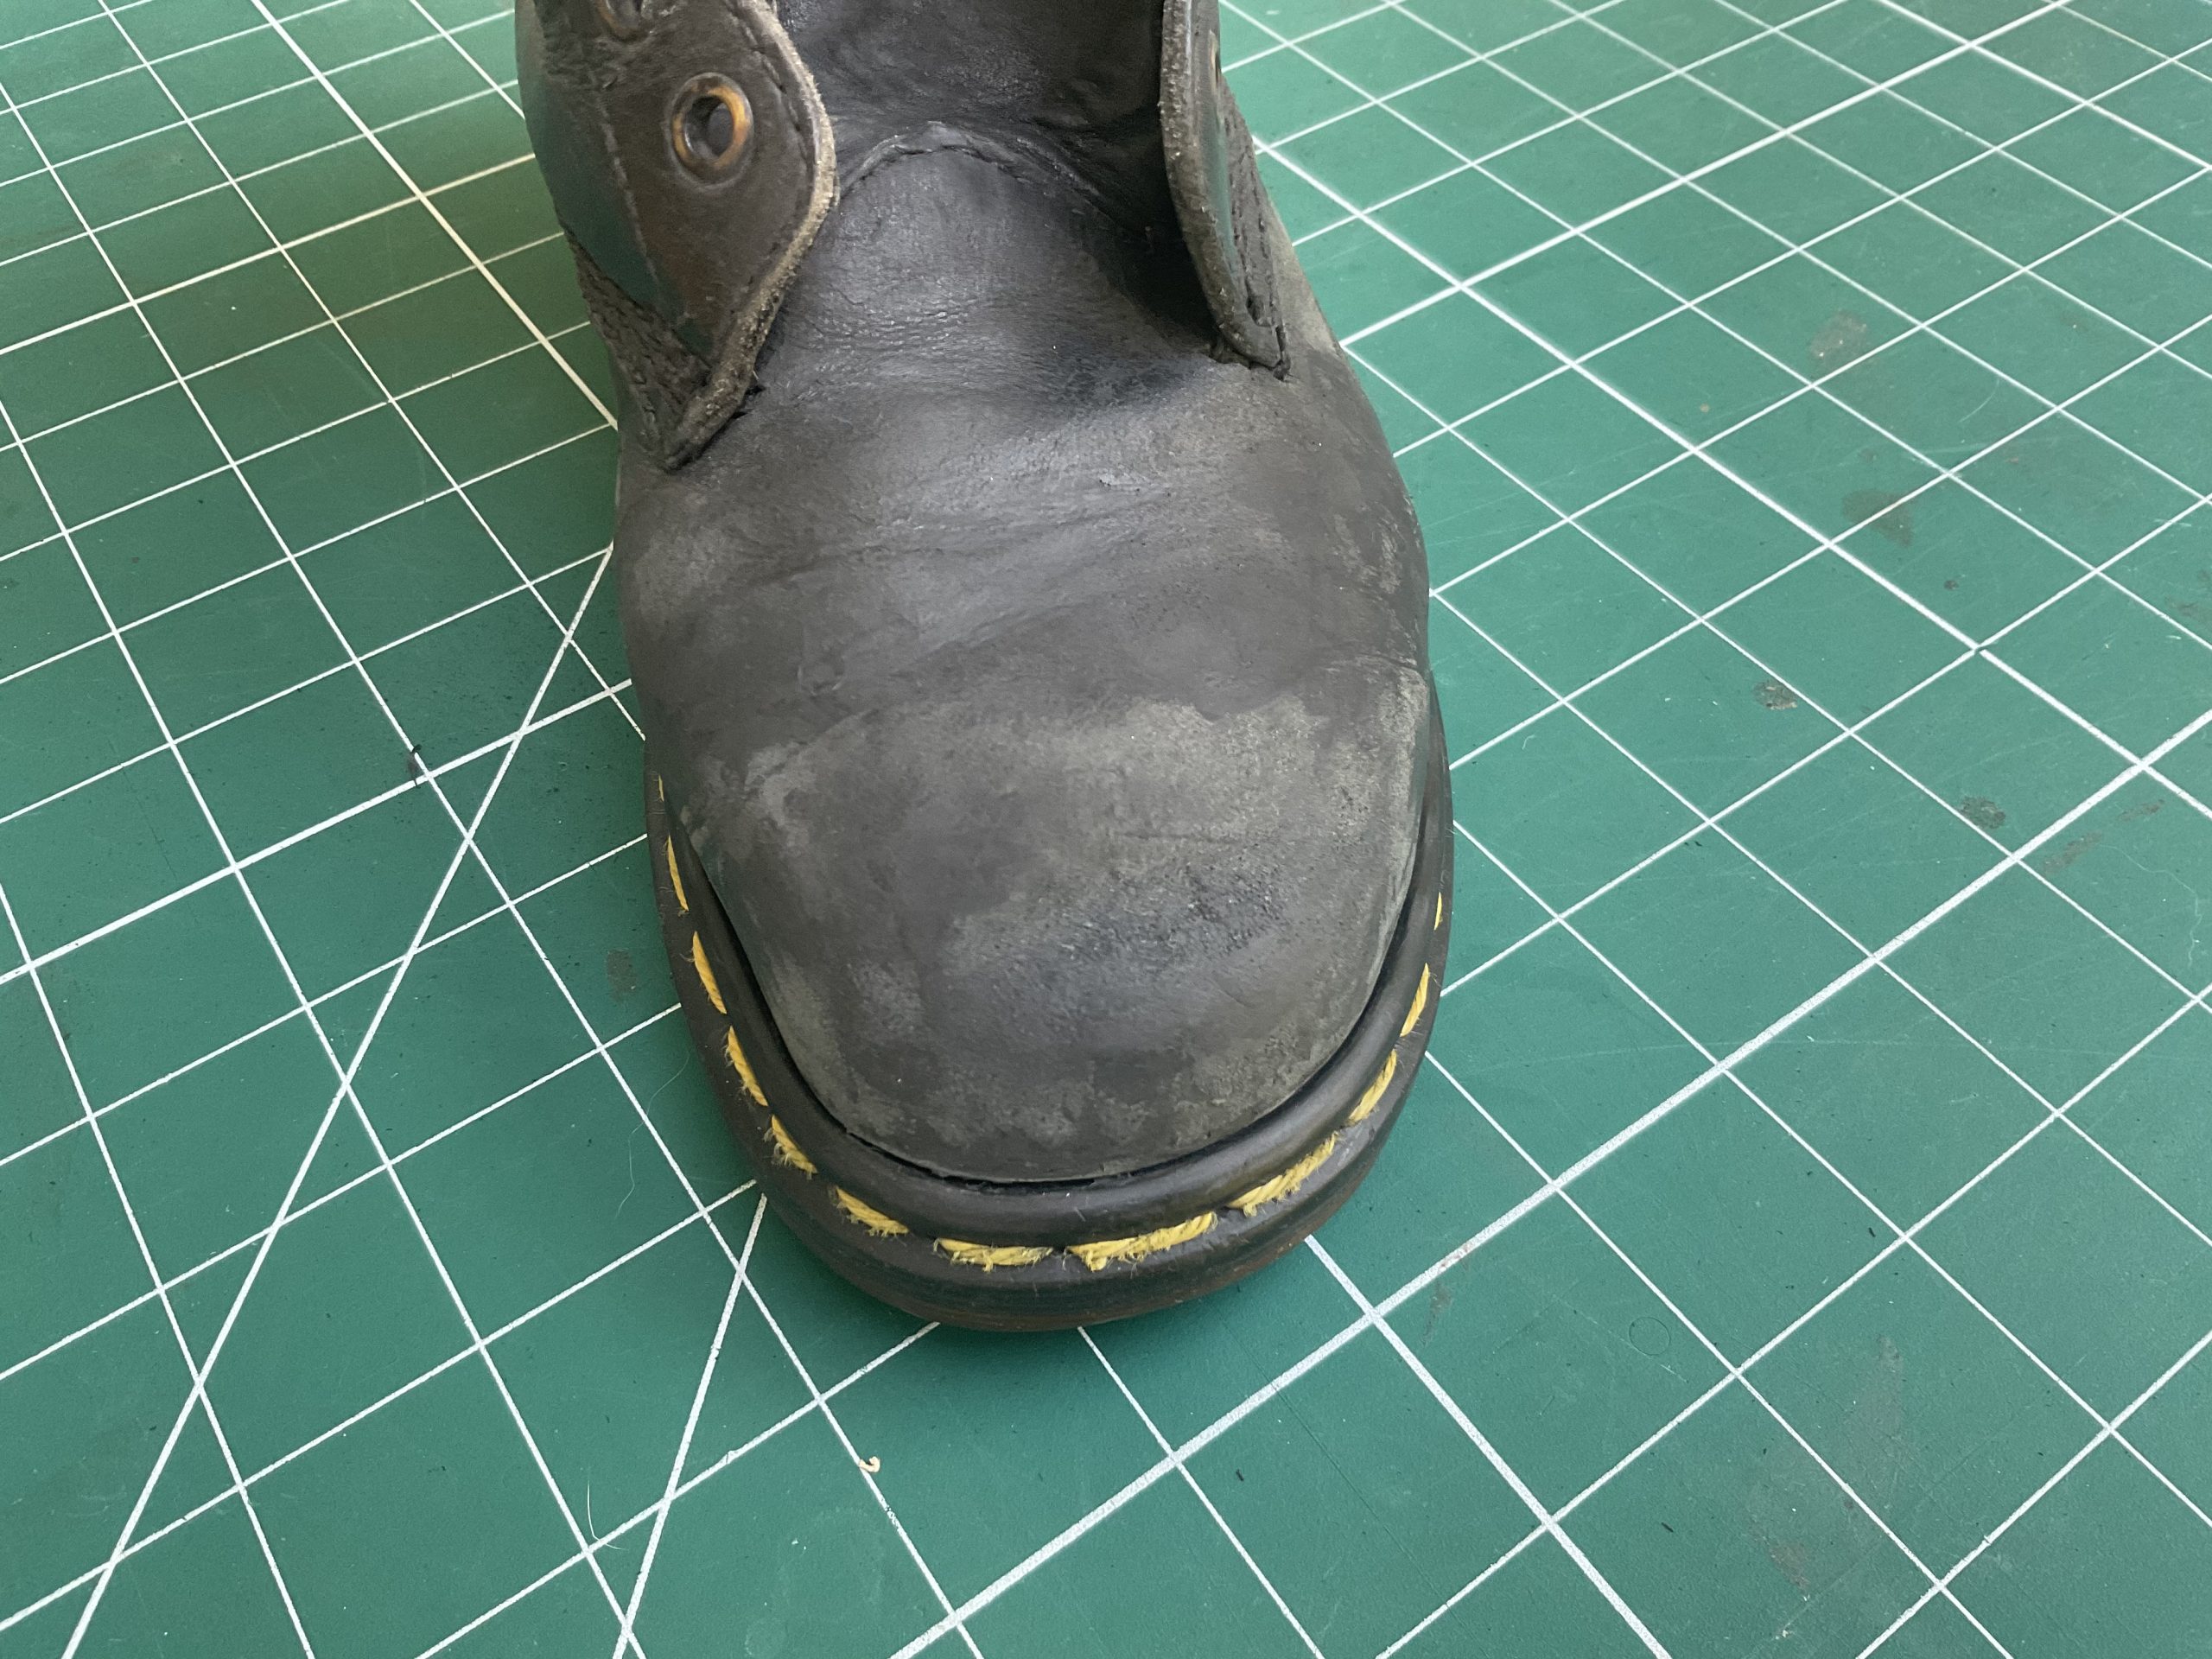
The cracks low down near the stitched welt are almost filled – more work required.
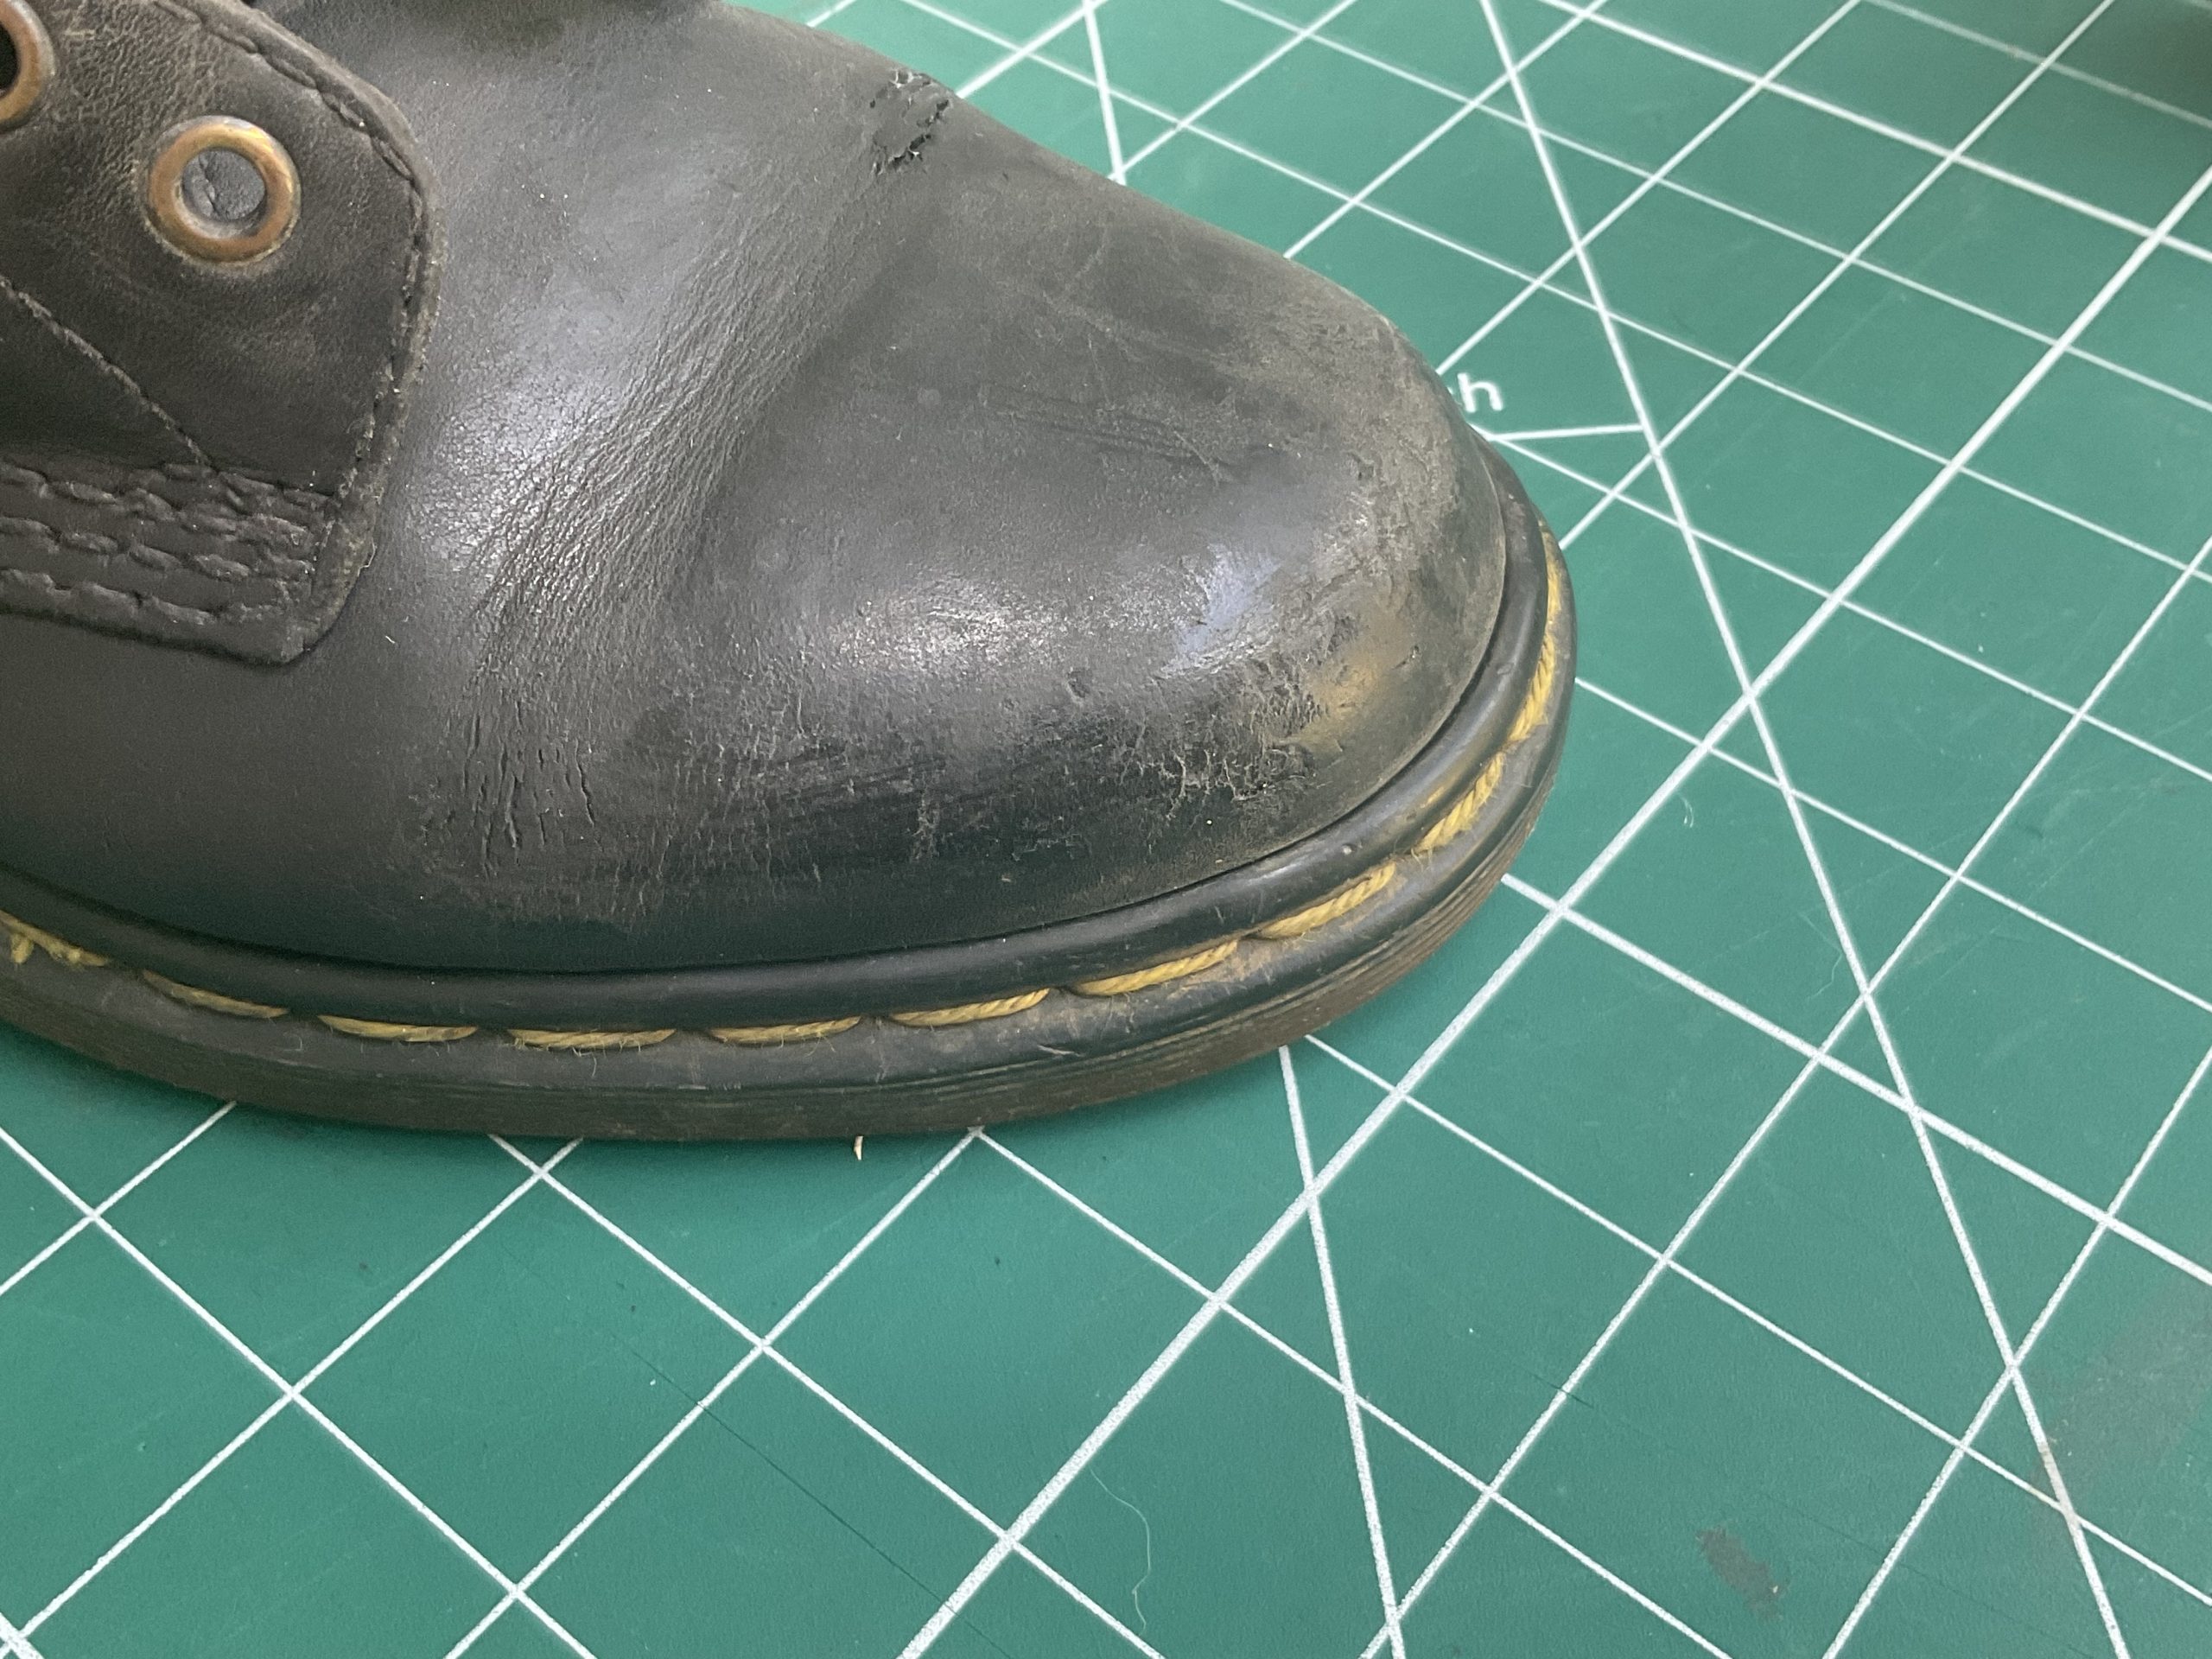
The whole of the toe cap areas were given a thin layer of filler to hide all the dings and dents and the cracks given their final fill. Any filler proud of the surface will then be sanded down using progressively finer grits of sandpaper.
This was the scary bit – sanding away the surface of the leather removes both the colour and sheen from the leather.
It Is quite difficult to feather in the filler to the leather as having a gloss finish will make any imperfections really stand out like a sore thumb.
At this stage I still had massive reservations that the finishing crème would bring the boot back to a full lustre.

It was a huge relief that the repair had worked out so well on the first boot. Although once polished I realised I hadn’t cleaned the yellow welt thread. Diluted carpet cleaner was used – perhaps better to do before the final polishing on the second boot!
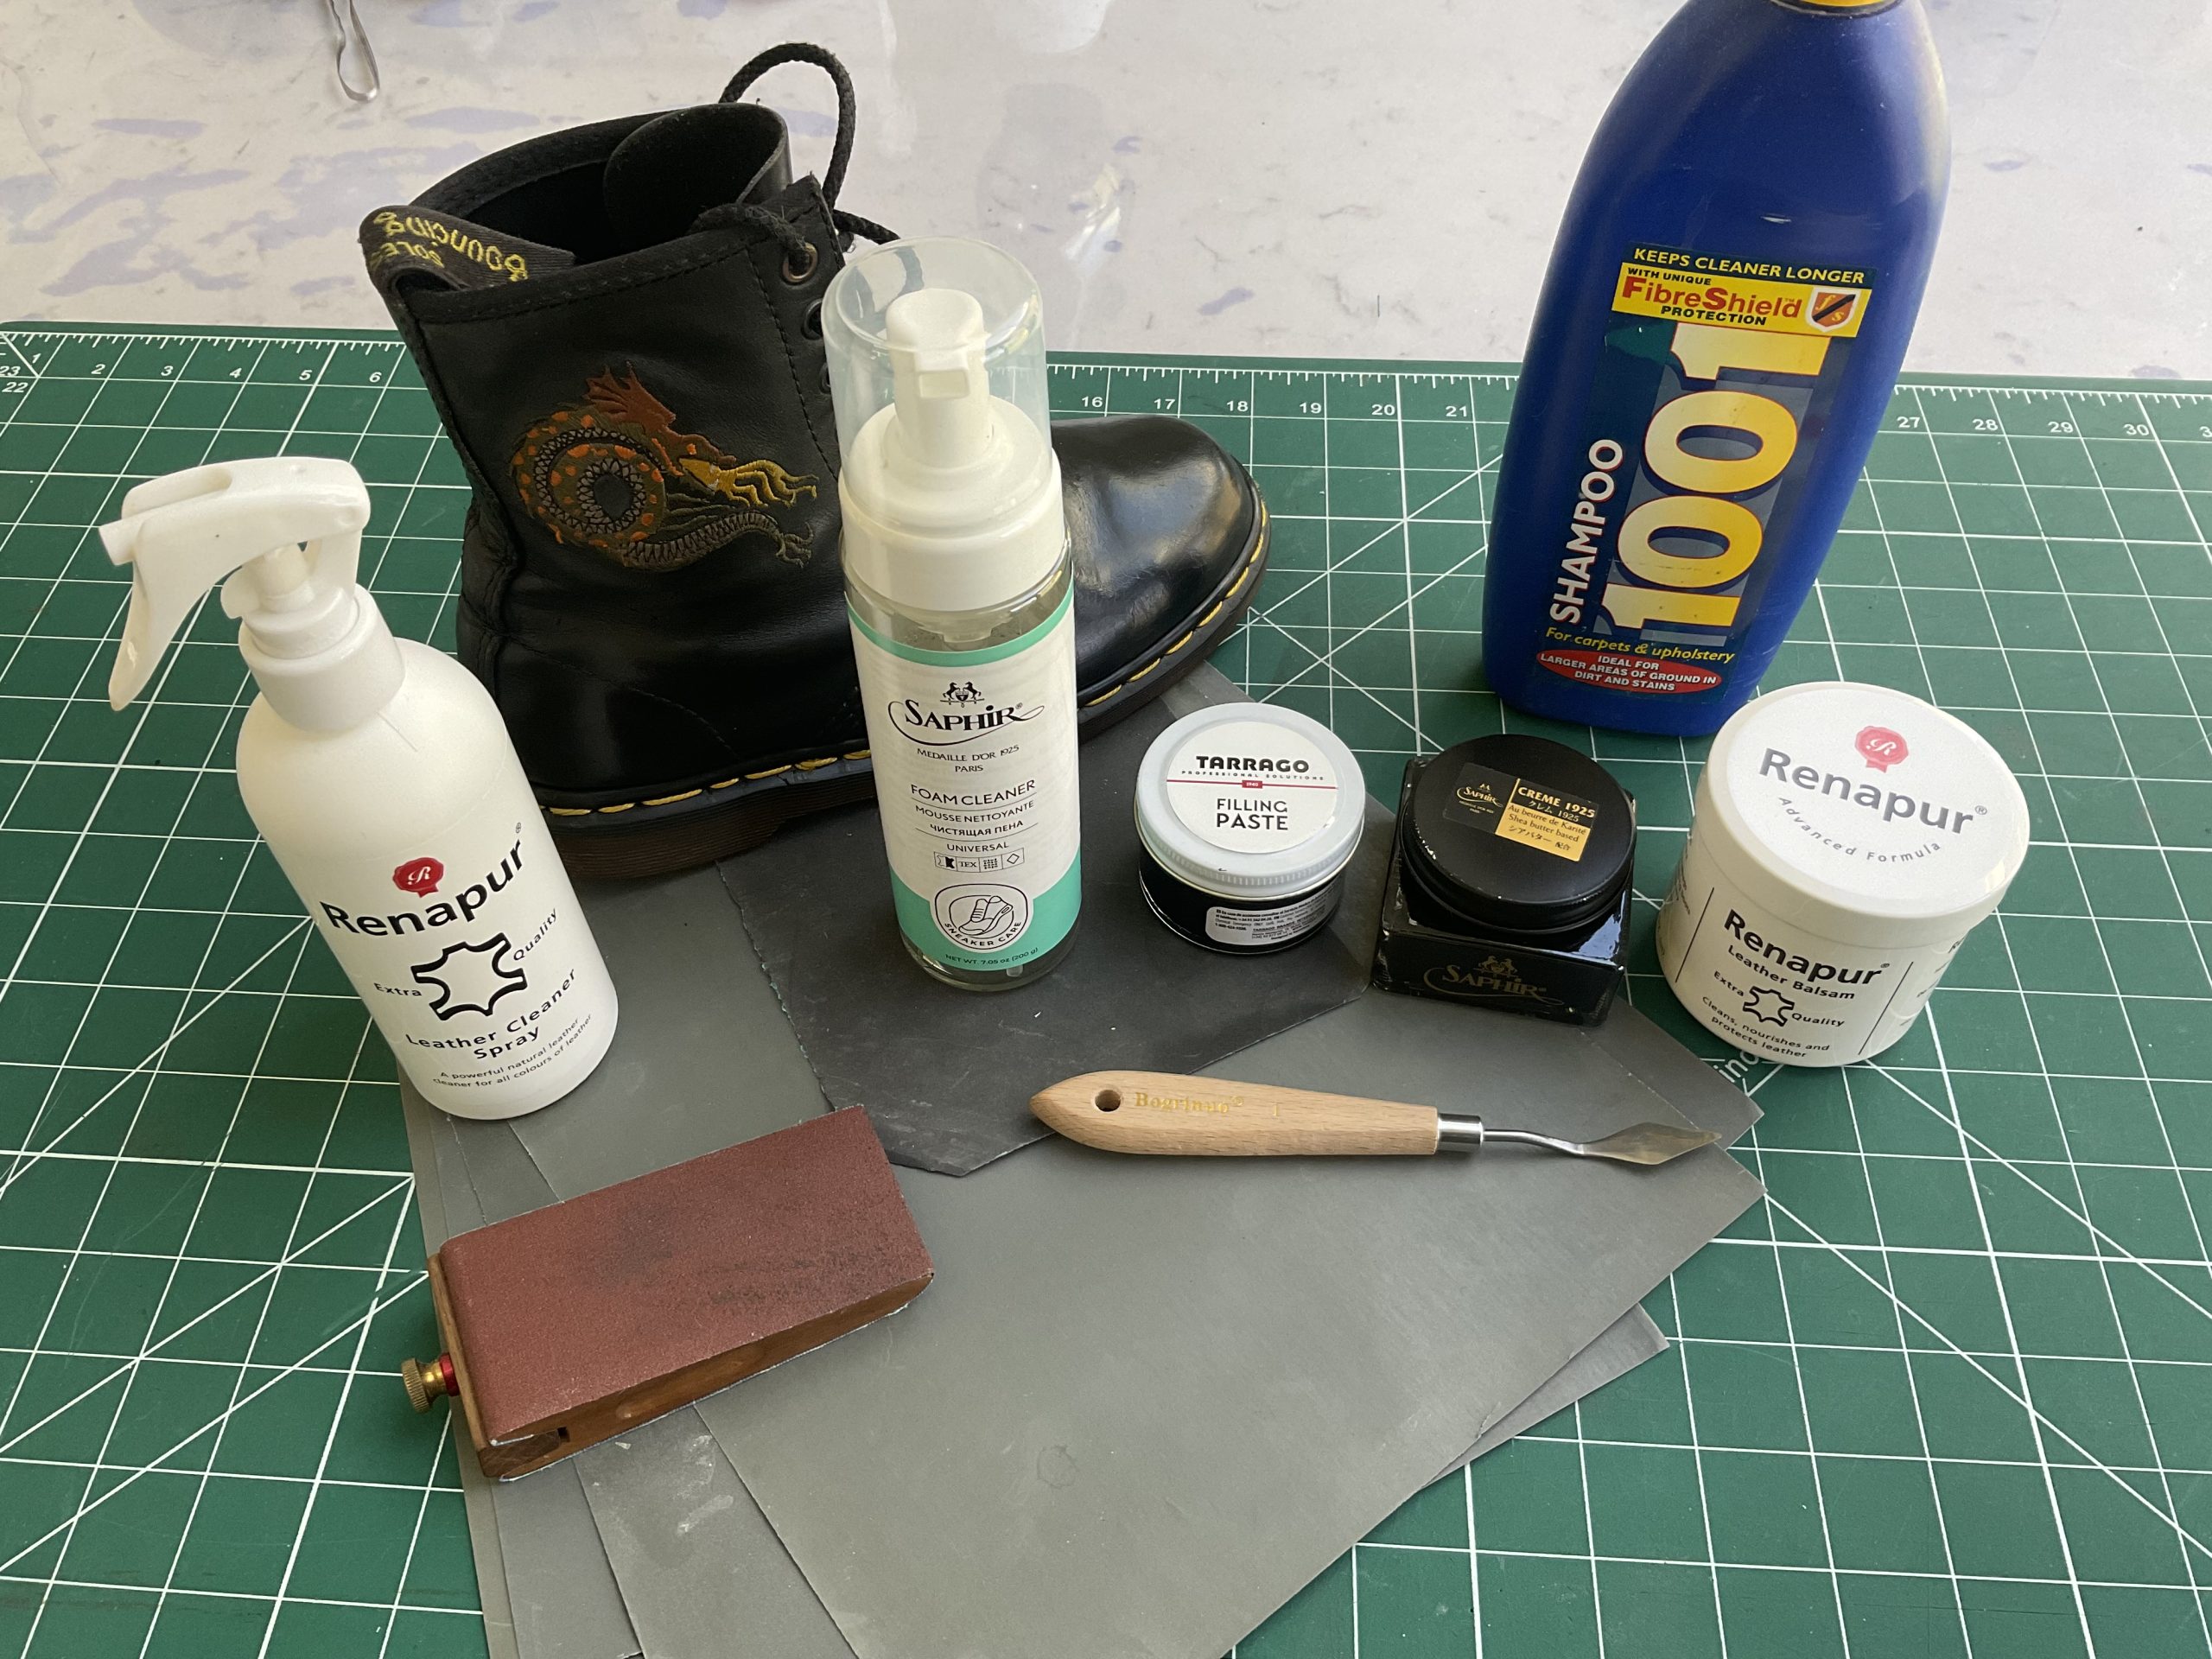
The assortment of products needed for the repair and aftercare
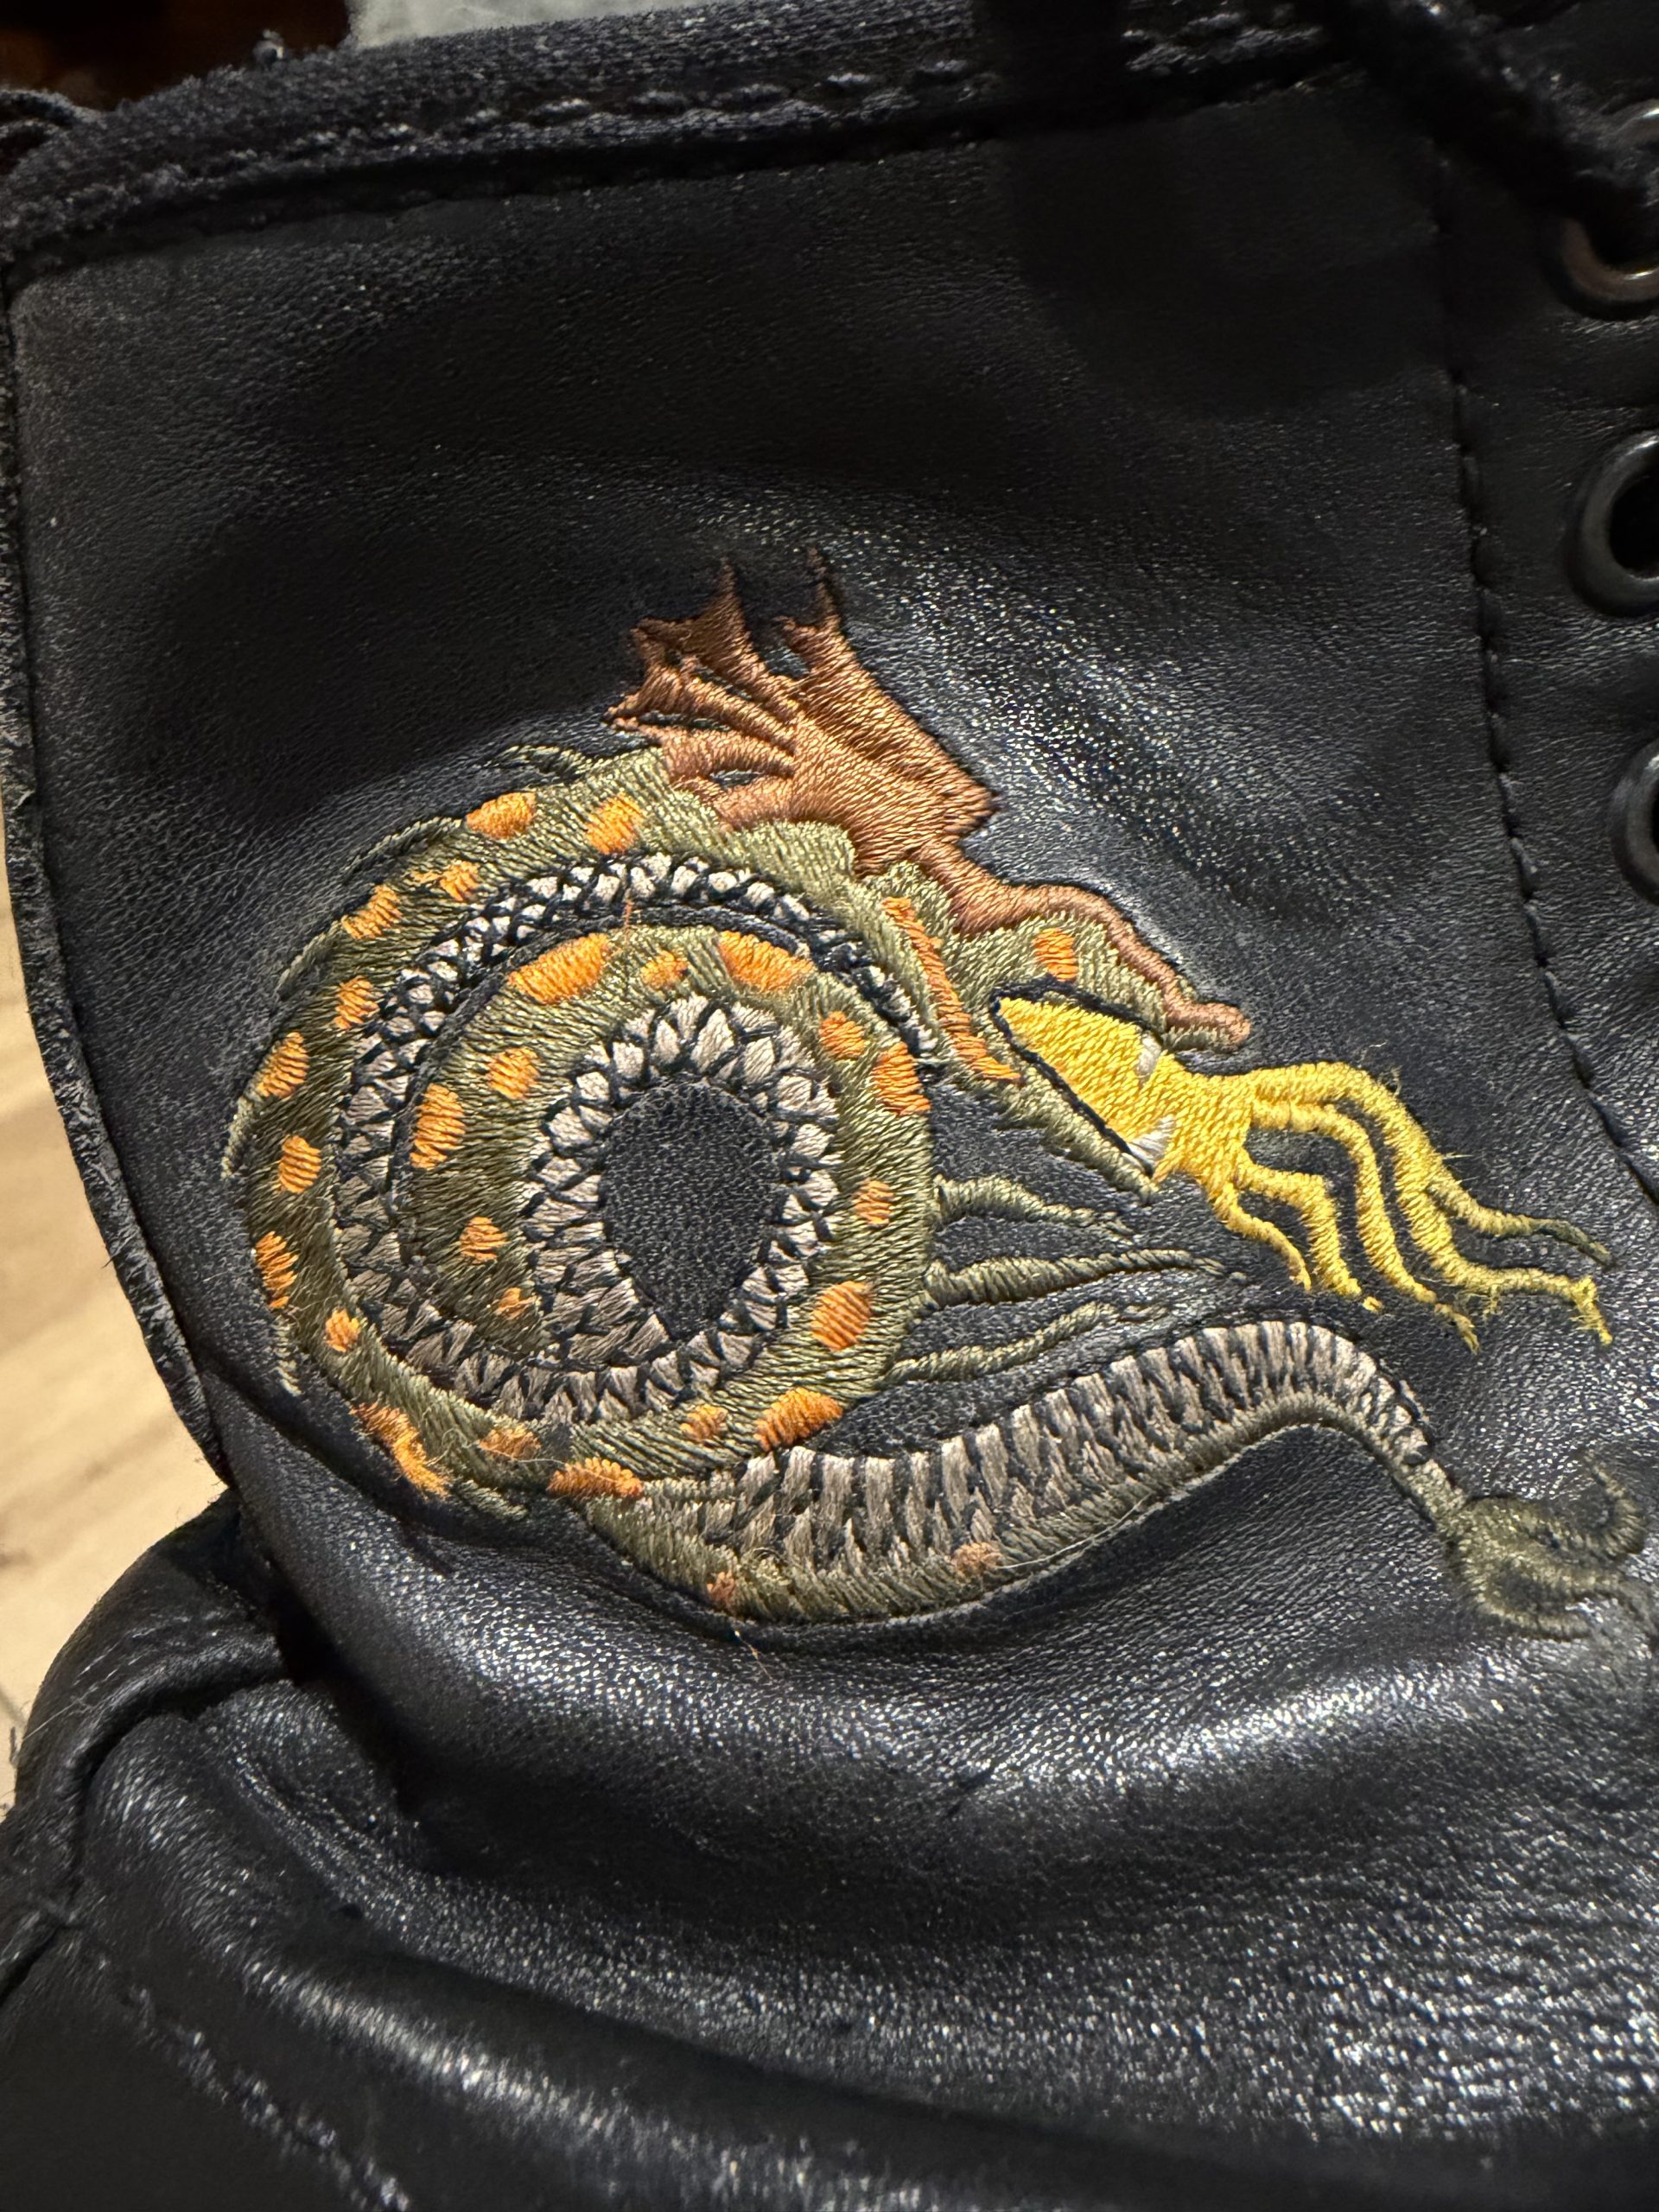
Apparently the boots were purchased from a Camden Town boutique store in the early 80s and the stores often added the embroidery patterns.
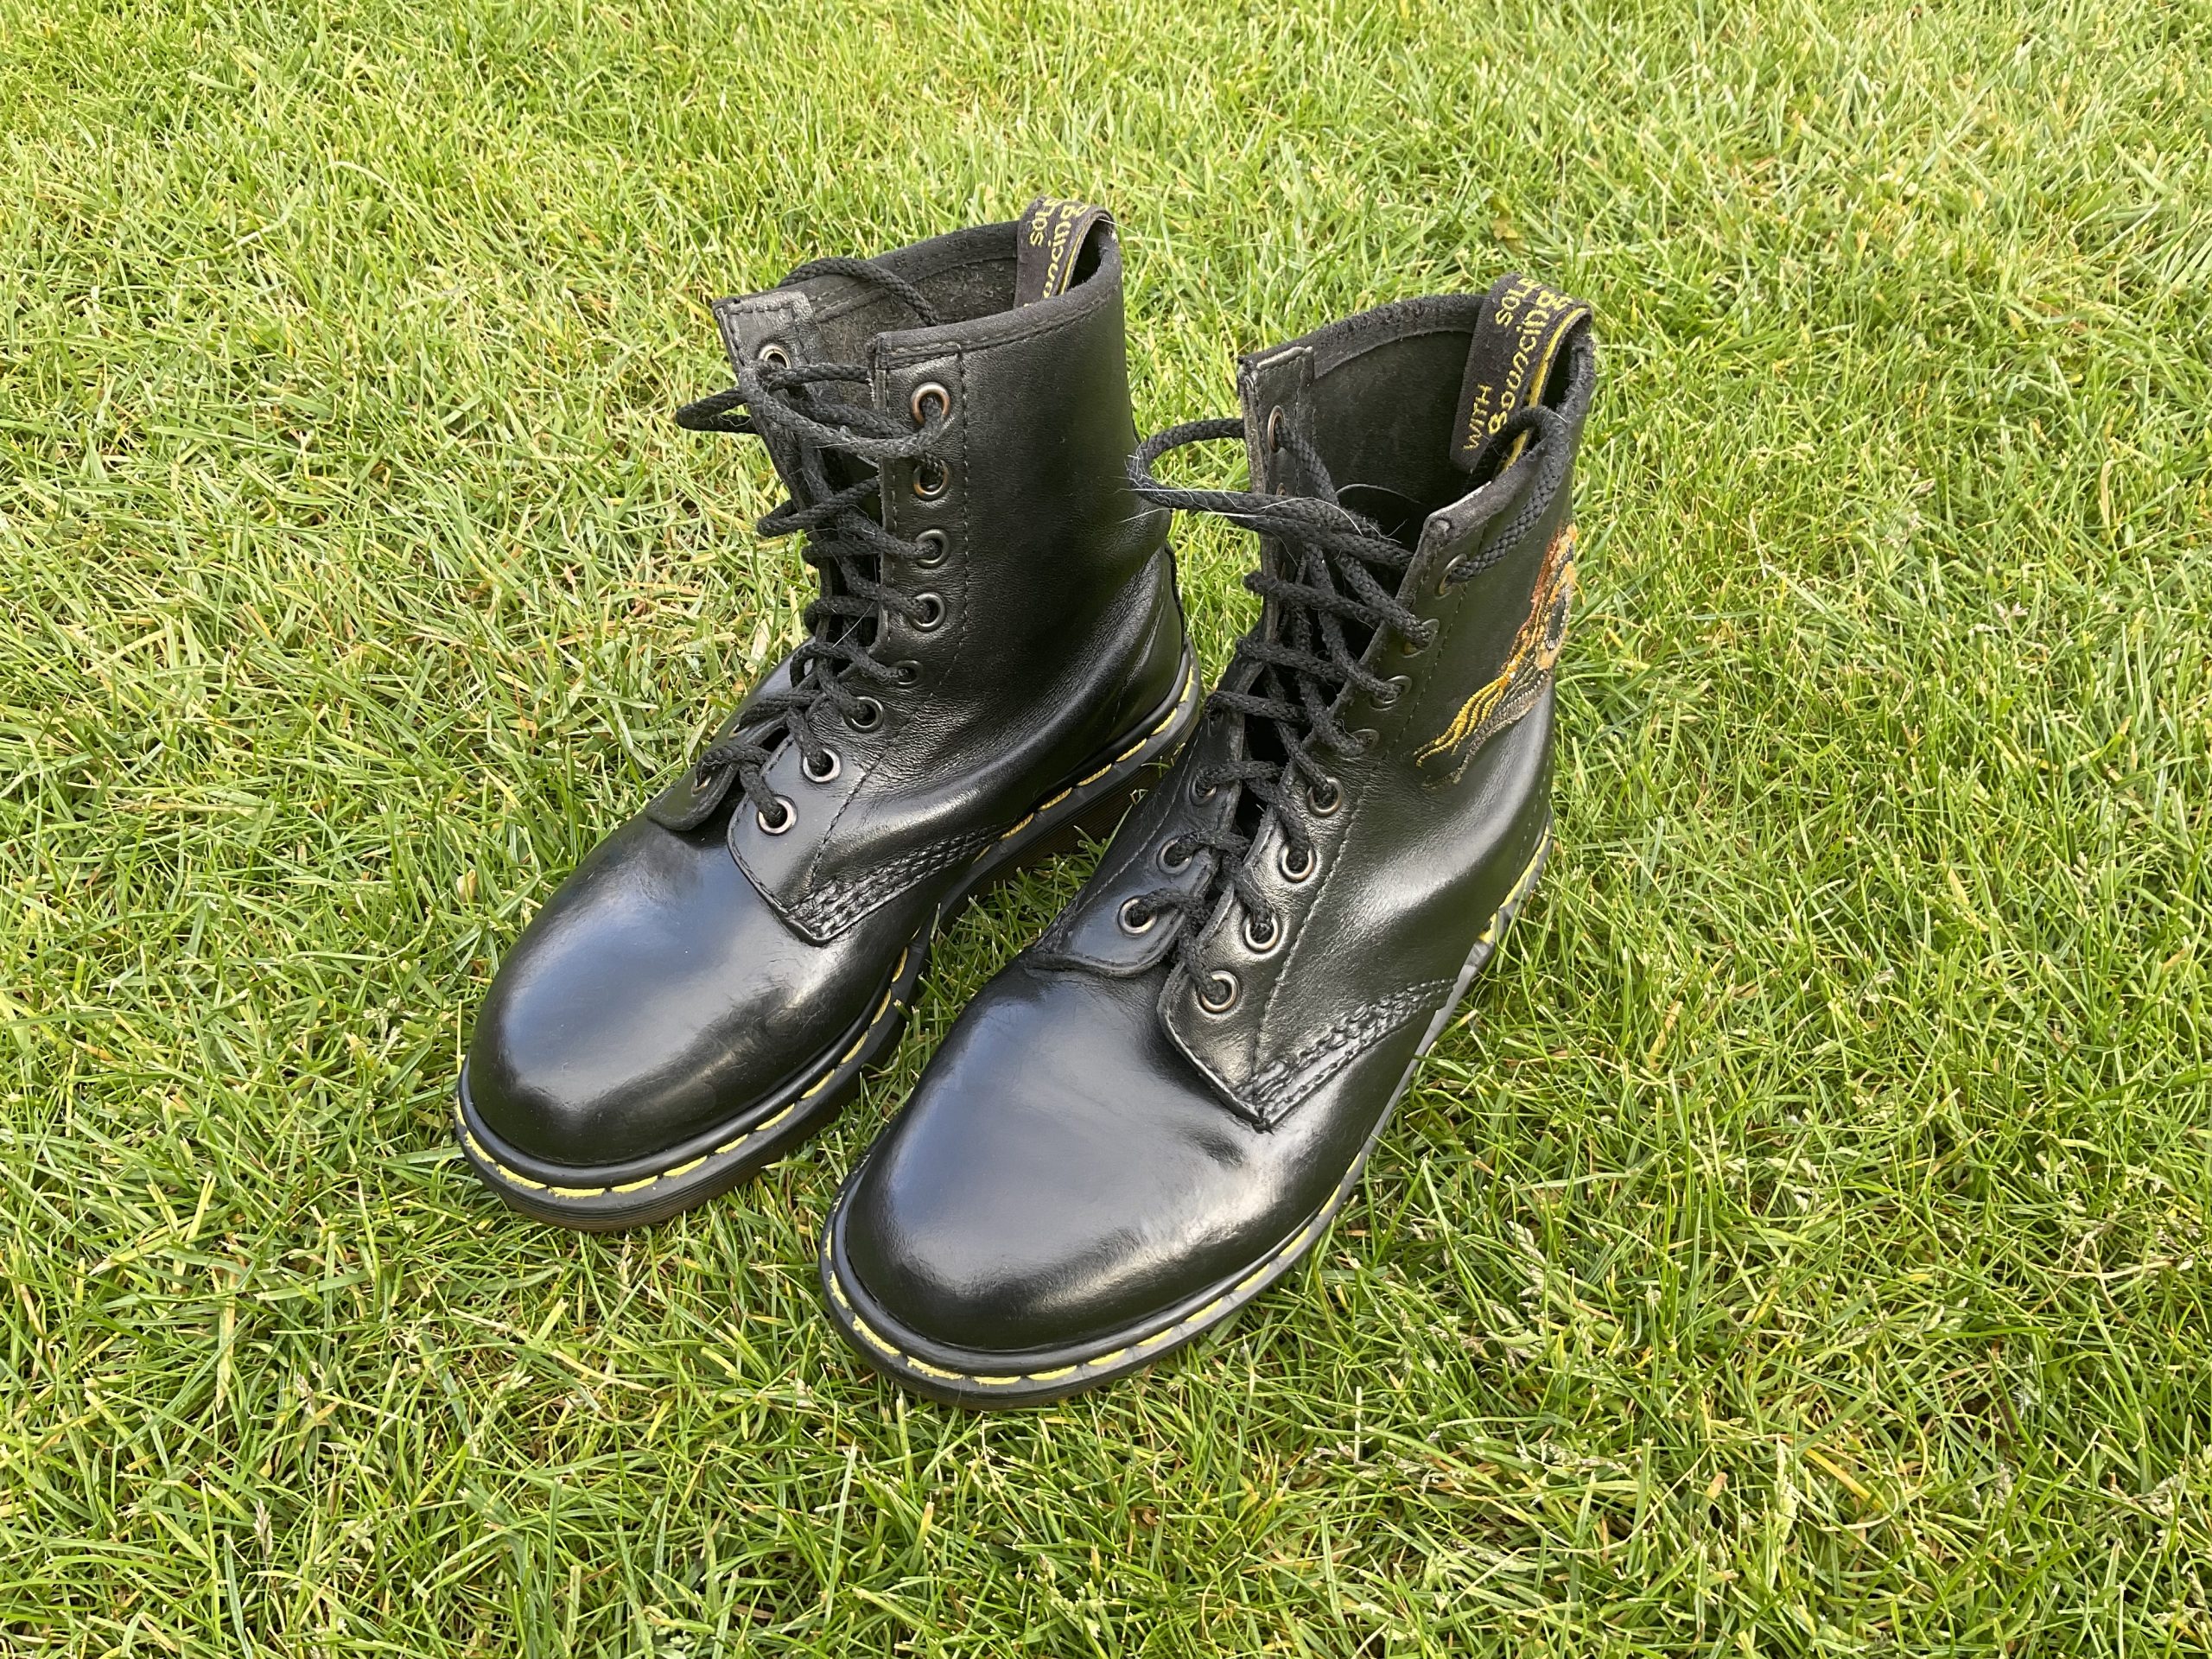
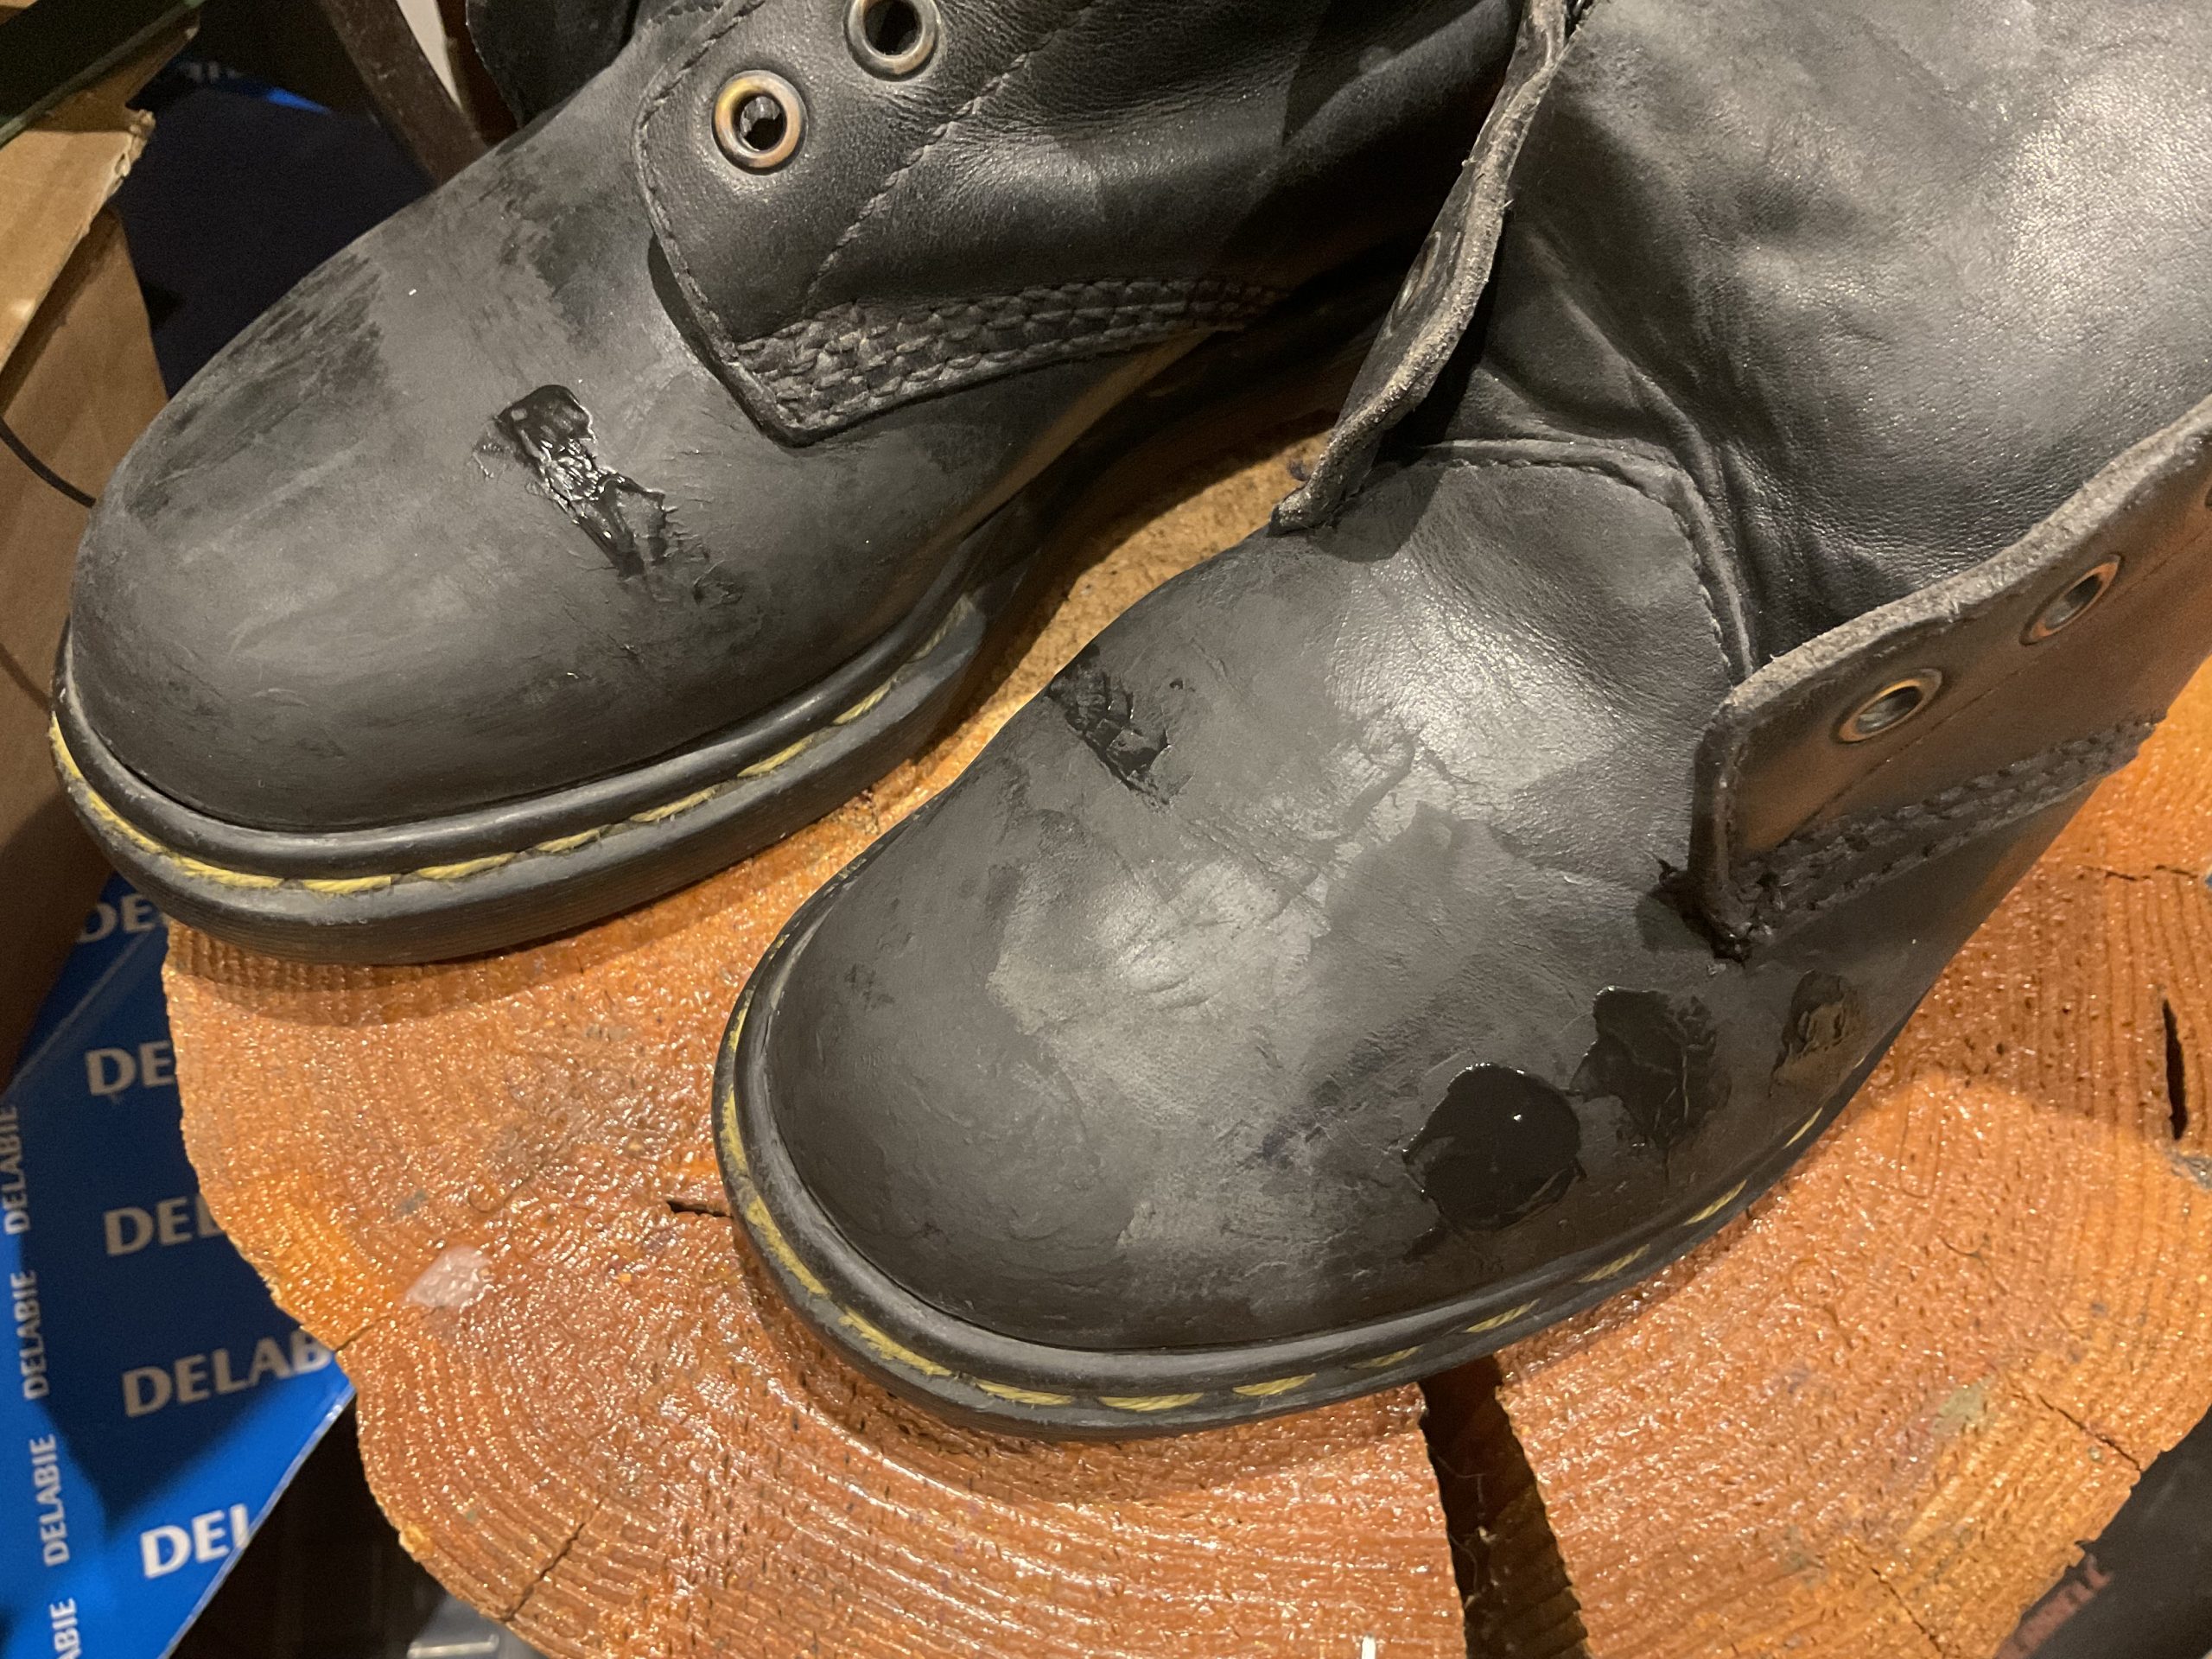
The second boot filled, sanded and stitching cleaned, ready for applying the black crème polish.
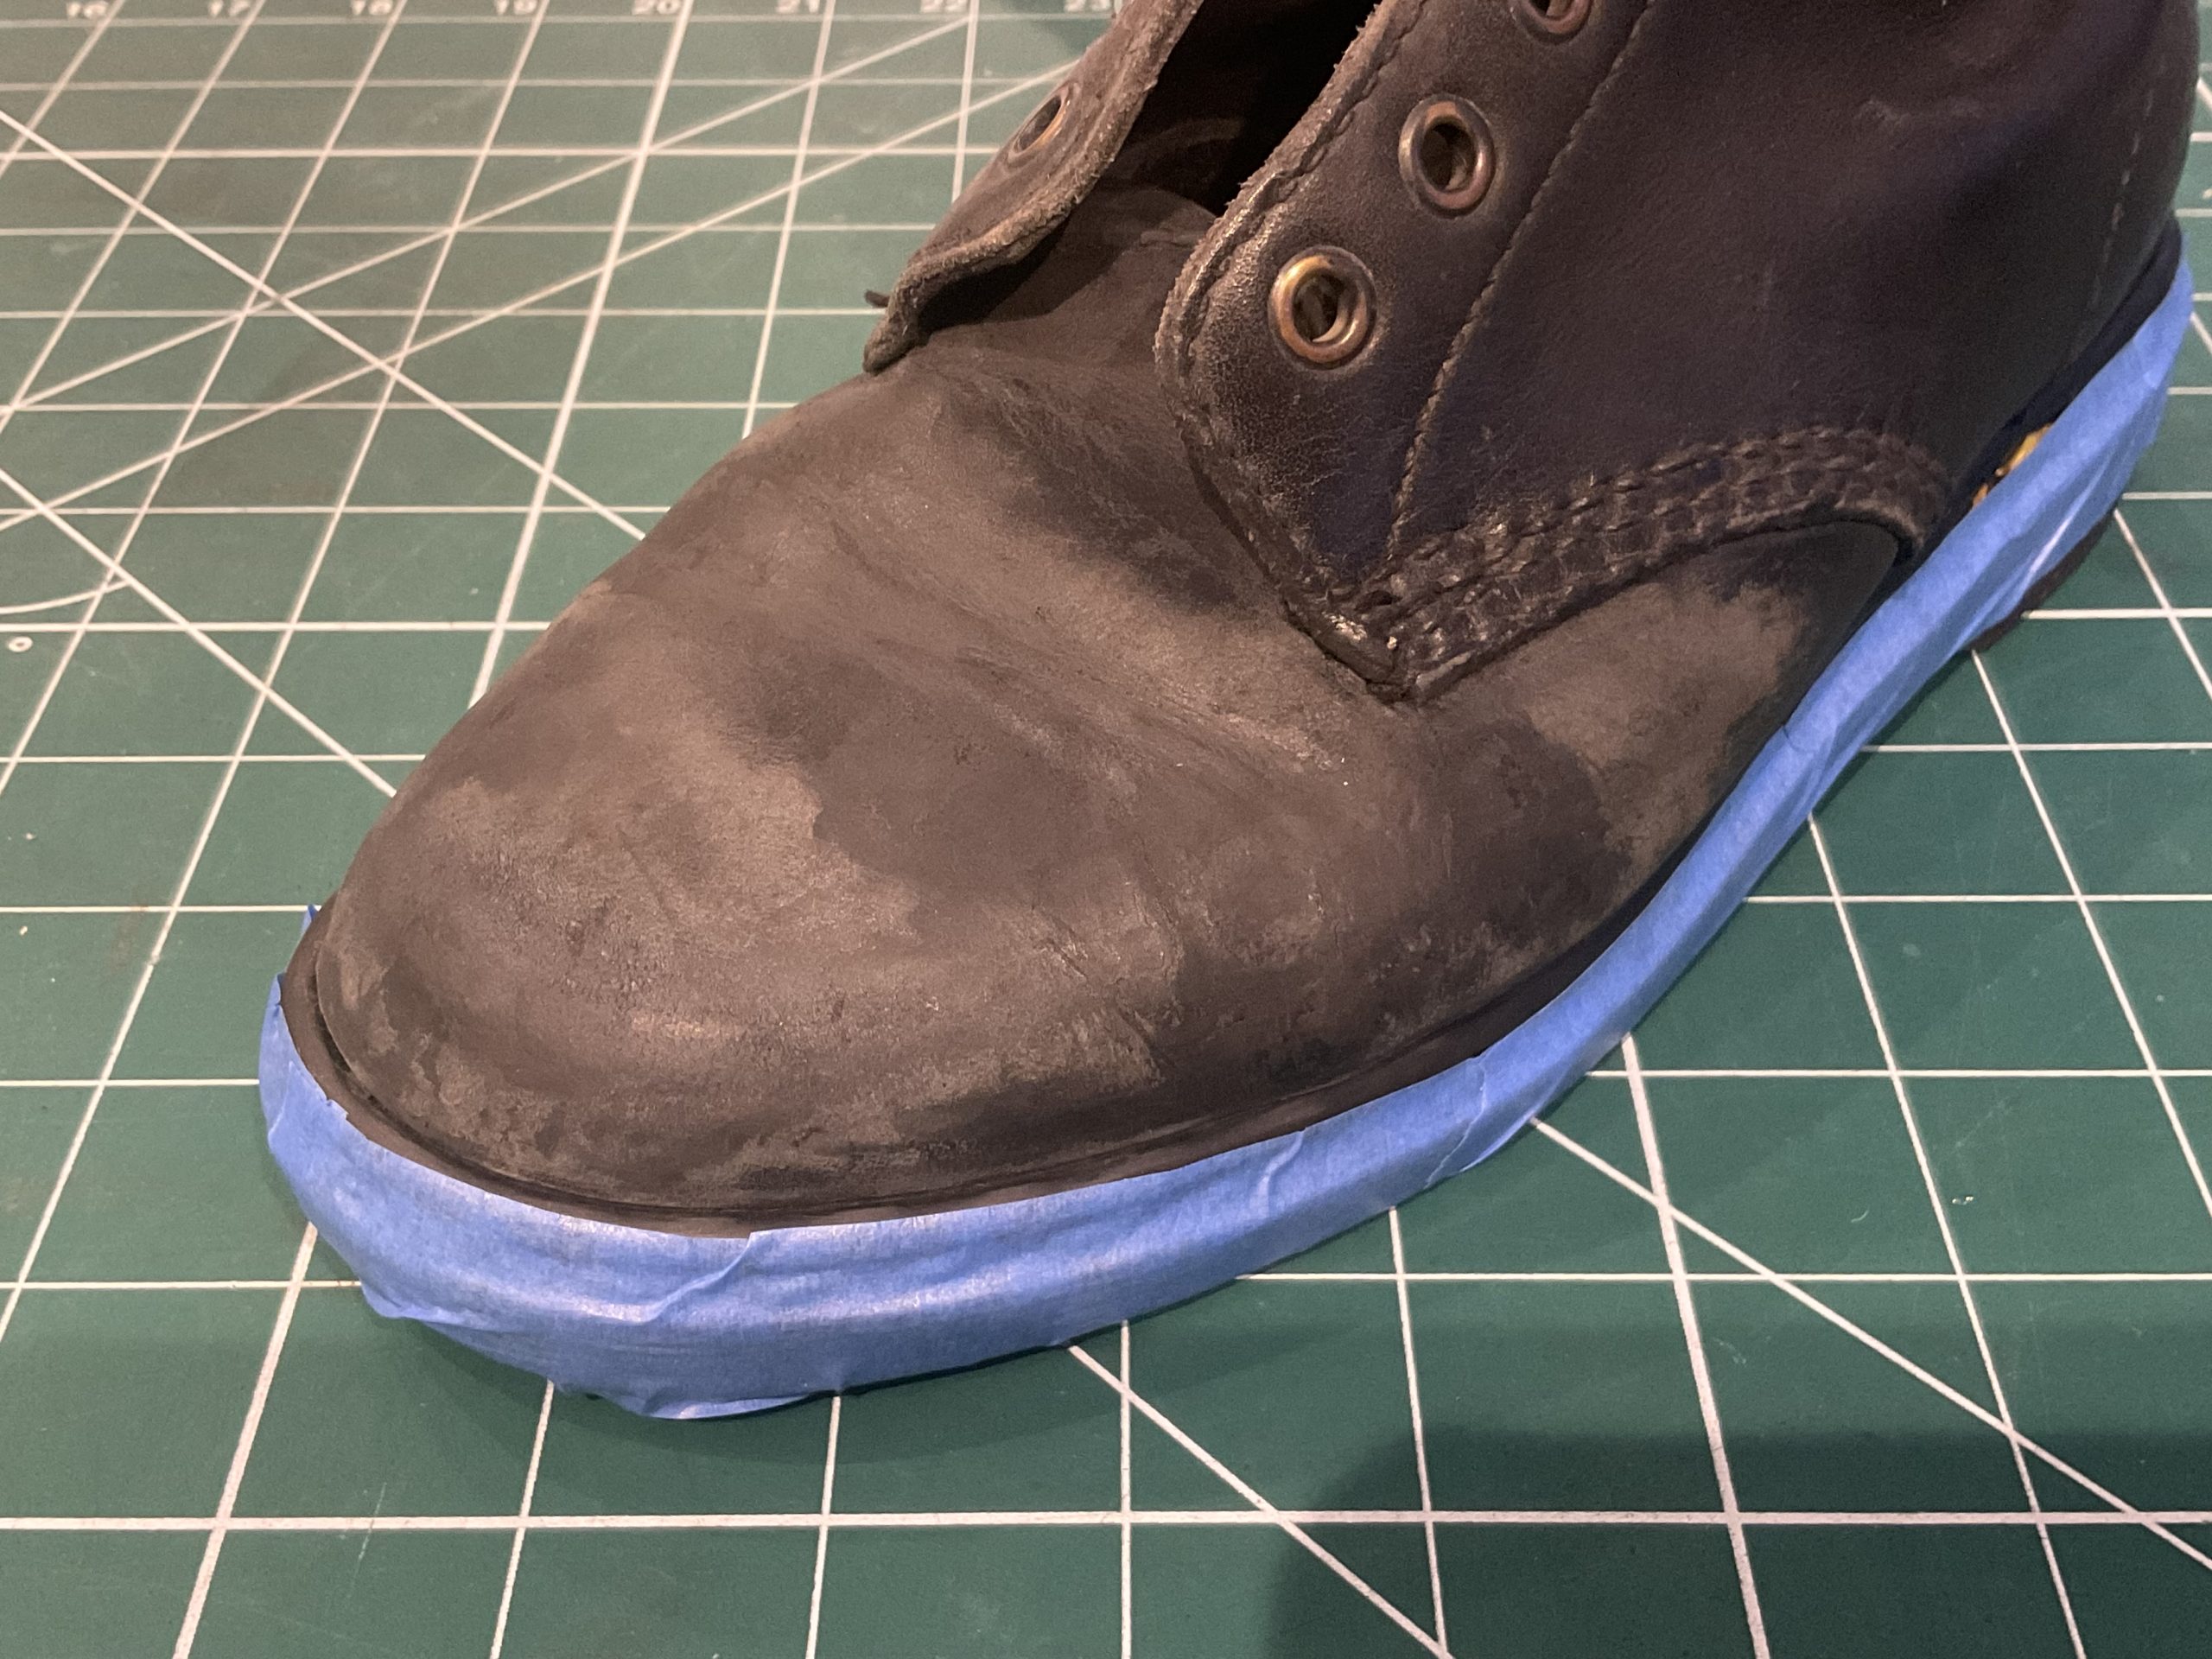
Tape used to mask the cleaned stitching – just in case.
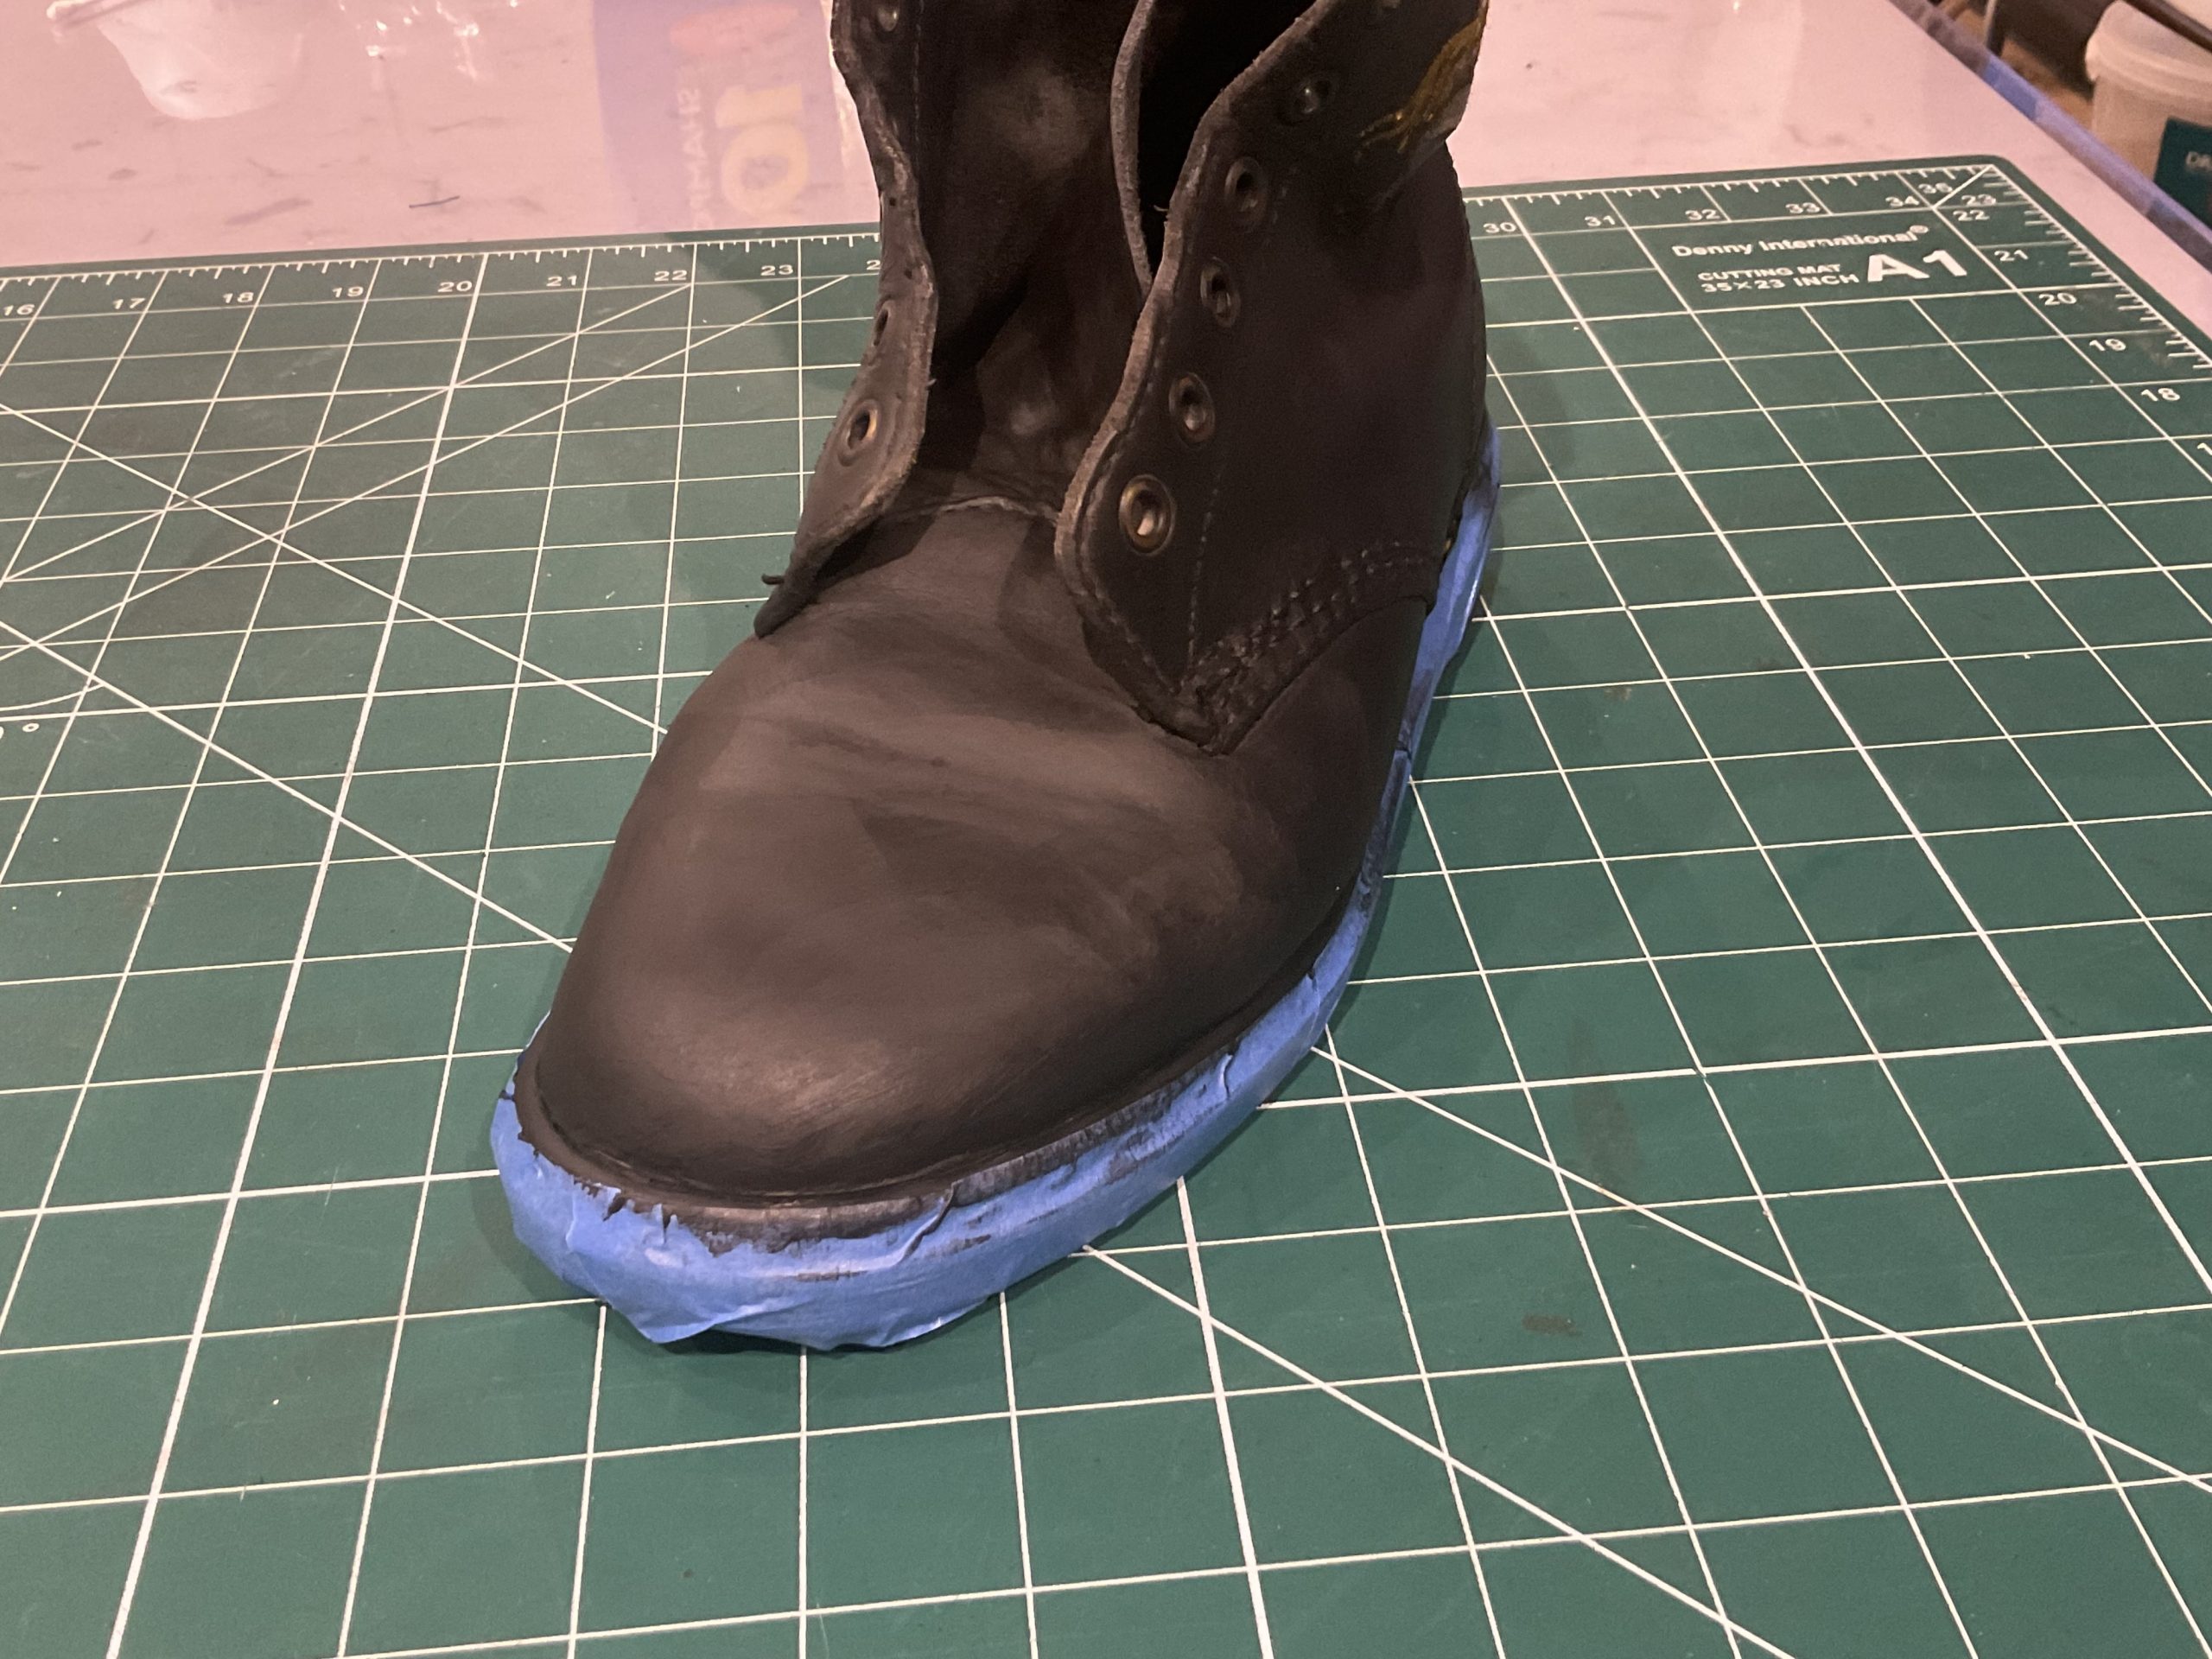
The boot was left for several hours once the polish had been applied. It is then just brushed to finish. Masking tape was left as a precaution.
The polished boots ready for returning …….