
I’d been looking a various bucket bags simply to get a better understanding of the design process for creating 3D shapes. I got hold of a design by Japanese leatherworker Furaha and so was able to bypass having to reverse engineer things! After studying his design, it really isn’t that difficult. The key dimensions are the diameter of the (typically round) base then the height above the base of the widest point plus its diameter. Above the widest point, the bags dimensions stay the same as the shaping is achieved by folding/collapsing in each alternate section. In this case each canvas section.
Leather : Metropolitan Leather Lamport Shoulder in Dark Tan 2.0-2.2mm
Canvas : British Millerain Texwax Ranger 14oz in Lichen (GR106)
Lining : Croft Mill (51% viscose, 49% cotton) twill lining fabric in Cream

Cutting out the two canvas pieces

Transferring the seam allowances to the canvas

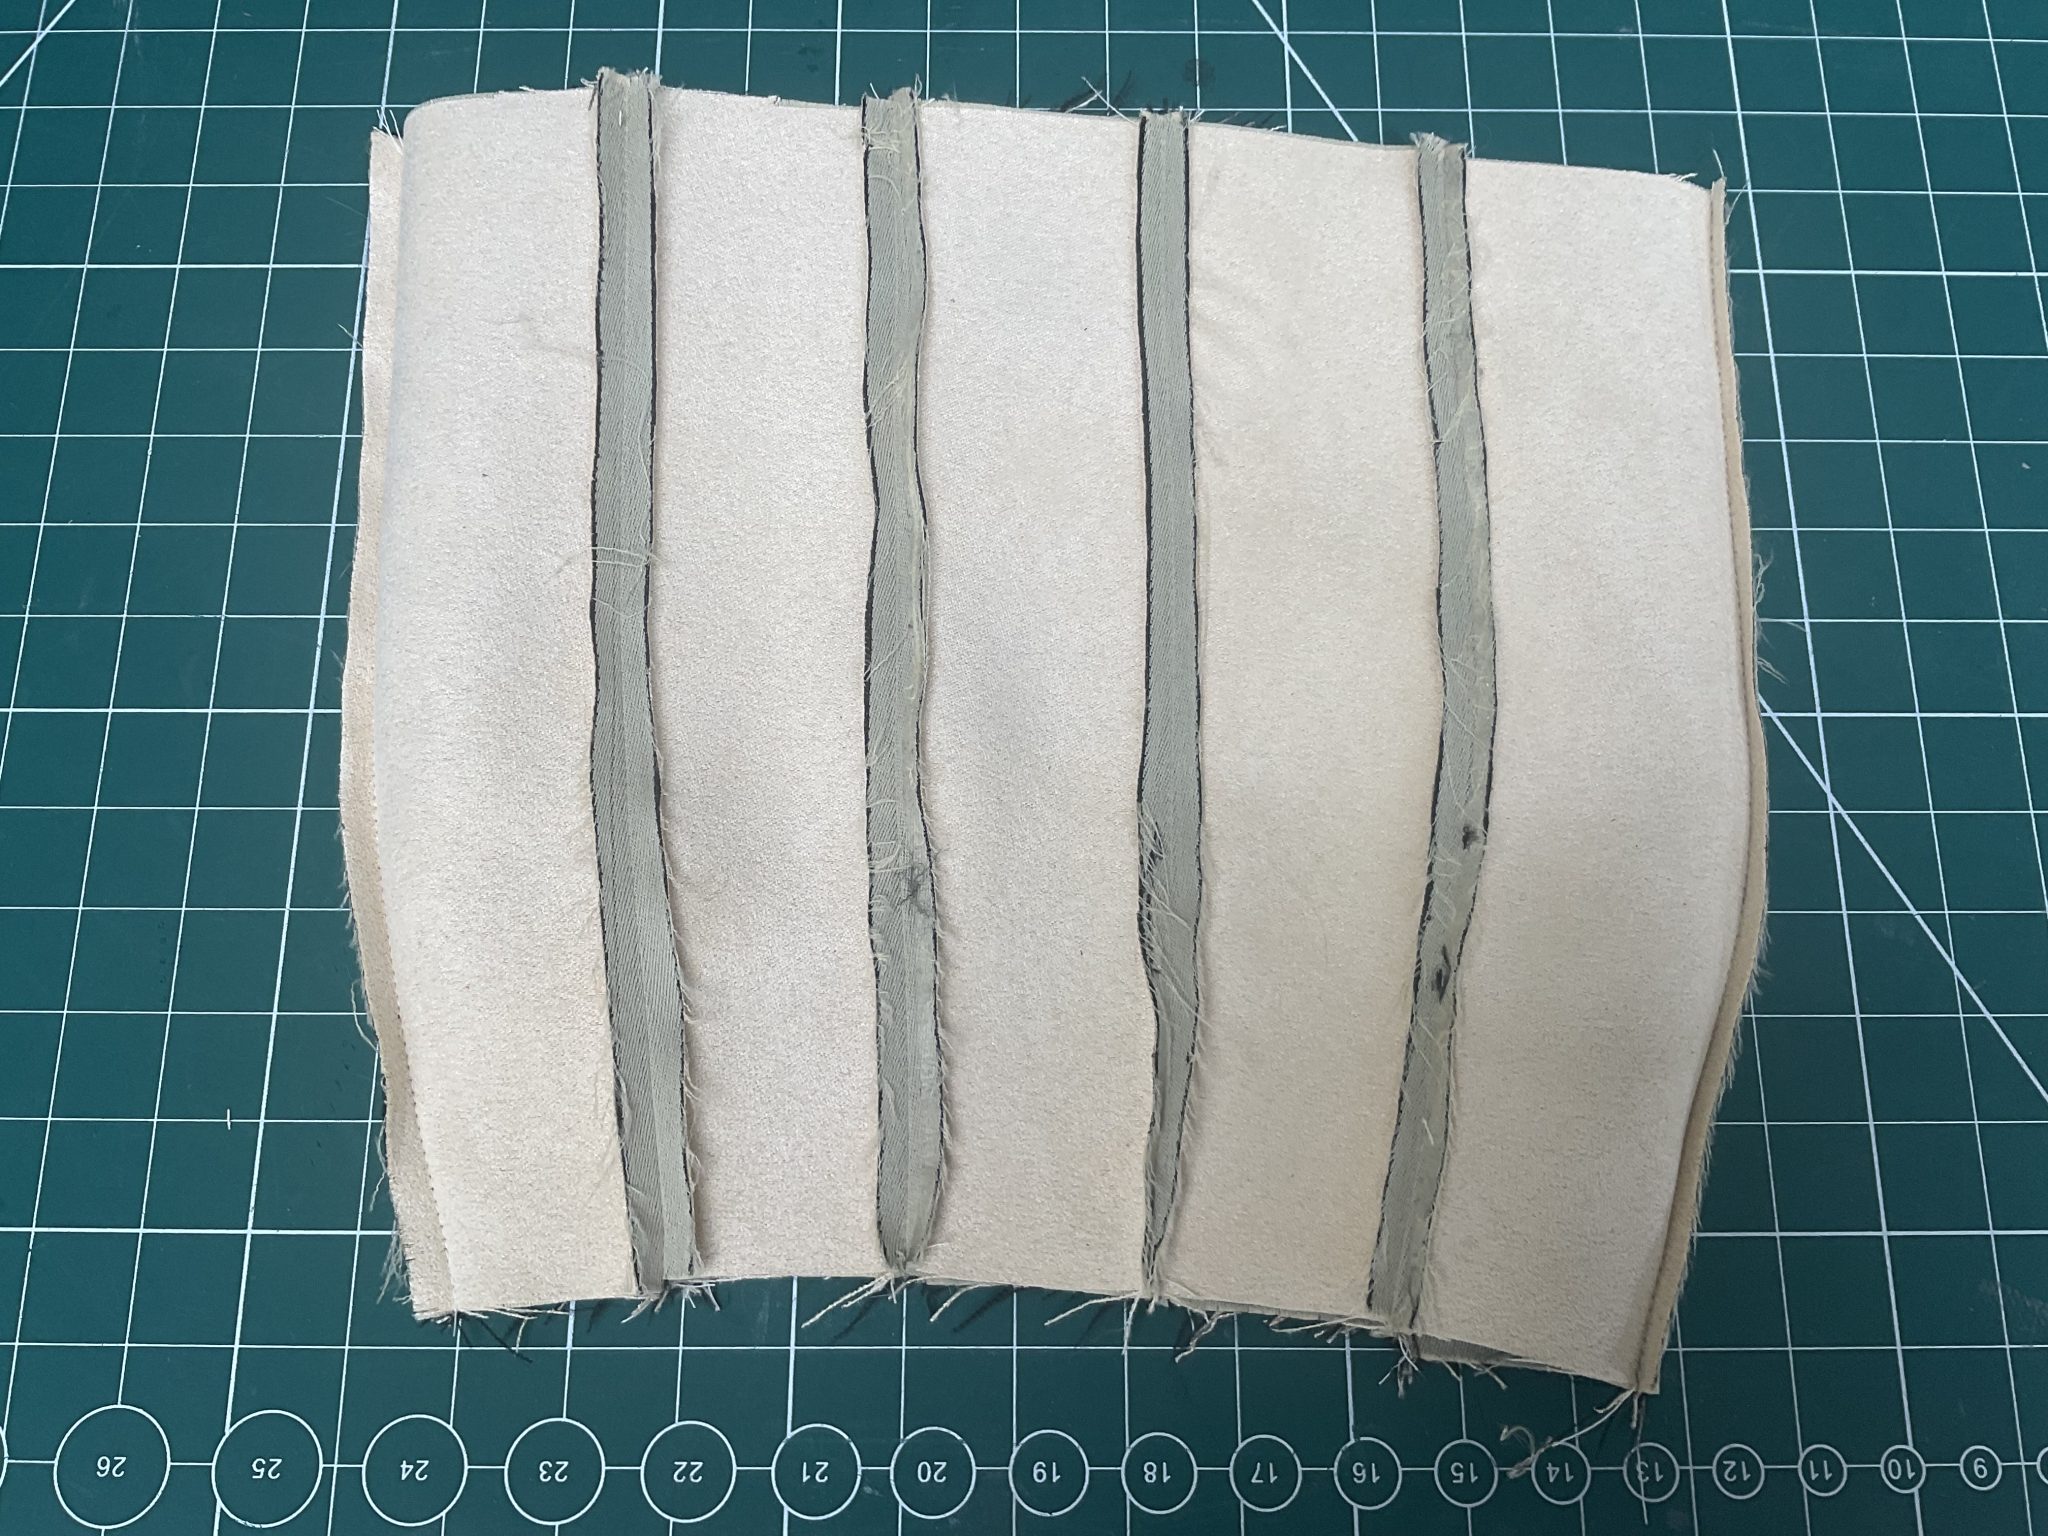
10mm holes were punched into the canvas to stop it puckering up when the five ‘fingers’ are stitched together

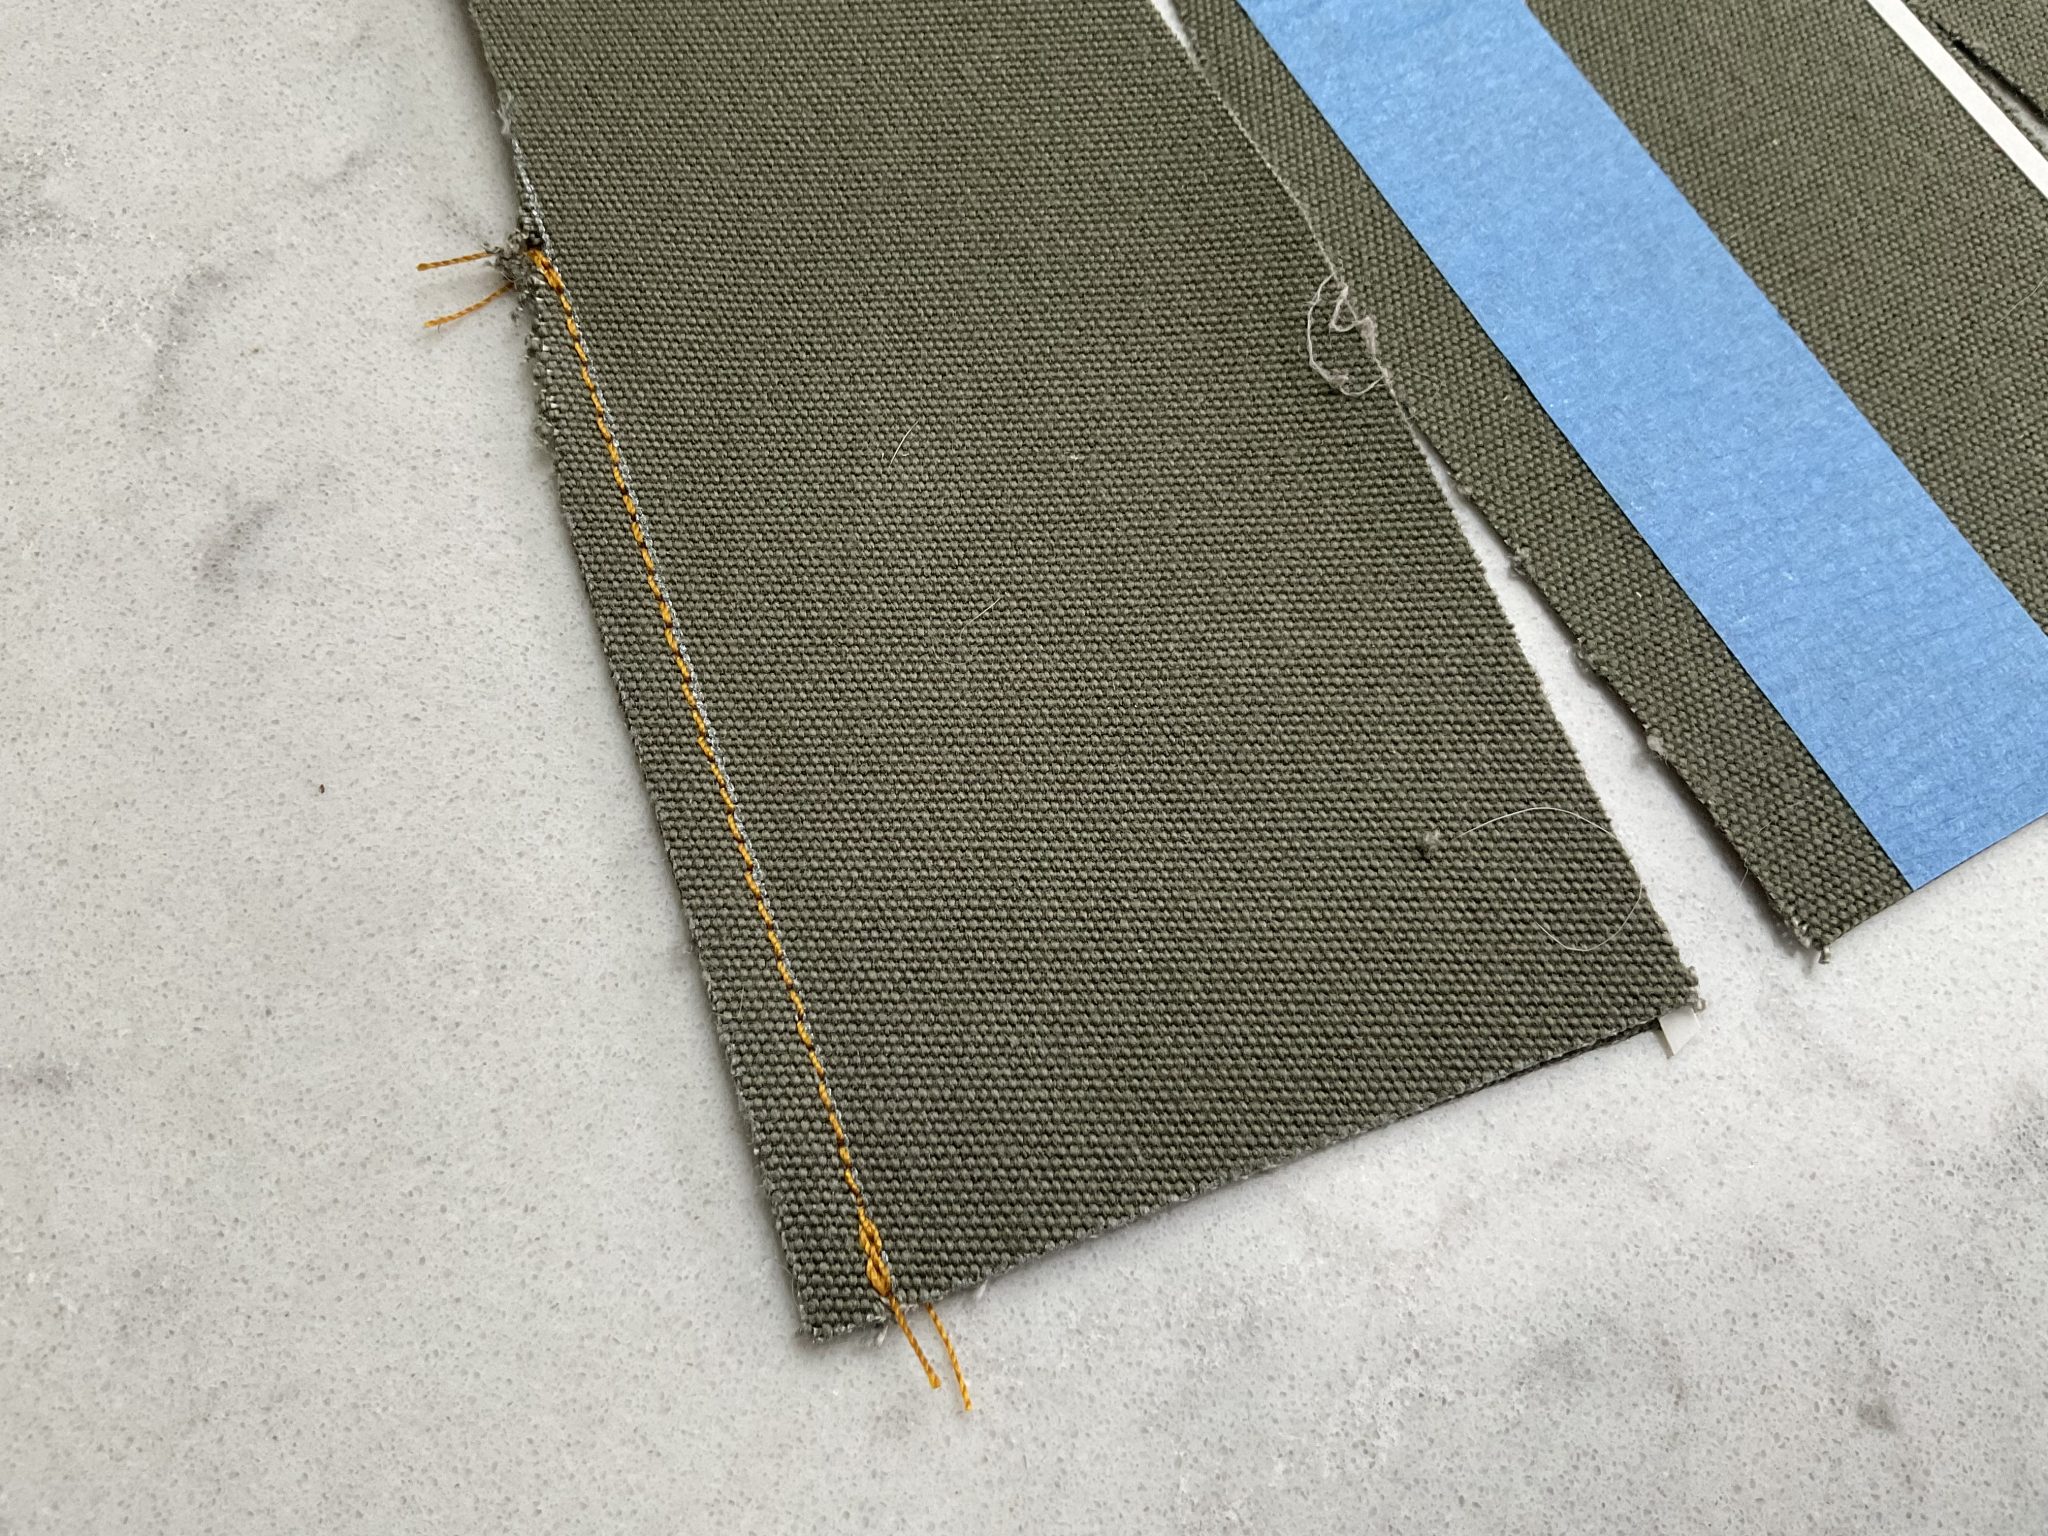
Double-sided tape was used to temporarily hold the canvas together

The seams could then be machined stitched

The outer leather needs to be joined to the canvas before the two half can be joined


Once stitched the seam is opened up to remove the double sided-tape and then hammered flat
.

The outer shell comprises of 10 identical leather pieces

Each piece is first edge creased and the stitching holes punched.

Masking tape was applied down the centre lines of the canvas ‘fingers’ to mark the position of each leather piece.

Locking pins secure the leather pieces in situ while stitching.

The stitching is relatively slow going compared to just stitching leather as the stitching irons aren’t used to create holes in the canvas (as the irons would cut the fabric strands). Therefore you just have to rely on the needle creating the necessary hole and making sure the second needle passes through the same hole.


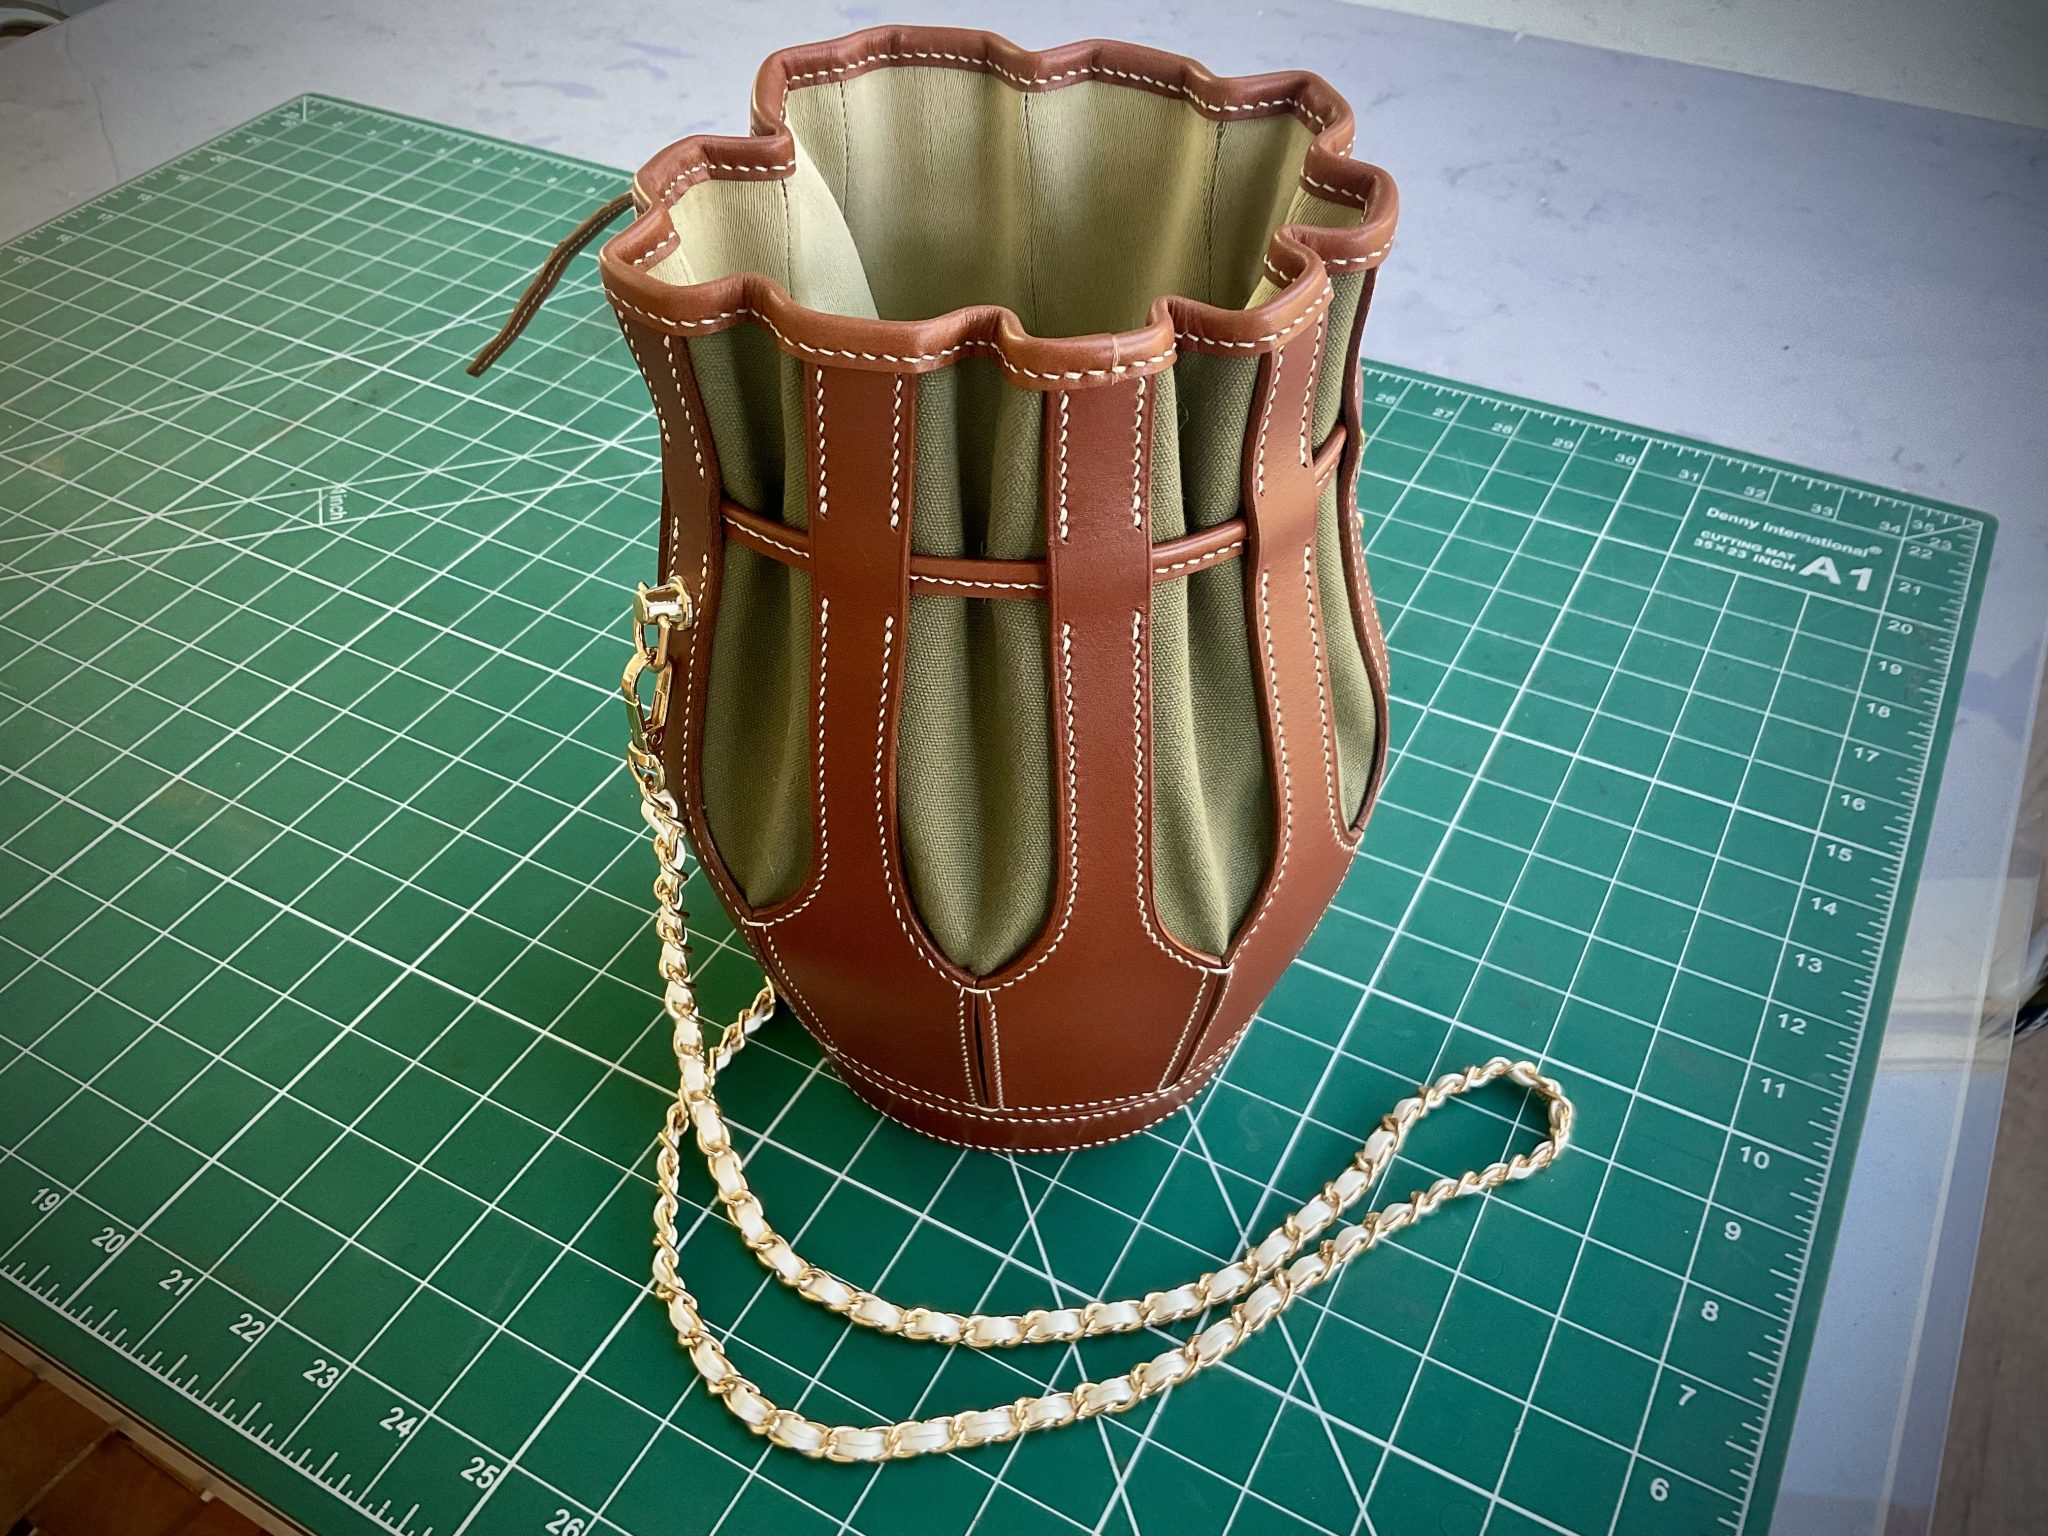
One half of the bag completed.

The two halves will then be machine stitched before attaching the final two leather pieces, which will require the strap attachments fitted.

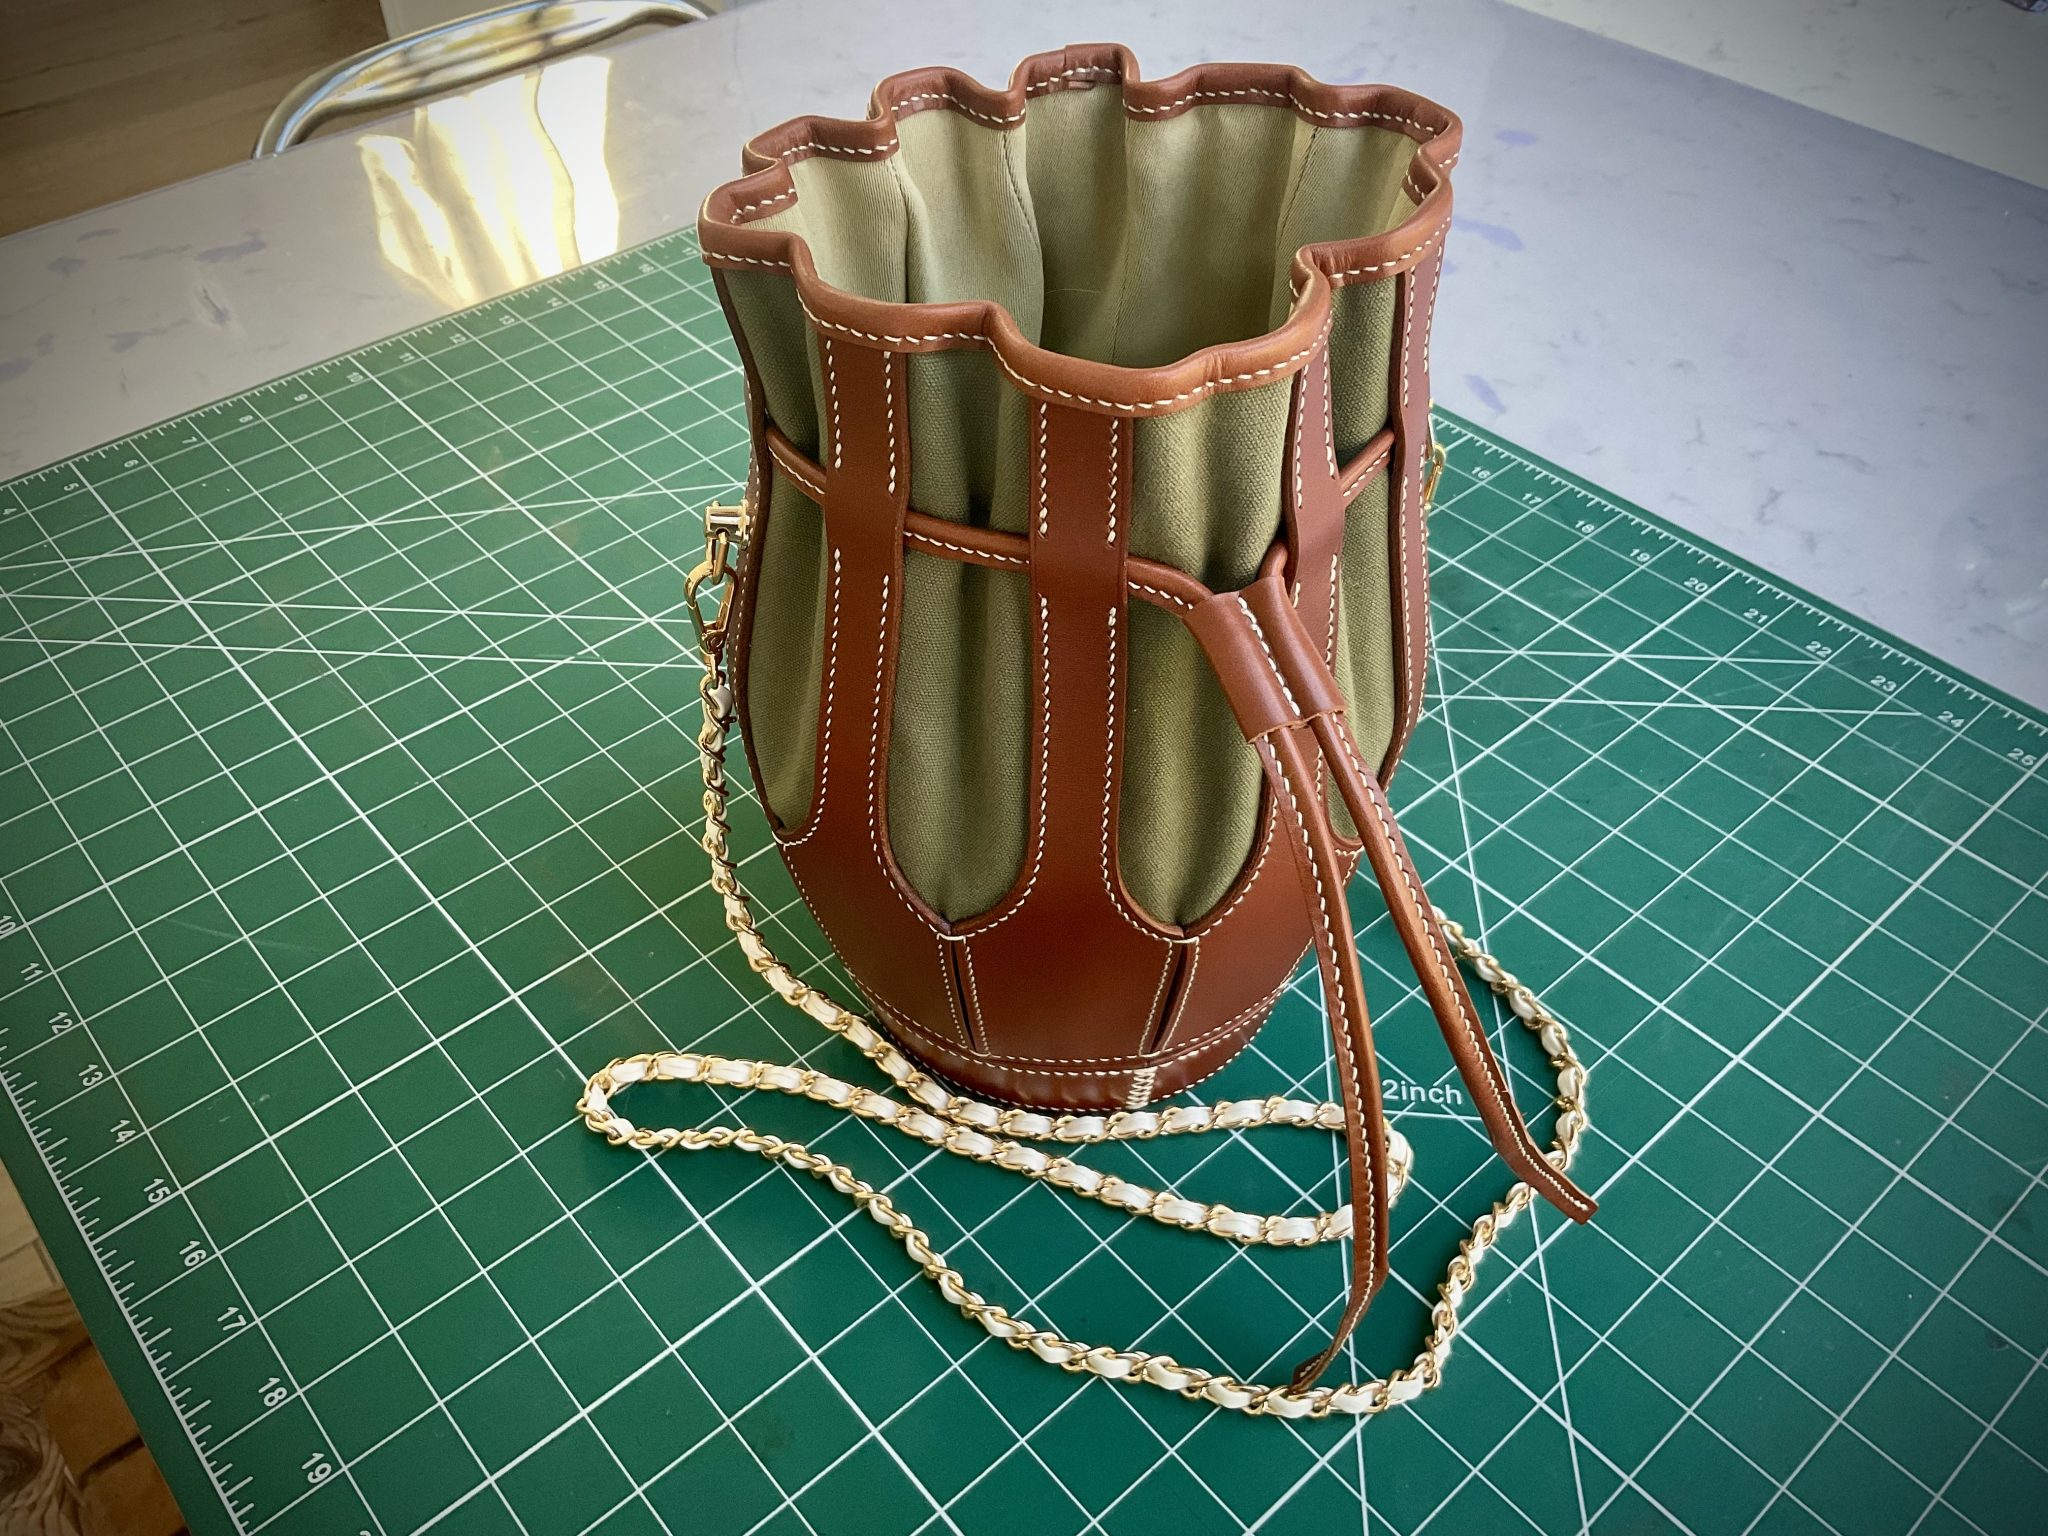
The two halves joined before turning the right way out.

Positioning the final leather pieces – fortunately there was front and rear panels are lined with 1.5mm self-adhesive foam to give a more luxurious feel.

The front and rear panels are lined with 1.5mm self-adhesive foam to give a more luxurious feel.

The front and rear panels are lined with 1.5mm self-adhesive foam to give a more luxurious feel.

The front and rear panels are lined with 1.5mm self-adhesive foam to give a more luxurious feel.

The front and rear panels are lined with 1.5mm self-adhesive foam to give a more luxurious feel.

The front and rear panels are lined with 1.5mm self-adhesive foam to give a more luxurious feel.

The front and rear panels are lined with 1.5mm self-adhesive foam to give a more luxurious feel.

The front and rear panels are lined with 1.5mm self-adhesive foam to give a more luxurious feel.

The front and rear panels are lined with 1.5mm self-adhesive foam to give a more luxurious feel.

The front and rear panels are lined with 1.5mm self-adhesive foam to give a more luxurious feel.
The front and rear panels are lined with 1.5mm self-adhesive foam to give a more luxurious feel.

The front and rear panels are lined with 1.5mm self-adhesive foam to give a more luxurious feel.

The front and rear panels are lined with 1.5mm self-adhesive foam to give a more luxurious feel.
The front and rear panels are lined with 1.5mm self-adhesive foam to give a more luxurious feel.
The front and rear panels are lined with 1.5mm self-adhesive foam to give a more luxurious feel.